Would you like to save this?
It’s spooky season! Sometimes a fun Halloween sensory bin can be the perfect activity to get into the spooky swing of things. This fun bucket would work great as a way to boo your neighbors too!
The great thing about sensory bins is that they don’t need a lot to make them fun. Just pull some items out of the pantry, grab a few things at the store and you’re ready to go! You can customize these however is easiest for you, I hope this helps get the inspiration going!
Why Kids Love Sensory Bins
Sensory bins are amazing because kids can practice independent play while working on all kinds of developmental skills. They’re practicing colors, sorting, and really working on their fine motor skills. You can fine tune your sensory bin for different ages too, just make sure anything you add to your bin is age appropriate and safe.
One of the best things about sensory bins is that you can make them custom and specialized for holidays, or you can throw in any random supplies you have laying around. Ladles are great, along with kids cups and other age-appropriate kitchen tools.
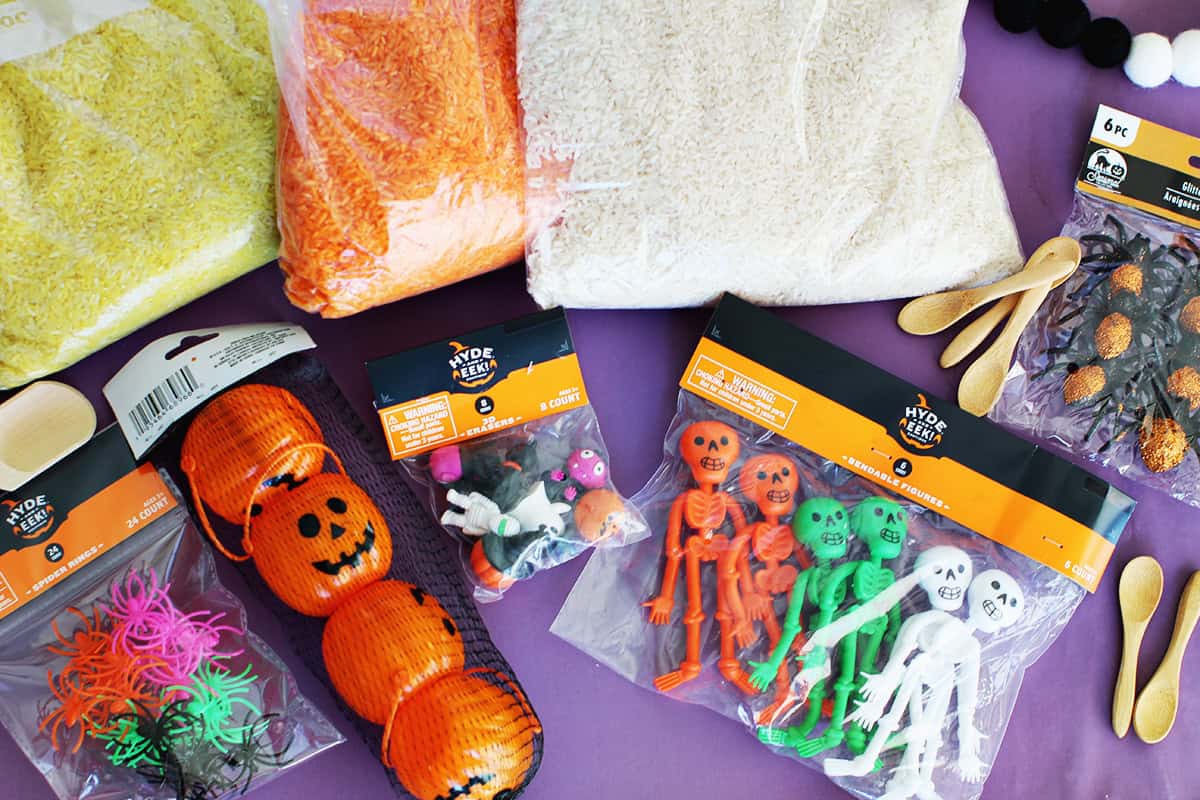
Supplies
- 16 quart storage bin or 28q storage bin (28q is lower profile for younger kids to be able to reach in and play)
- Food Dye (gel or liquid will work!)
- White Rice (I got a 10lb bag of long grain white rice)
- White vinegar (to dye rice)
- Ziplock bags to dye rice
- Wax paper or paper towels with cookie sheet underneath
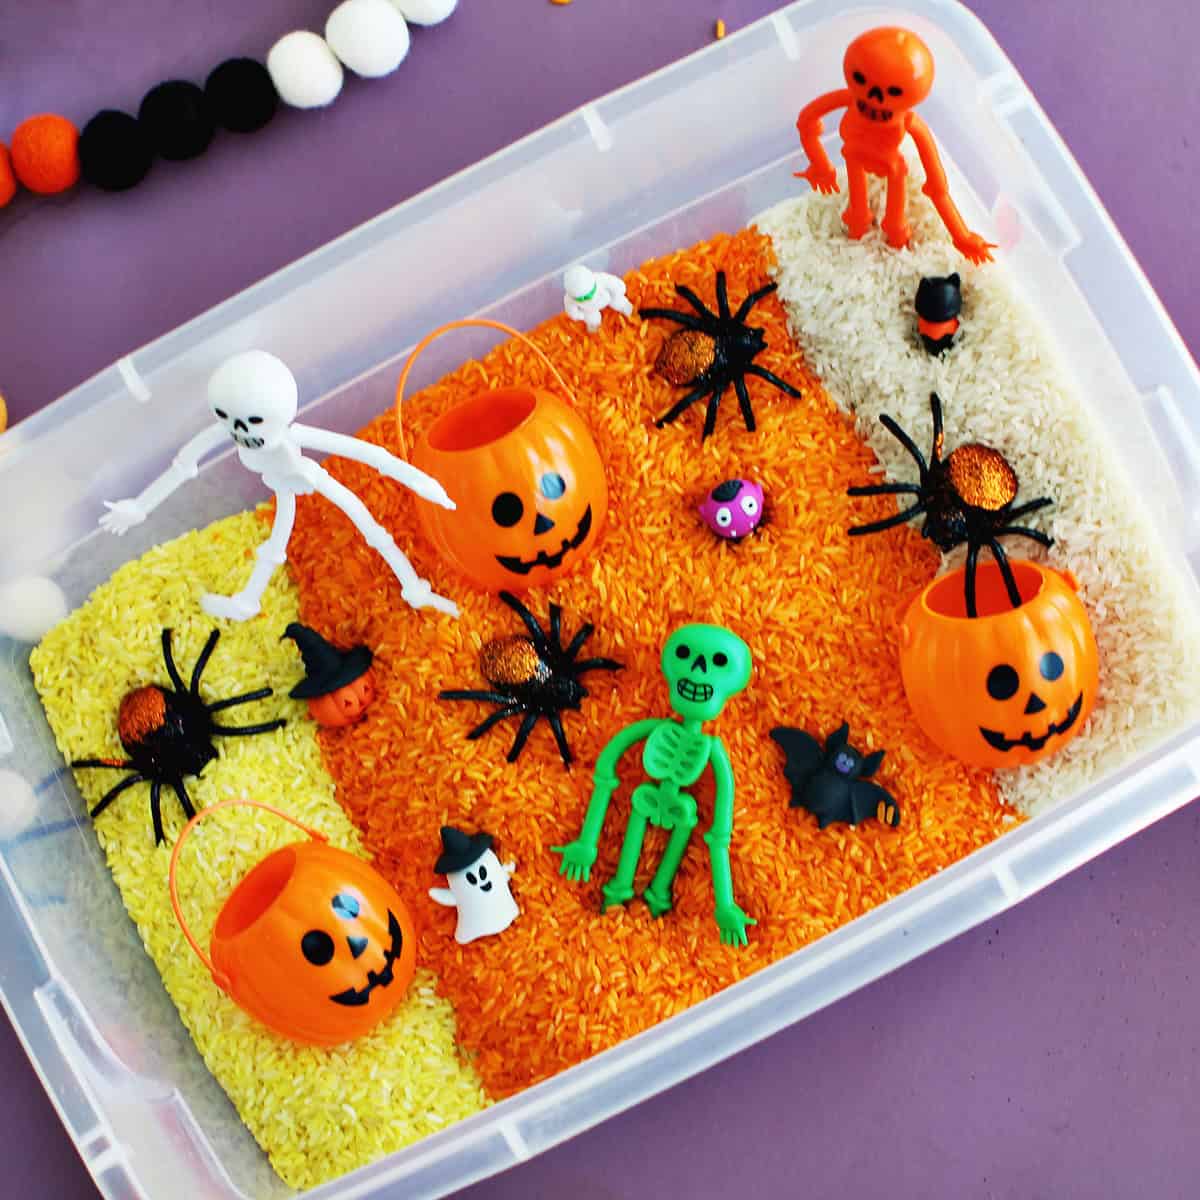
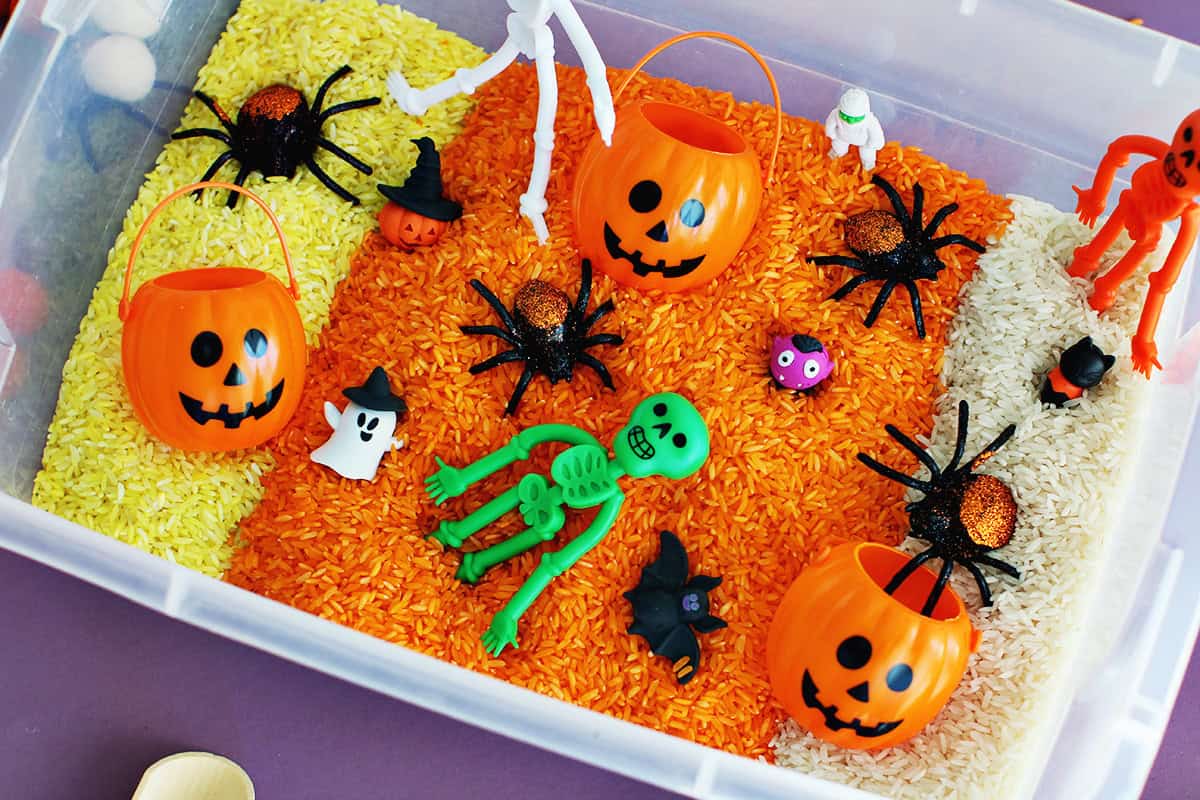
- Pretend spiders
- Skeletons
- Halloween themed erasers
- Pumpkins/Cauldrons
- Shiny spiders
- Wood scoops
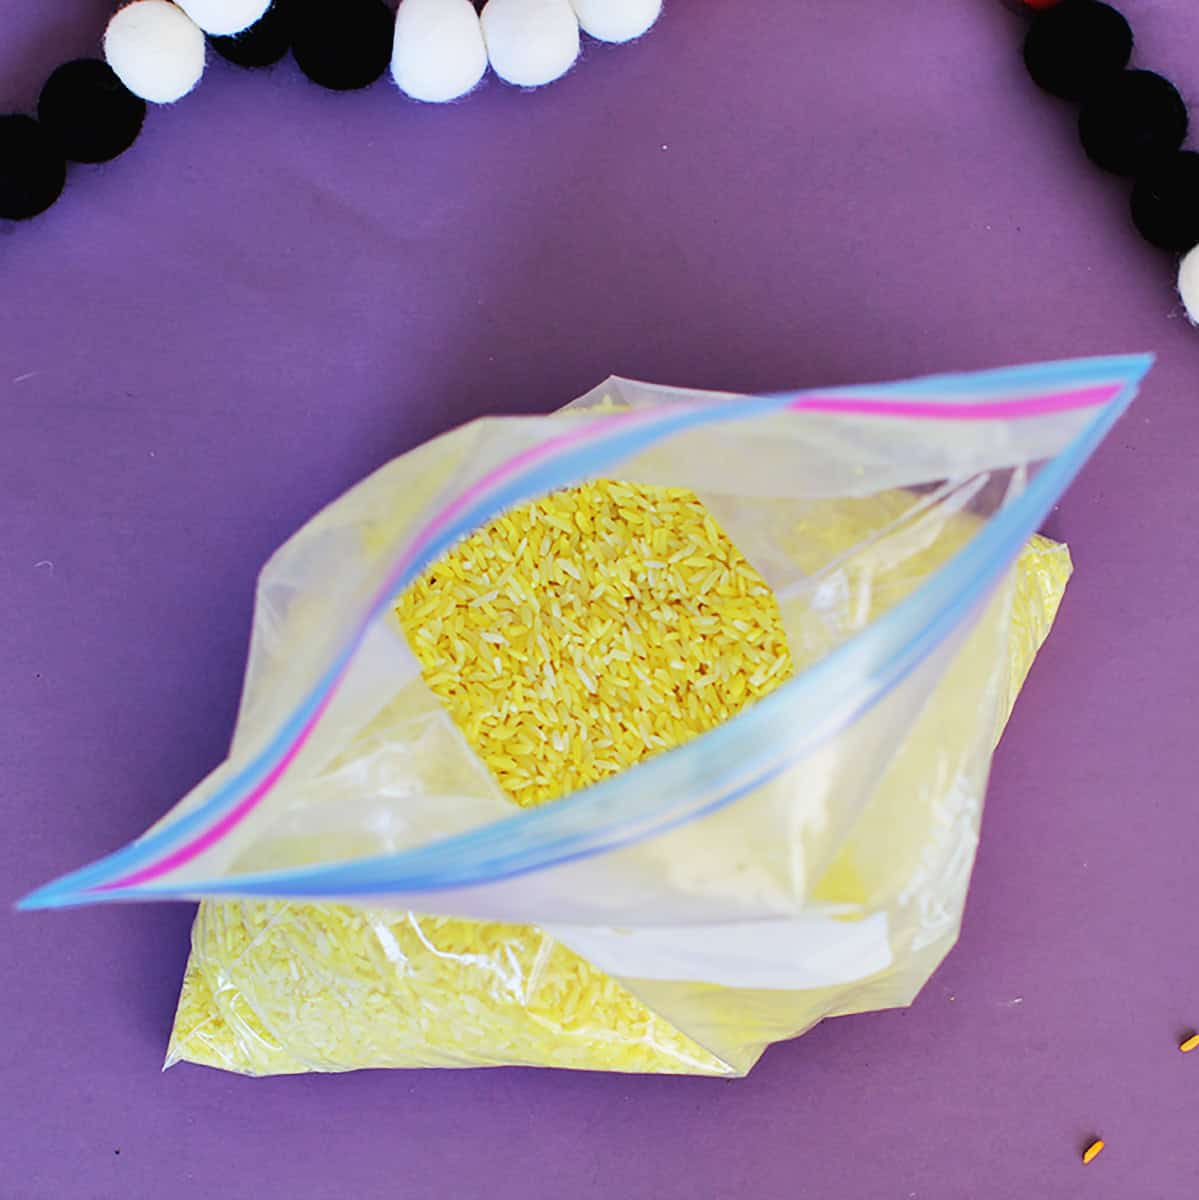
Dying Rice
1 cup : 1 tsp Rice to Vinegar (I did 6 cups rice to 6 tsp vinegar)
- Pour 6 cup uncooked white rice (long grain bagged rice works better than boxed Minute rice!) into a plastic baggie and add a few drops of orange food coloring to the bag.
- Add 6 teaspoon vinegar to the bag and shake until the rice is colored.
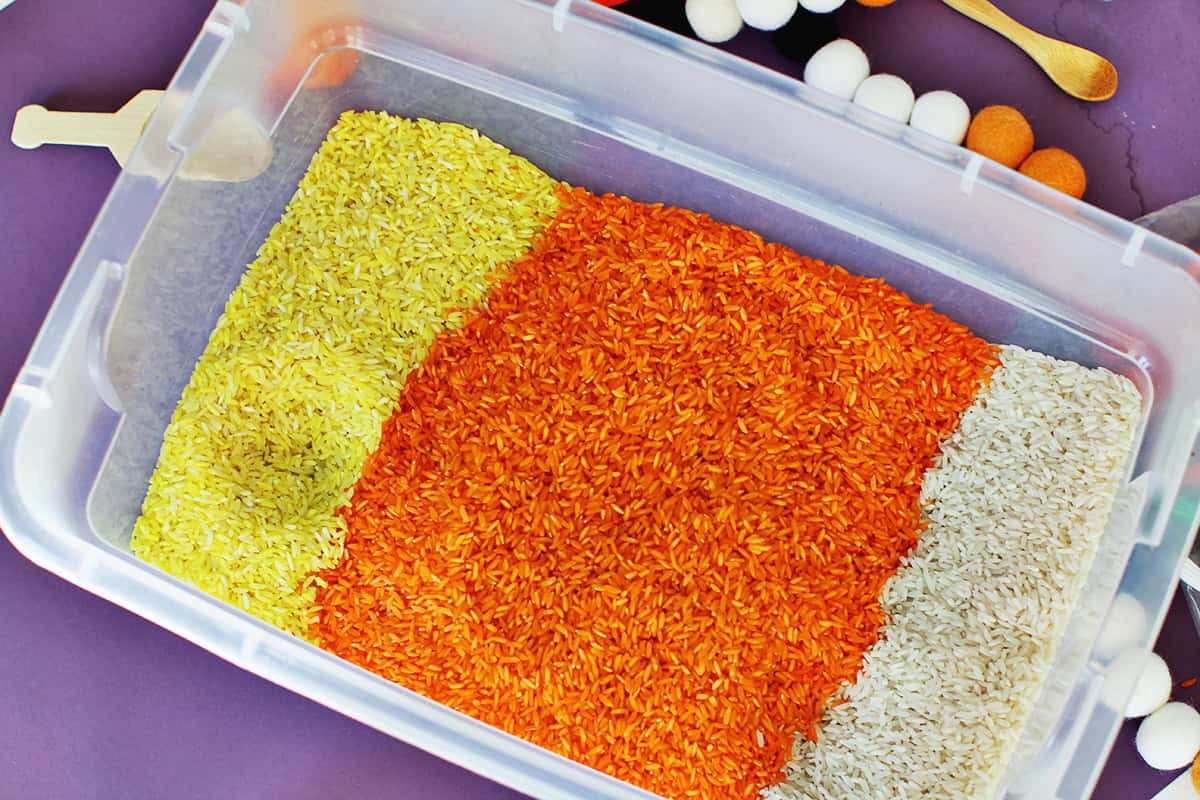
- Dump the colored rice on wax paper (I didn’t have any so I just placed some paper towels on a cookie sheet and called it a day!) and spread it out evenly to dry. Allow one hour to dry!
- Once dried, pour each color of rice into a different plastic bag – we did this so we could color sort on the first day of the sensory bin. (I reused the plastic bag I used to mix the rice and food dye).
- Repeat this process with yellow dye!
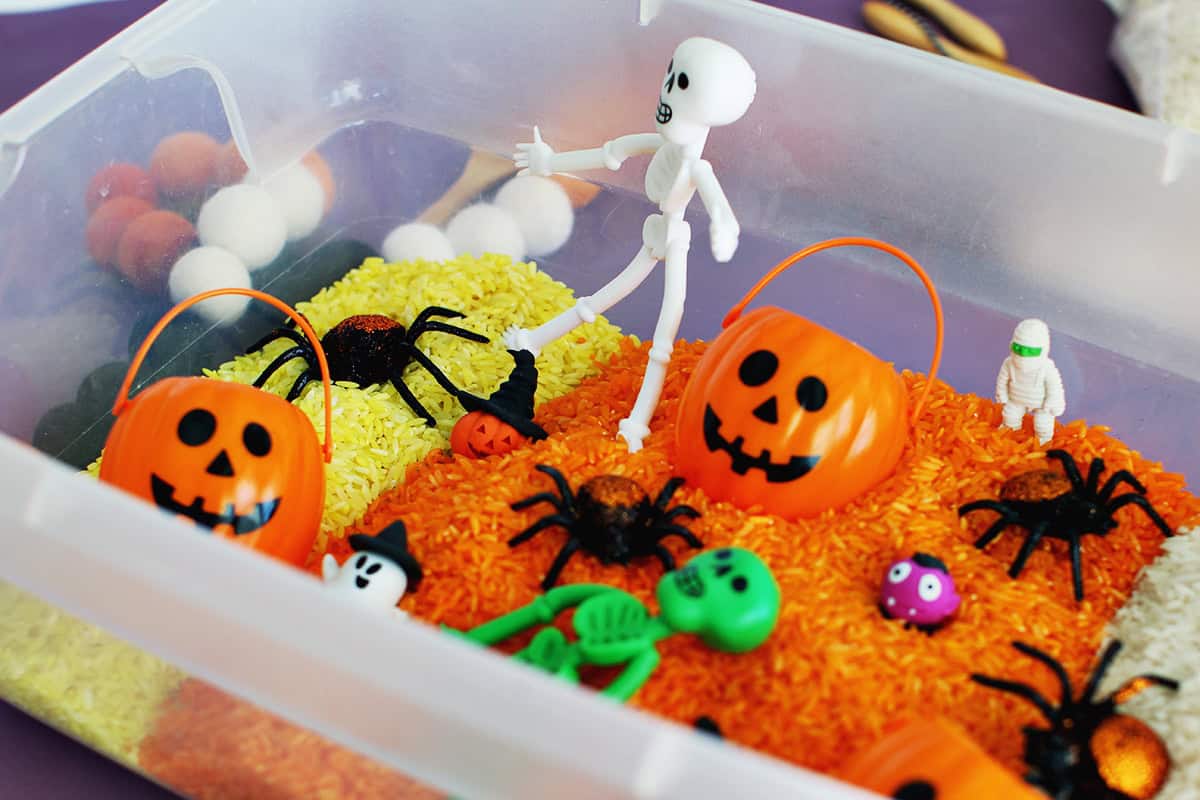
I went with a candy corn themed sensory bin, so I chose to dump the yellow, orange, then white rice into the sensory bin to create that candy corn look to start. I love starting with the colors separated to allow for color sorting activities. We used the wood spoons to color sort the rice into the pumpkin buckets. Once we finished color sorting, my kids loved mixing all the colors together and let their imaginations take over with the fun manipulatives! The Halloween sections at Target, Walmart and Dollar Tree have so many fun Halloween themed objects, just grab whatever stands out and dump it in your bin, you can’t go wrong here!
Storing Your Sensory Bin
To store, we recommend putting the dyed rice in an airtight container. Stored in an airtight container the rice will keep for years. (Just make sure it’s completely dry before you try to store it.) In a ziploc baggie keep the accessories that are Halloween specific together so you can pull them out easily. I like to reuse my bins for other sensory play.
Ideas for Other Things To Add
There are all kinds of fun things you can try with your Halloween sensory bin, here are a few of our favorites!
- Use pom poms or cotton rounds instead of rice. These pastel ones are super cute!
- Try beans for a different texture.
- Add plastic cauldrons instead of pumpkins.
- Use spider rings as a fun addition.