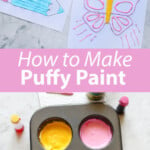
Looking for a fun and creative way to keep your kids engaged and entertained? Look no further than puffy paint! This easy-to-make craft material adds a whole new dimension to your children’s art. In this blog post, we’ll guide you through the process of making homemade puffy paint and explore why parents love using it as a delightful activity with kids. Find more projects in our Sensory archives.
Related: If you love homemade puffy paint, next up try Homemade Playdough, Slime, or the Milk Painting Experiment.
Puffy paint is a unique type of paint that, when applied, dries with a raised, three-dimensional texture. This fascinating feature adds depth and tactile appeal to your child’s artwork, making it stand out from regular flat paintings.

Why Puffy Paint is awesome:
- Sensory Exploration – Puffy paint provides a fantastic sensory experience for children. The texture of the paint allows them to explore different tactile sensations as they spread and manipulate it on paper.
- Fine Motor Skills – Working with puffy paint requires a certain level of precision and control, which helps improve fine motor skills in young children. As they squeeze, spread, and decorate, they are enhancing their hand-eye coordination.
- Focus and Engagement – The novelty of working with puffy paint can capture a child’s attention for extended periods. This engaged focus can provide parents with some well-deserved moments of relaxation.
- Three Ingredients – Puffy paint only requires three basic ingredients to make.

Ingredients
- Glue – white school glue like Elmer’s
- Shaving cream – this is what makes it puffy
- Food coloring
Puffy paint is made with equal parts glue to shaving cream and then you color the paint with food coloring. You can make a big batch, for a classroom or party, or you can make just a small amount for one kiddo to enjoy some rainy afternoon you need a project.

Directions
In a container, add equal parts glue and shaving cream. While you can measure, it’s also OK to simply eyeball it! Puffy paint is not temperamental in this way, so if you have slightly more glue or shaving cream, it will still turn out fine.
Add a drop or two of food coloring. Then mix the three ingredients together to make puffy paint.
Letting kids mix their own colors can be a fun part of this project! A refresher:
- Red + Yellow = Orange
- Red + Blue = Purple
- Blue + Yellow = Green

Tips for Success
- Puffy paint can be made or stored in a cupcake tin or small cups (disposable or reusable). Since it’s made with non-edible ingredients like glue, you may not want to use the same kitchen items you use for eating.
- This paint is best used the day it is made. It will dry out over time. If you want to try and store leftovers to use later in the day or the next day, cover tightly so no air can get to the paint.
- You can paint puffy paint onto paper, fabric, cardboard, and other surfaces. I often just give my kiddo some solid construction paper or tear out a page from a coloring book. But we also have lots of printables you could download and print for FREE if you need something.

Puffy paint is a fantastic way to engage your kids in a fun and artistic activity that offers both entertainment and educational benefits. From sensory exploration to fine motor skill development, puffy paint provides a well-rounded experience for children.

By following our simple DIY recipe, you can easily create this captivating paint at home and watch as your kids’ imaginations come to life on paper. So, the next time you’re looking for an exciting activity to share with your children, give puffy paint a try—you won’t be disappointed!

Get creative ideas for recipes, crafts, decor, and more in your inbox!
 Get the How-To
Supplies
- ¼ cup glue
- ¼ cup shaving cream
- 1-2 drops food coloring
Instructions
- In a container, add equal parts glue and shaving cream.
- Add a drop or two of food coloring.
- Then mix the three ingredients together to make puffy paint.


Great activity!