If you’ve ever attended a little girl’s birthday party, you probably know that Barbie cakes are a delightful and enchanting addition. These whimsical cakes not only look stunning but also bring immense joy to the birthday girl and her guests. Whether you’re an experienced baker or a novice in the kitchen, creating a Barbie cake is something anyone can do. In this step-by-step guide, we’ll take you through the process of making a retro Barbie cake perfect for any birthday party!
Related: Other great birthday cake ideas include this Unicorn Cake, Ocean Cake, or Rainbow Cake. Looking for more kid-friendly recipes? Check out our entire Recipe Archive for more.
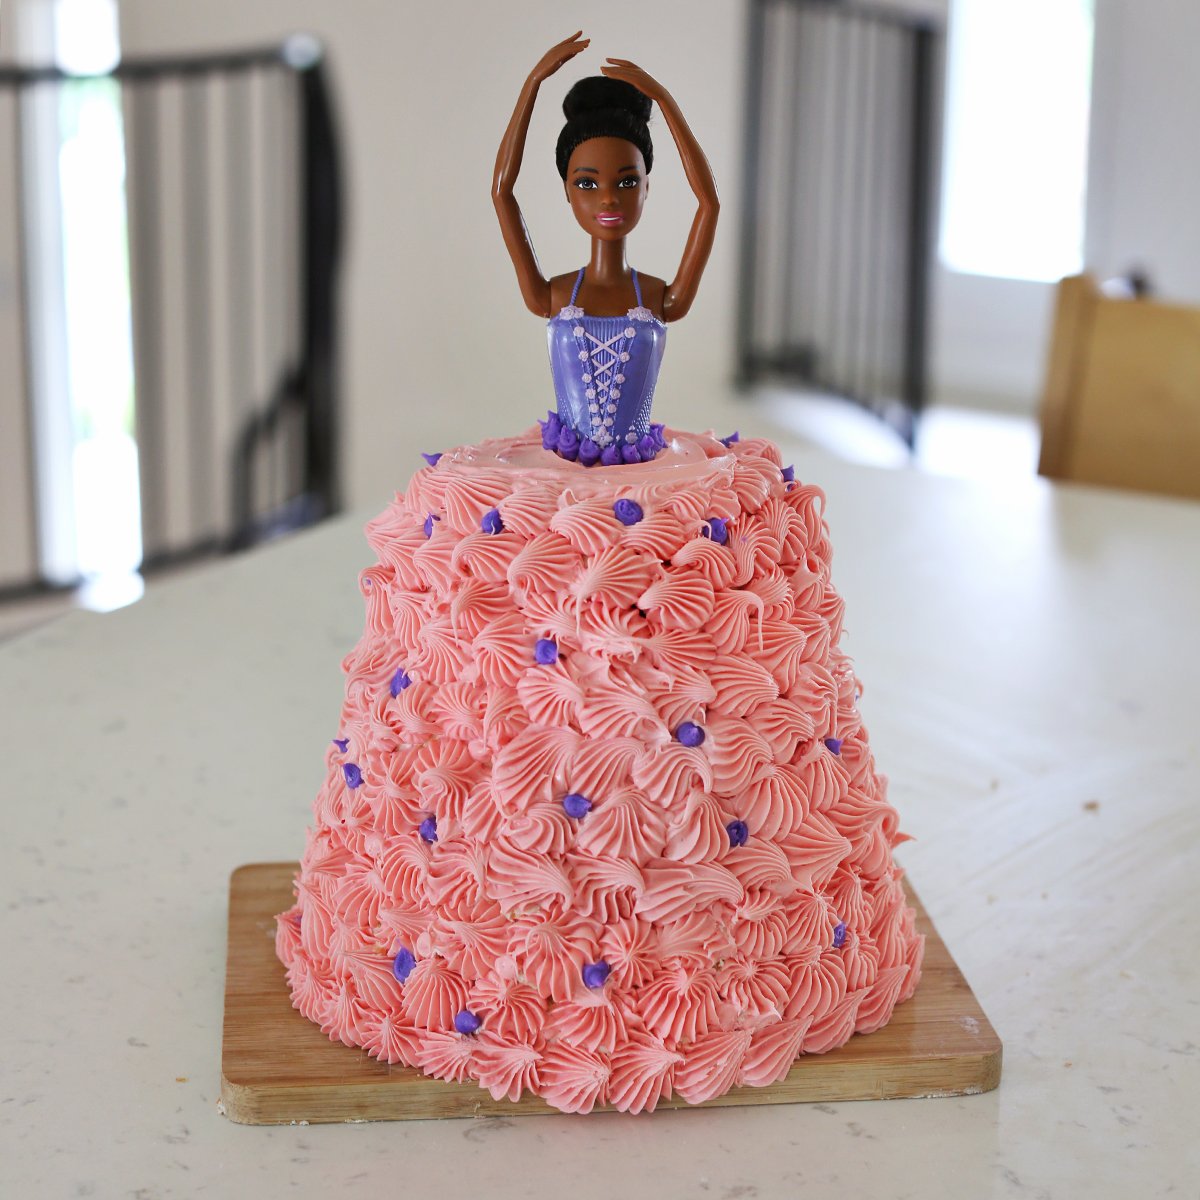
The most important supply is the Barbie doll that gets encased in the cake. Not only will this be a part of the cake decor, afterward the doll can be rinsed off and played with. It’s best to choose a Barbie that has plastic (painted on) clothes or clothes you can easily remove. If you are unable to remove the Barbie clothes, then wrap them tightly in plastic wrap before adding to the cake so the clothing doesn’t get stained by the frosting.
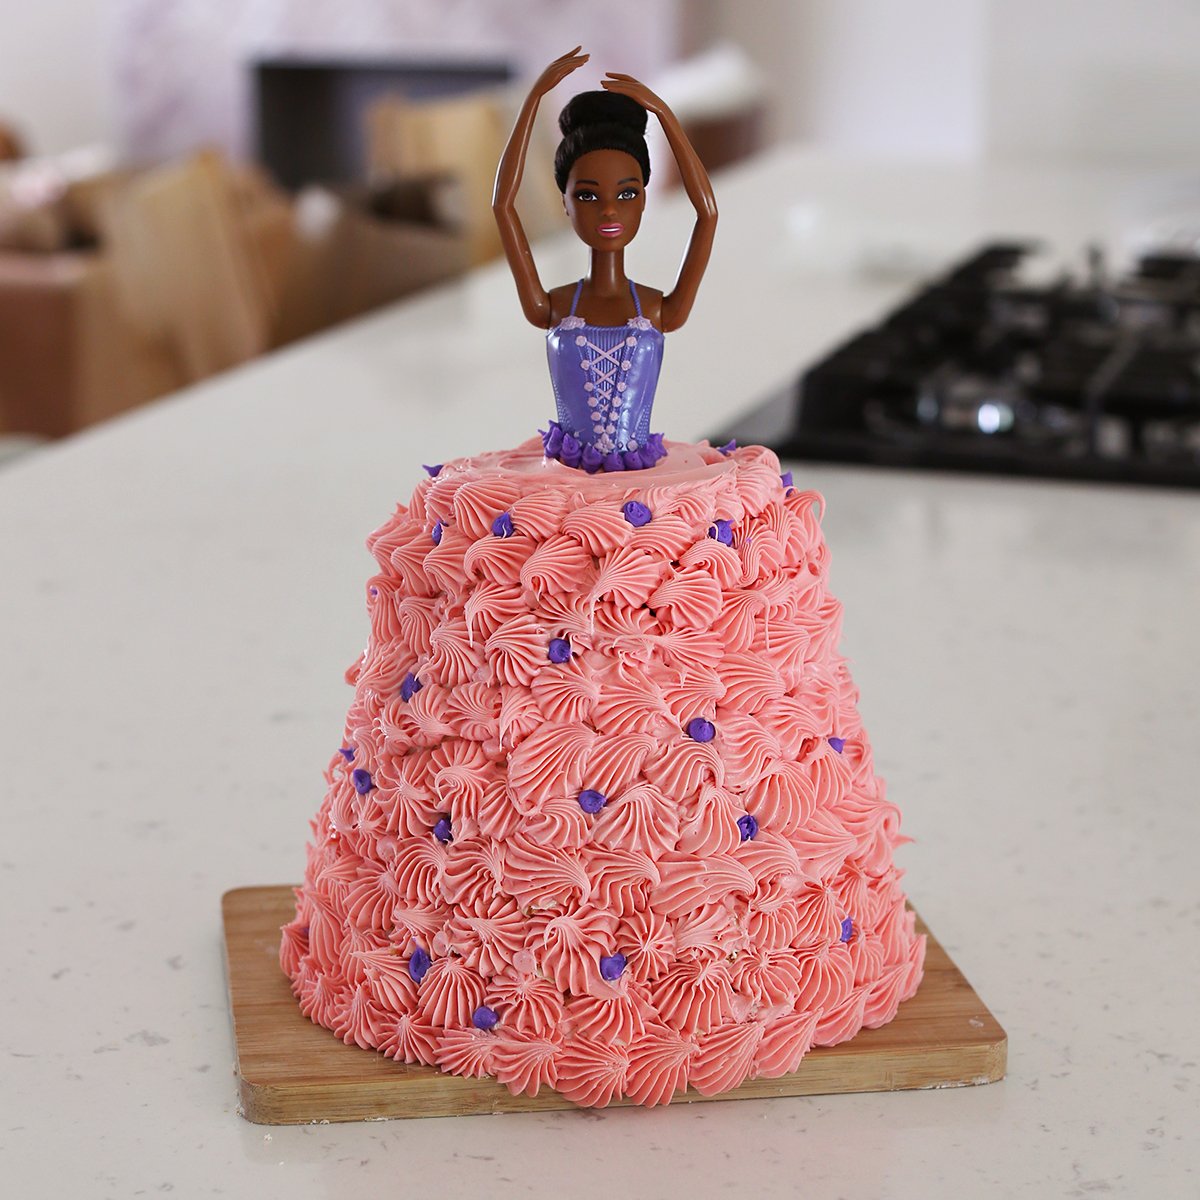
Barbie Cake Supplies
- Your favorite cake mix (or homemade cake batter)
- Buttercream frosting (store-bought or homemade)
- Food coloring – if the frosting isn’t already the color you want
- Edible glitter or sprinkles (optional)
- Barbie doll (make sure it’s new and clean)
- Cake pans (two 6-inch round and two 8-inch round)
- Piping bags and pastry tips
- Offset spatula
- Cutting board or cake board – to decorate the cake on and serve from

Directions
Prepare the cake batter following the instructions on the box or your recipe. Divide it evenly between the 6-inch and 8-inch round cake pans. Bake the cakes according to the recommended time and temperature. Once they are done, let them cool completely.
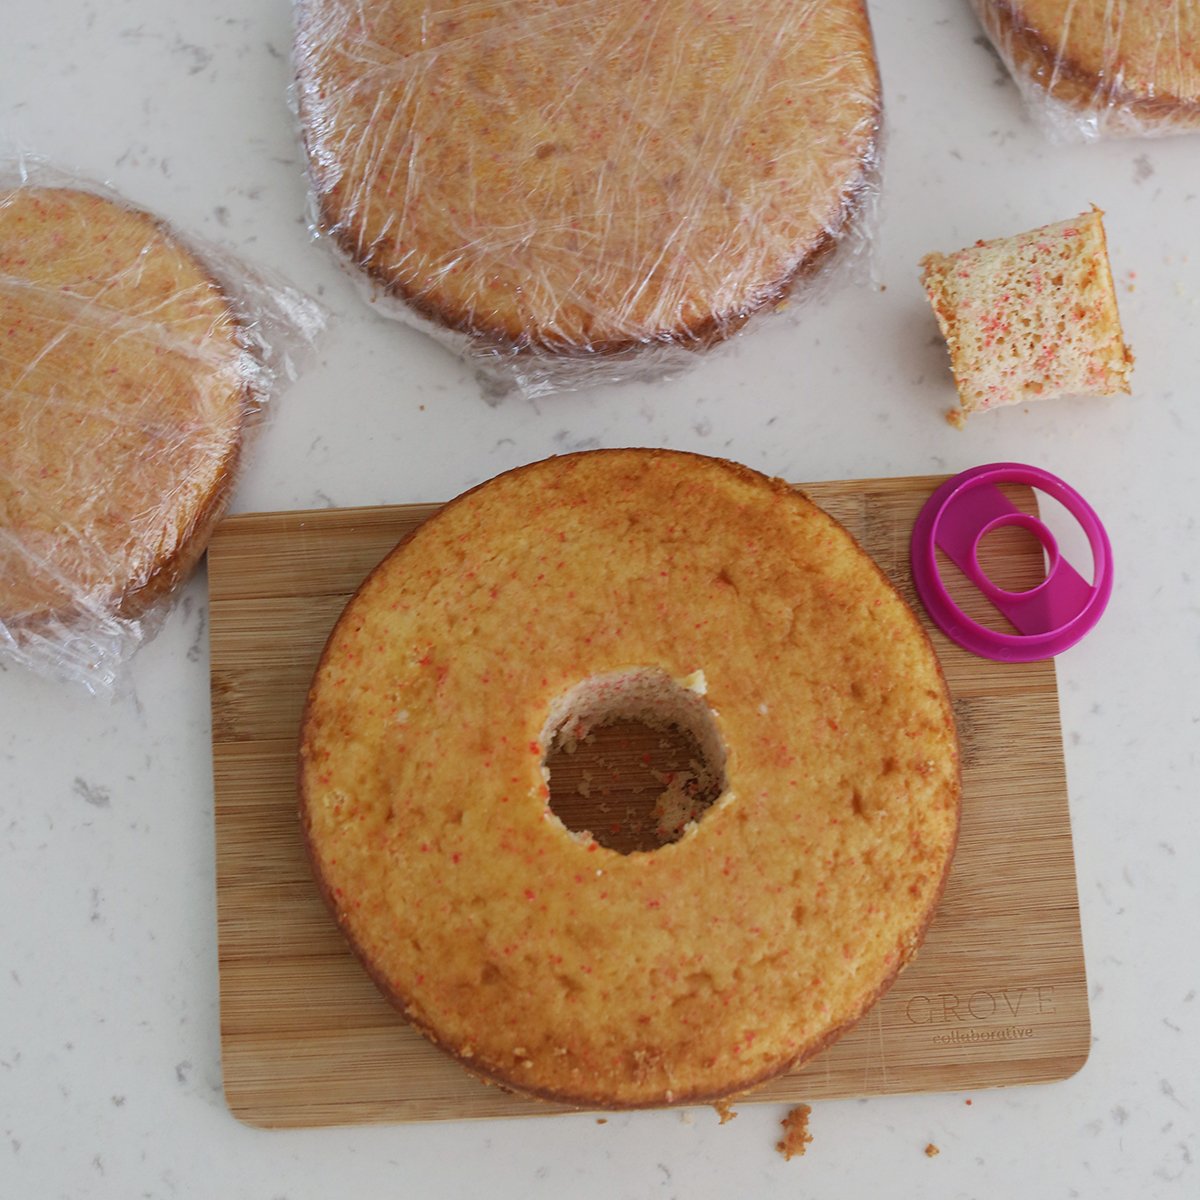
Next, level the tops of both cakes (if needed) using a serrated knife to ensure they sit flat. Add a hole to the center of each cake with a small circle cookie cutter or you can do this with a knife. The holes should be just big enough to squeeze the Barbie into. Place the 8-inch cake on your serving plate and stack the 6-inch cake on top, securing them with a thin layer of buttercream frosting between the layers.
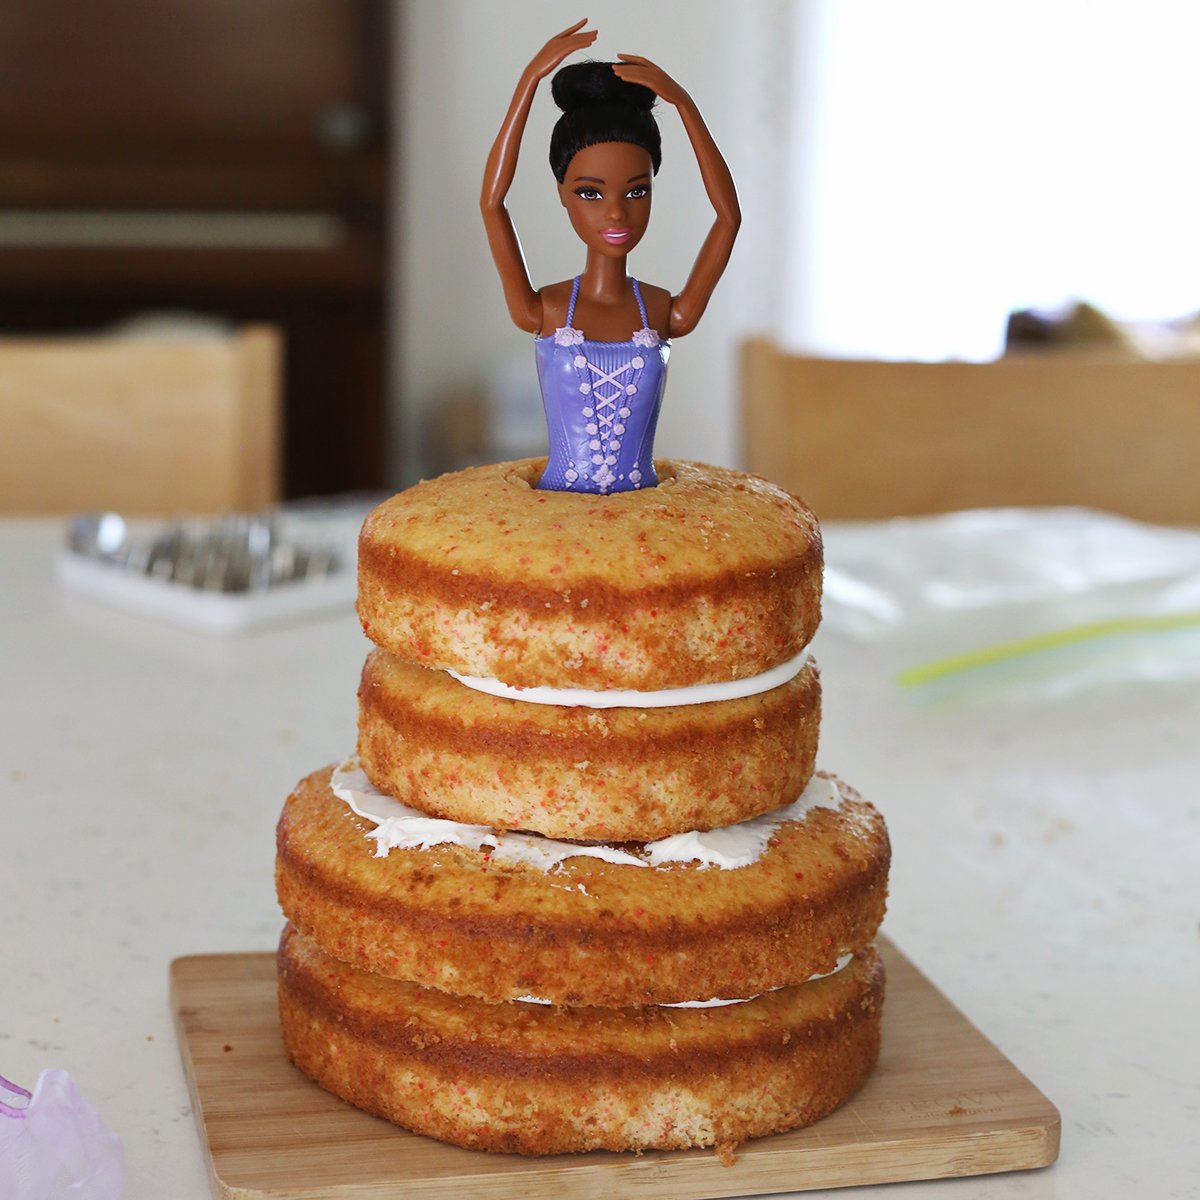
To create the iconic Barbie dress, carefully carve the cake layers into a flowing skirt shape. Start by making gentle cuts along the sides of the cake to achieve a gradual flare. Be patient and take your time to create the desired shape.
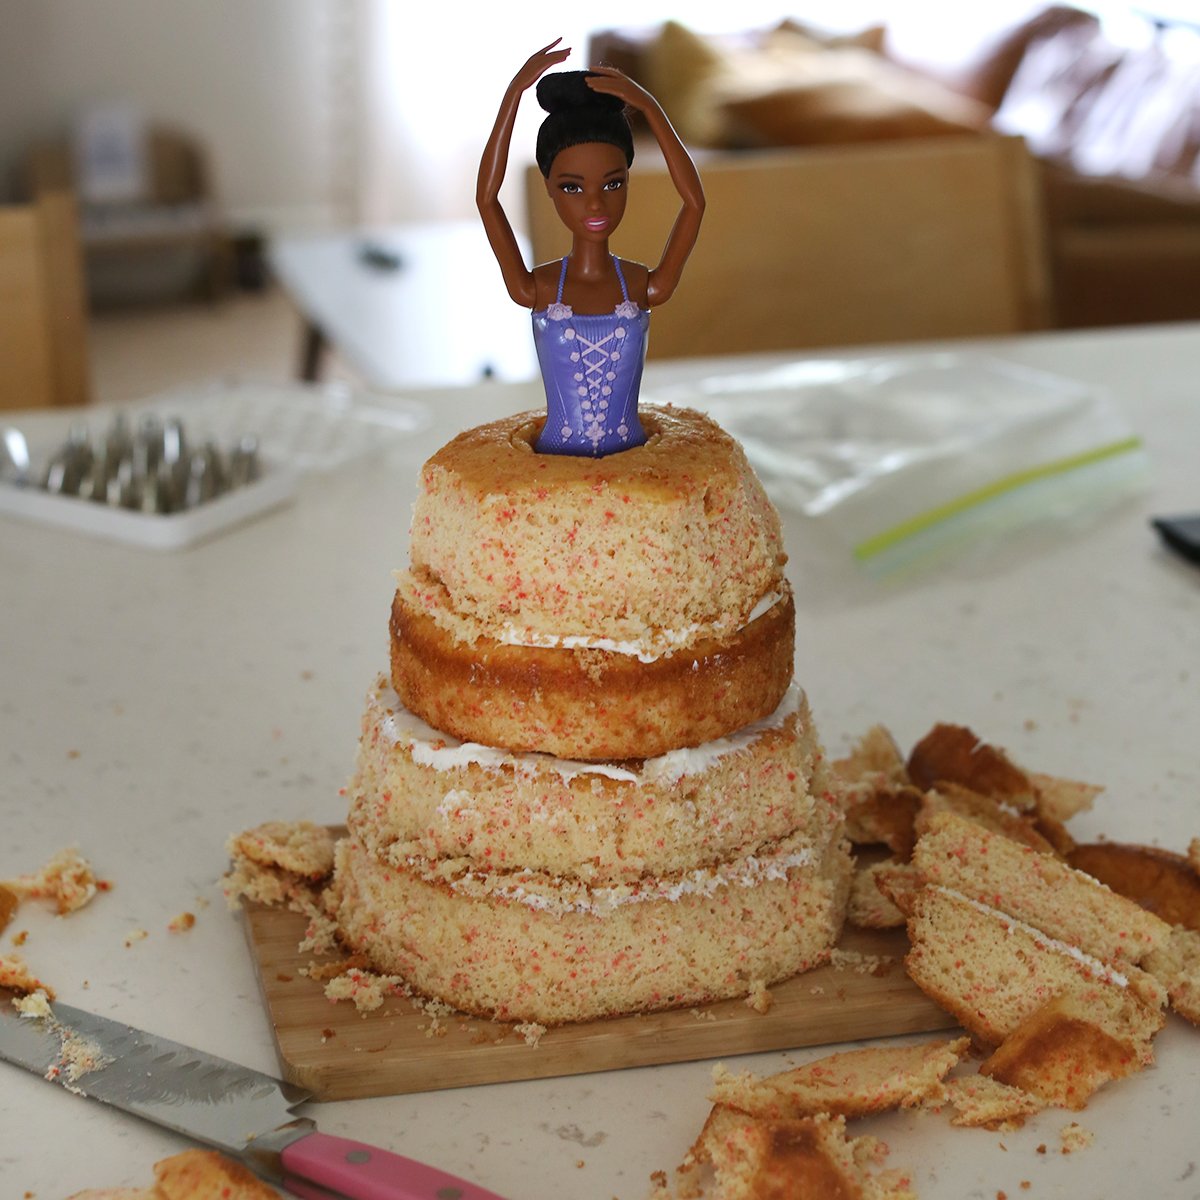
Apply a thin layer of buttercream frosting all over the cake. This crumb coat will seal in any loose crumbs and provide a smooth surface for the final layer of frosting. This layer will likely look messy and that’s OK! It will get covered with more frosting later. Chill the cake in the refrigerator for about 20-30 minutes to set the crumb coat.
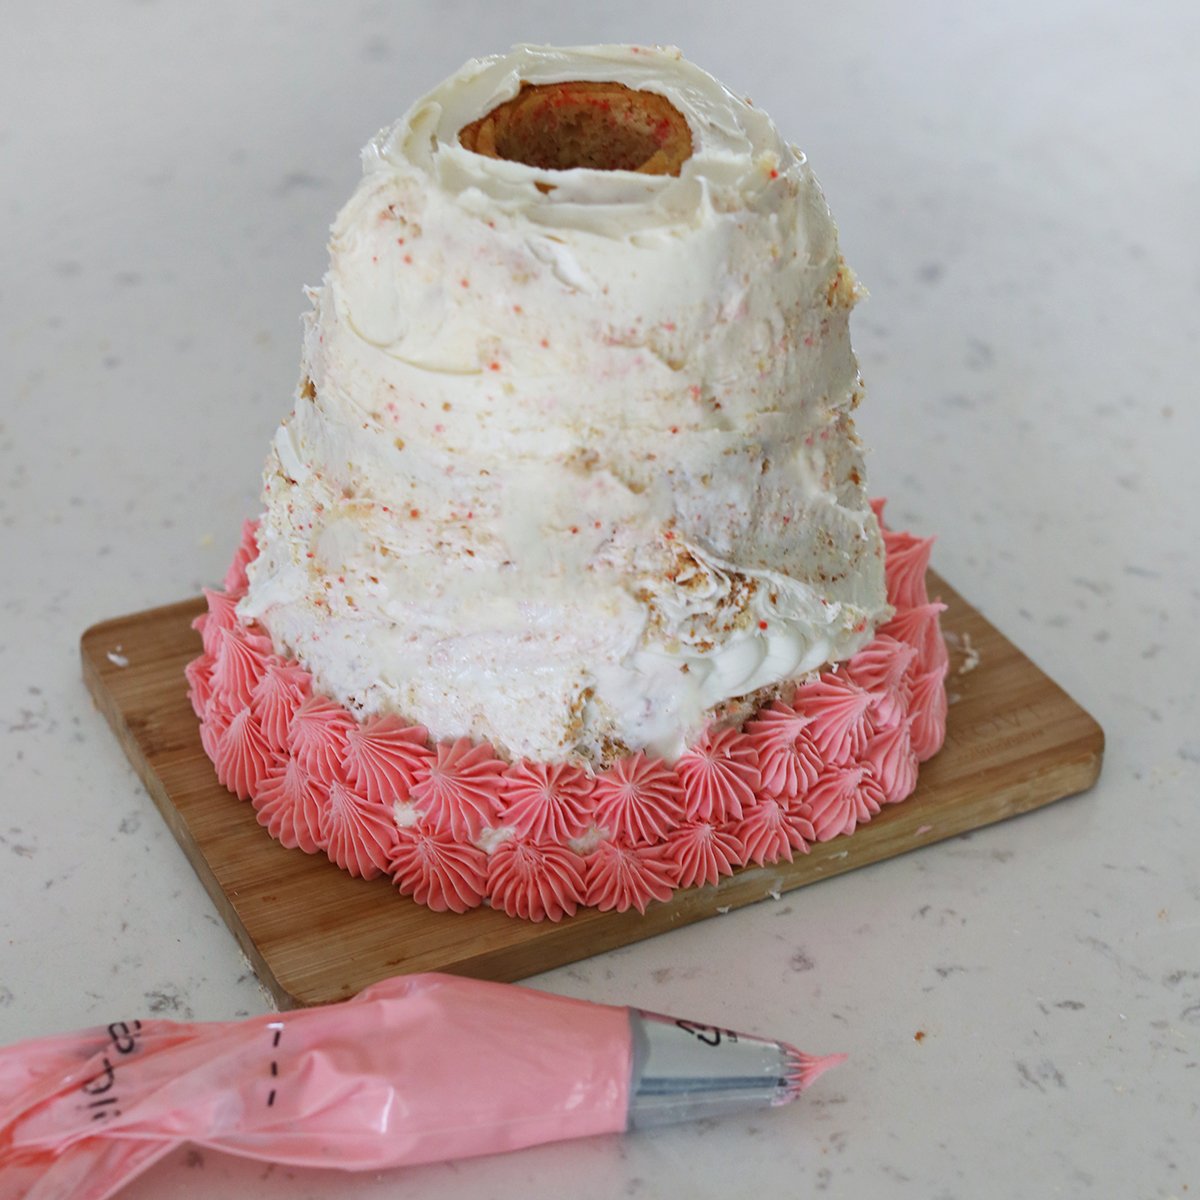
Once the crumb coat is firm, apply a thicker layer of buttercream frosting to the entire cake. Get creative with colors and designs using the pastry tips to personalize the cake for the birthday girl. Add edible glitter or sprinkles for extra sparkle.
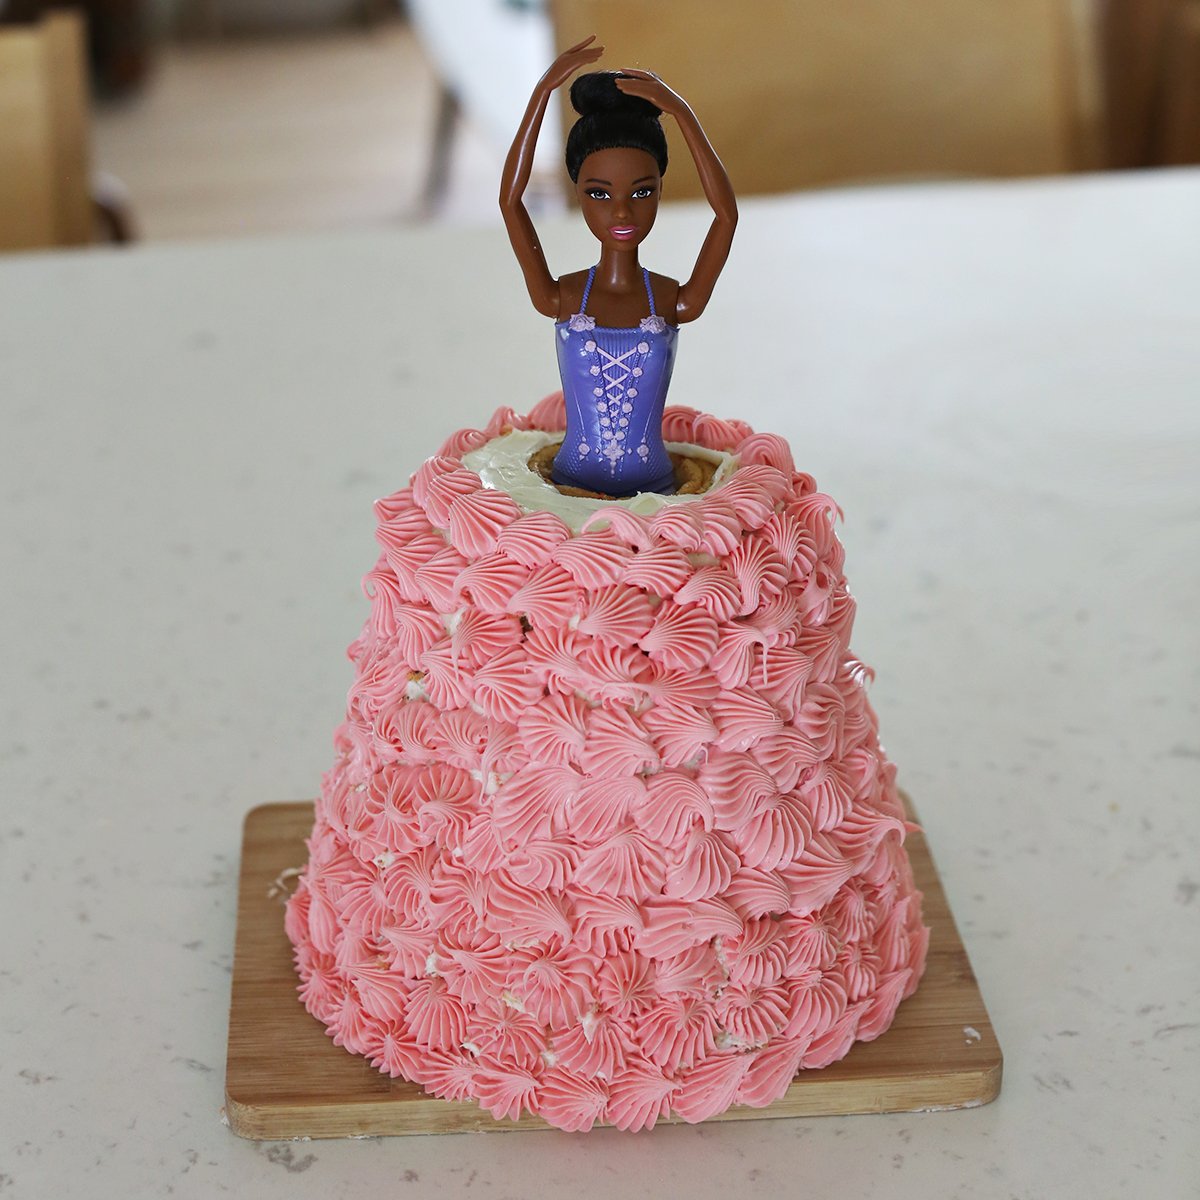
Insert the doll into the center of the cake, making sure it stands upright. Now add frosting around the top of the cake, just touching the doll so it looks like the dress connects.
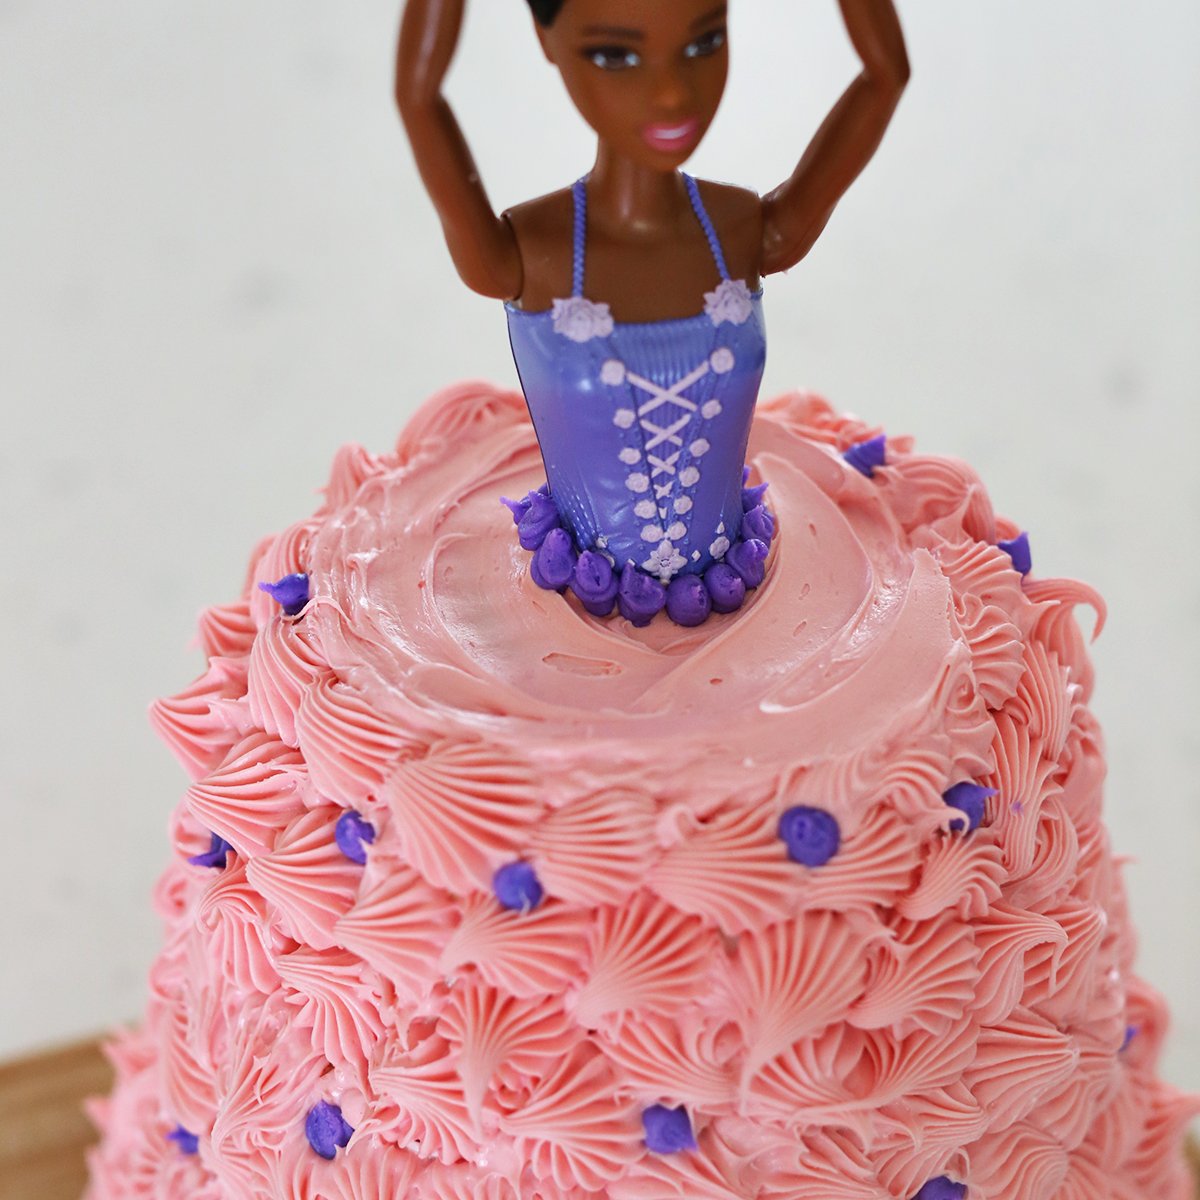
Check over the Barbie cake and if you see any small holes or imperfections in your frosting, add small accent beads with frosting or sprinkles to complete the look.
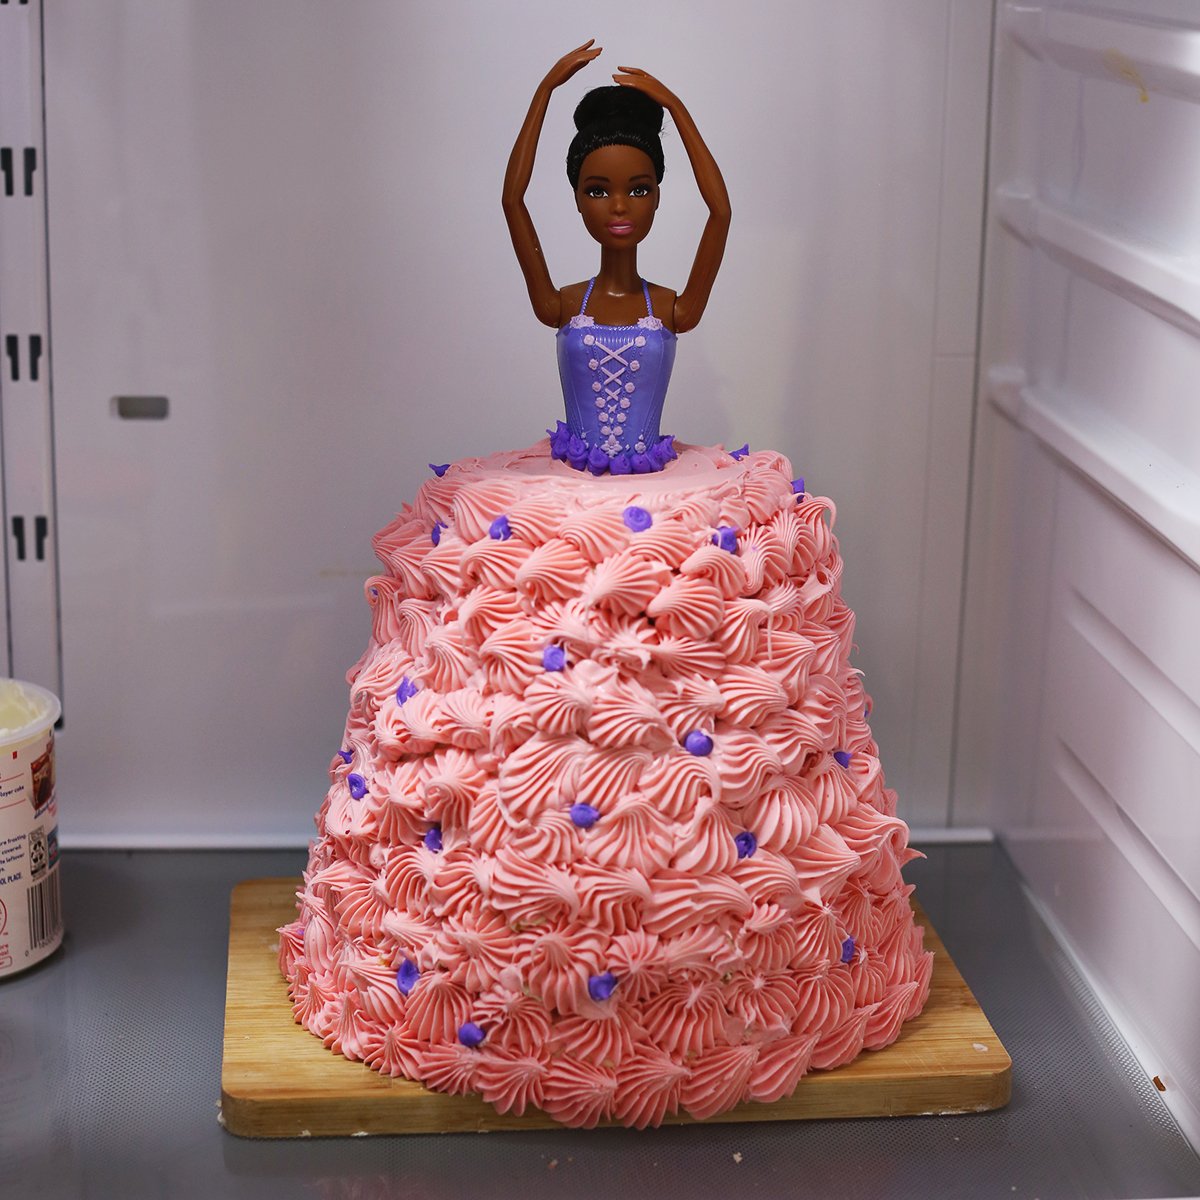
The finished Barbie cake can be stored upright in the refrigerator for up to eight hours. This cake will be best the day it was frosted, but it can be stored for a while if needed. Happy cake decorating!
Get creative ideas for recipes, crafts, decor, and more in your inbox!
 Get the How-To
Supplies
- 2 boxes cake mix
- 4 containers buttercream frosting (16 ounces each)
- food coloring
- sprinkles (optional)
Instructions
- Prepare the cake batter following the instructions on the box or your recipe. Divide it evenly between the 6-inch and 8-inch round cake pans. Bake the cakes according to the recommended time and temperature. Once they are done, let them cool completely.
- Next, level the tops of both cakes (if needed) using a serrated knife to ensure they sit flat. Add a hole to the center of each cake with a small circle cookie cutter or you can do this with a knife. Place the 8-inch cake on your serving plate and stack the 6-inch cake on top, securing them with a thin layer of buttercream frosting between the layers.
- To create the iconic Barbie dress, carefully carve the cake layers into a flowing skirt shape. Start by making gentle cuts along the sides of the cake to achieve a gradual flare. Be patient and take your time to create the desired shape.
- Apply a thin layer of buttercream frosting all over the cake. This crumb coat will seal in any loose crumbs and provide a smooth surface for the final layer of frosting. This layer will likely look messy and that’s OK! It will get covered with more frosting later. Chill the cake in the refrigerator for about 20-30 minutes to set the crumb coat.
- Once the crumb coat is firm, apply a thicker layer of buttercream frosting to the entire cake. Get creative with colors and designs using the pastry tips to personalize the cake for the birthday girl. Add edible glitter or sprinkles for extra sparkle.
- Insert the doll into the center of the cake, making sure it stands upright. Now add frosting around the top of the cake, just touching the doll so it looks like the dress connects.
- Check over the Barbie cake, if you see any small holes or imperfections in your frosting add small accent beads with frosting or sprinkles to complete the look.


Doll cakes are so fun!
This looks so much fun to make!