
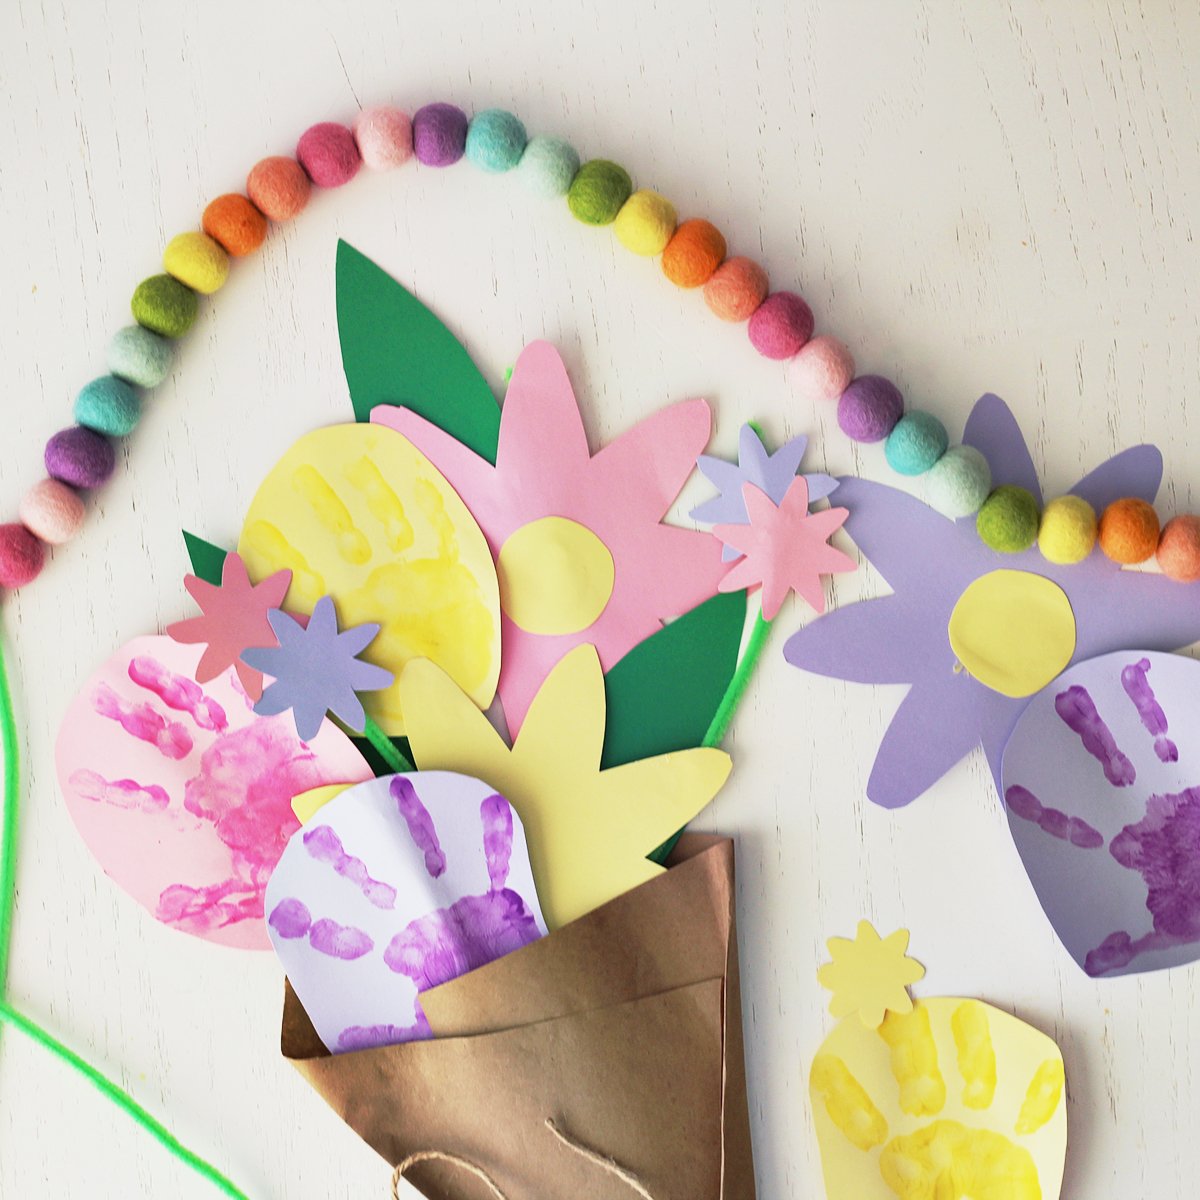
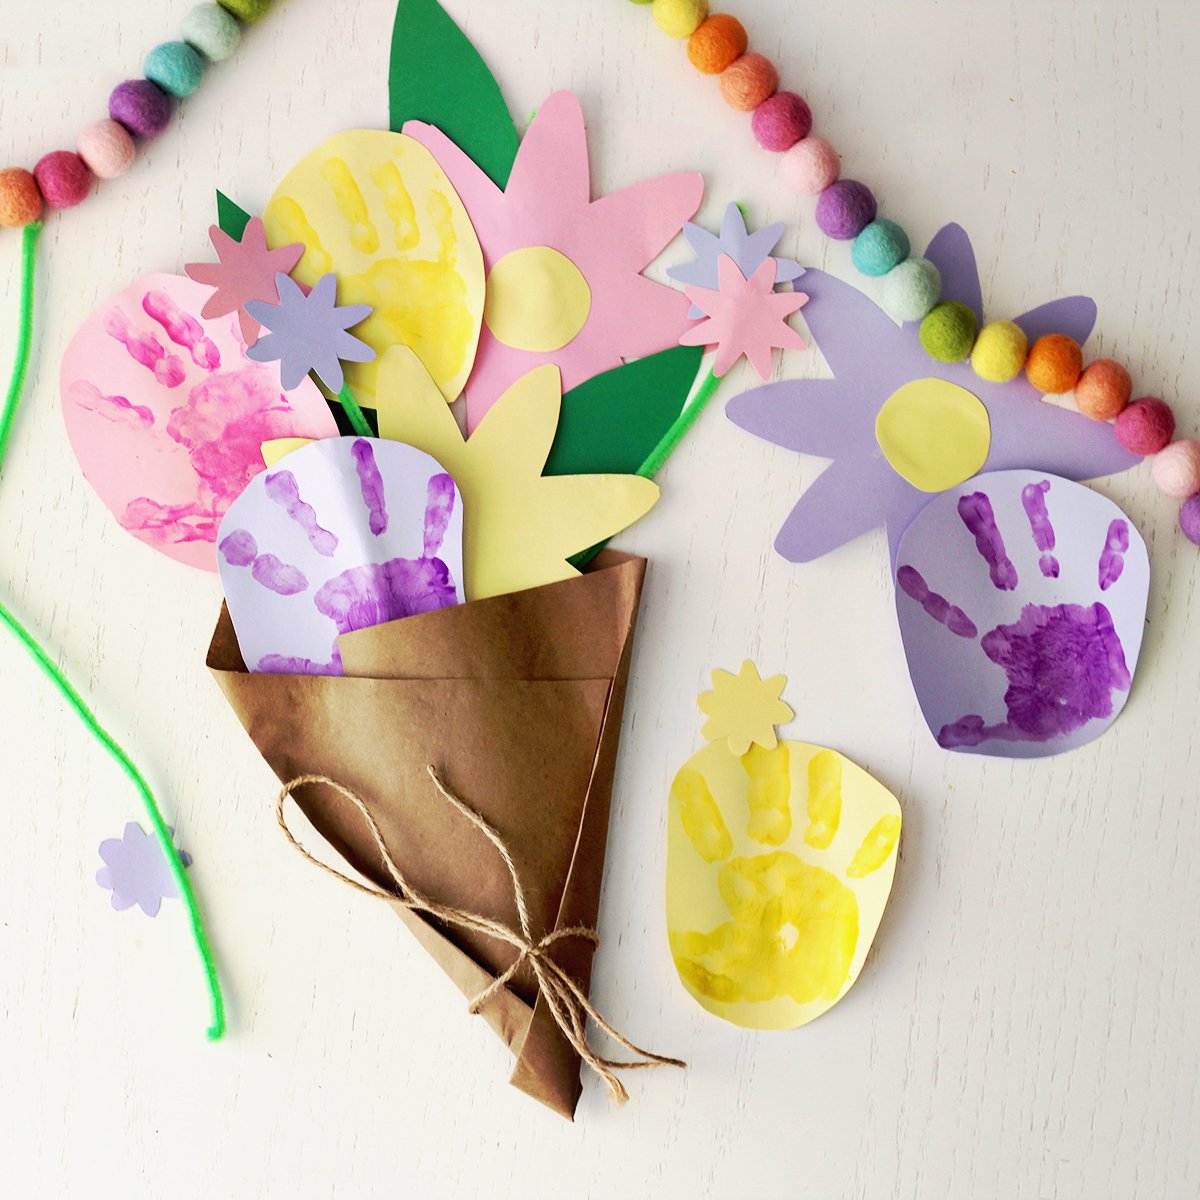
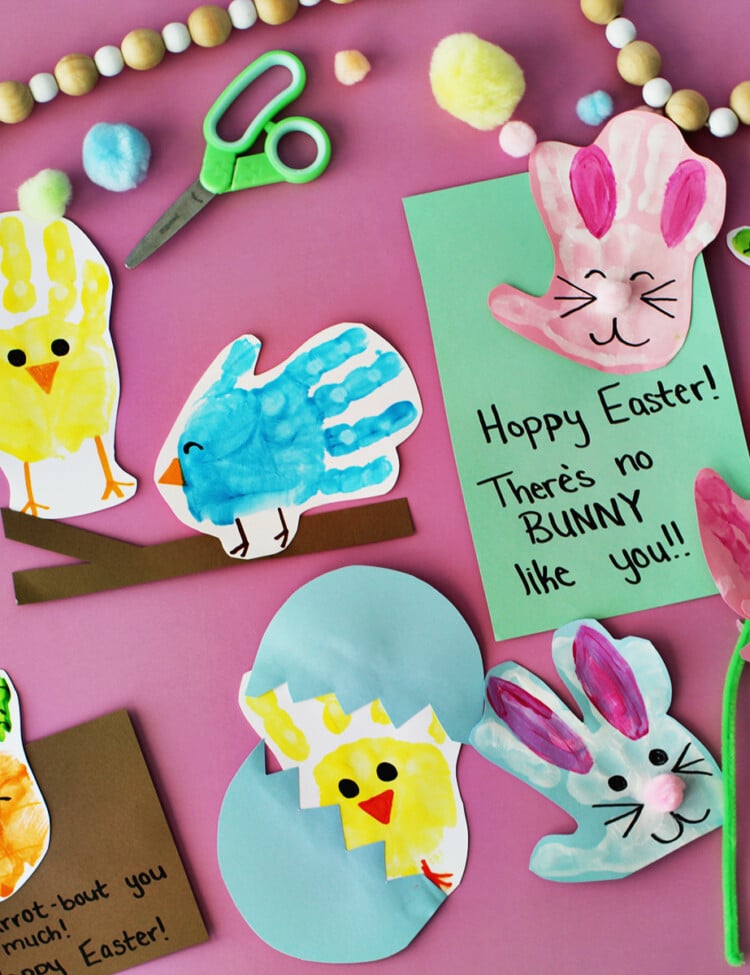
Whether you’re looking for a fun craft for Mother’s Day or even Valentine’s Day, making a handprint bouquet of flowers is a great way to show someone you love them! This craft is perfect for kids to help with and the best part is these flowers won’t wilt!
We’ve included a free printable daisy template so you can add in additional flowers for your bouquet. If you want to add tulips or roses check out our free printable flower outlines! Kids of all ages can help with this project- toddlers can have fun making their handprints and decorating the flowers. Preschoolers and younger kids can work on their scissor skills (supervised) by helping cut out their handprints and the daisy shapes. Older kids can do more of the cutting, glueing and assembly.
Why kids love this handprint bouquet of flowers?
- It’s a fun gift to make because it’s personalized and feels special to give to a love one. Make sure kids know that no one else has their exact handprint and that it will be a cherished gift!
- It’s super customizable and kids can either use their favorite colors or their loved ones to make this special.
What you’ll need to make it
- Cardstock in colors of choice (Variety pack)
- Kids paint- I used this washable paint
- Pipe cleaners or green cardstock/construction paper
- Scotch tape
- School glue
- Brown kraft paper and ribbon or twine
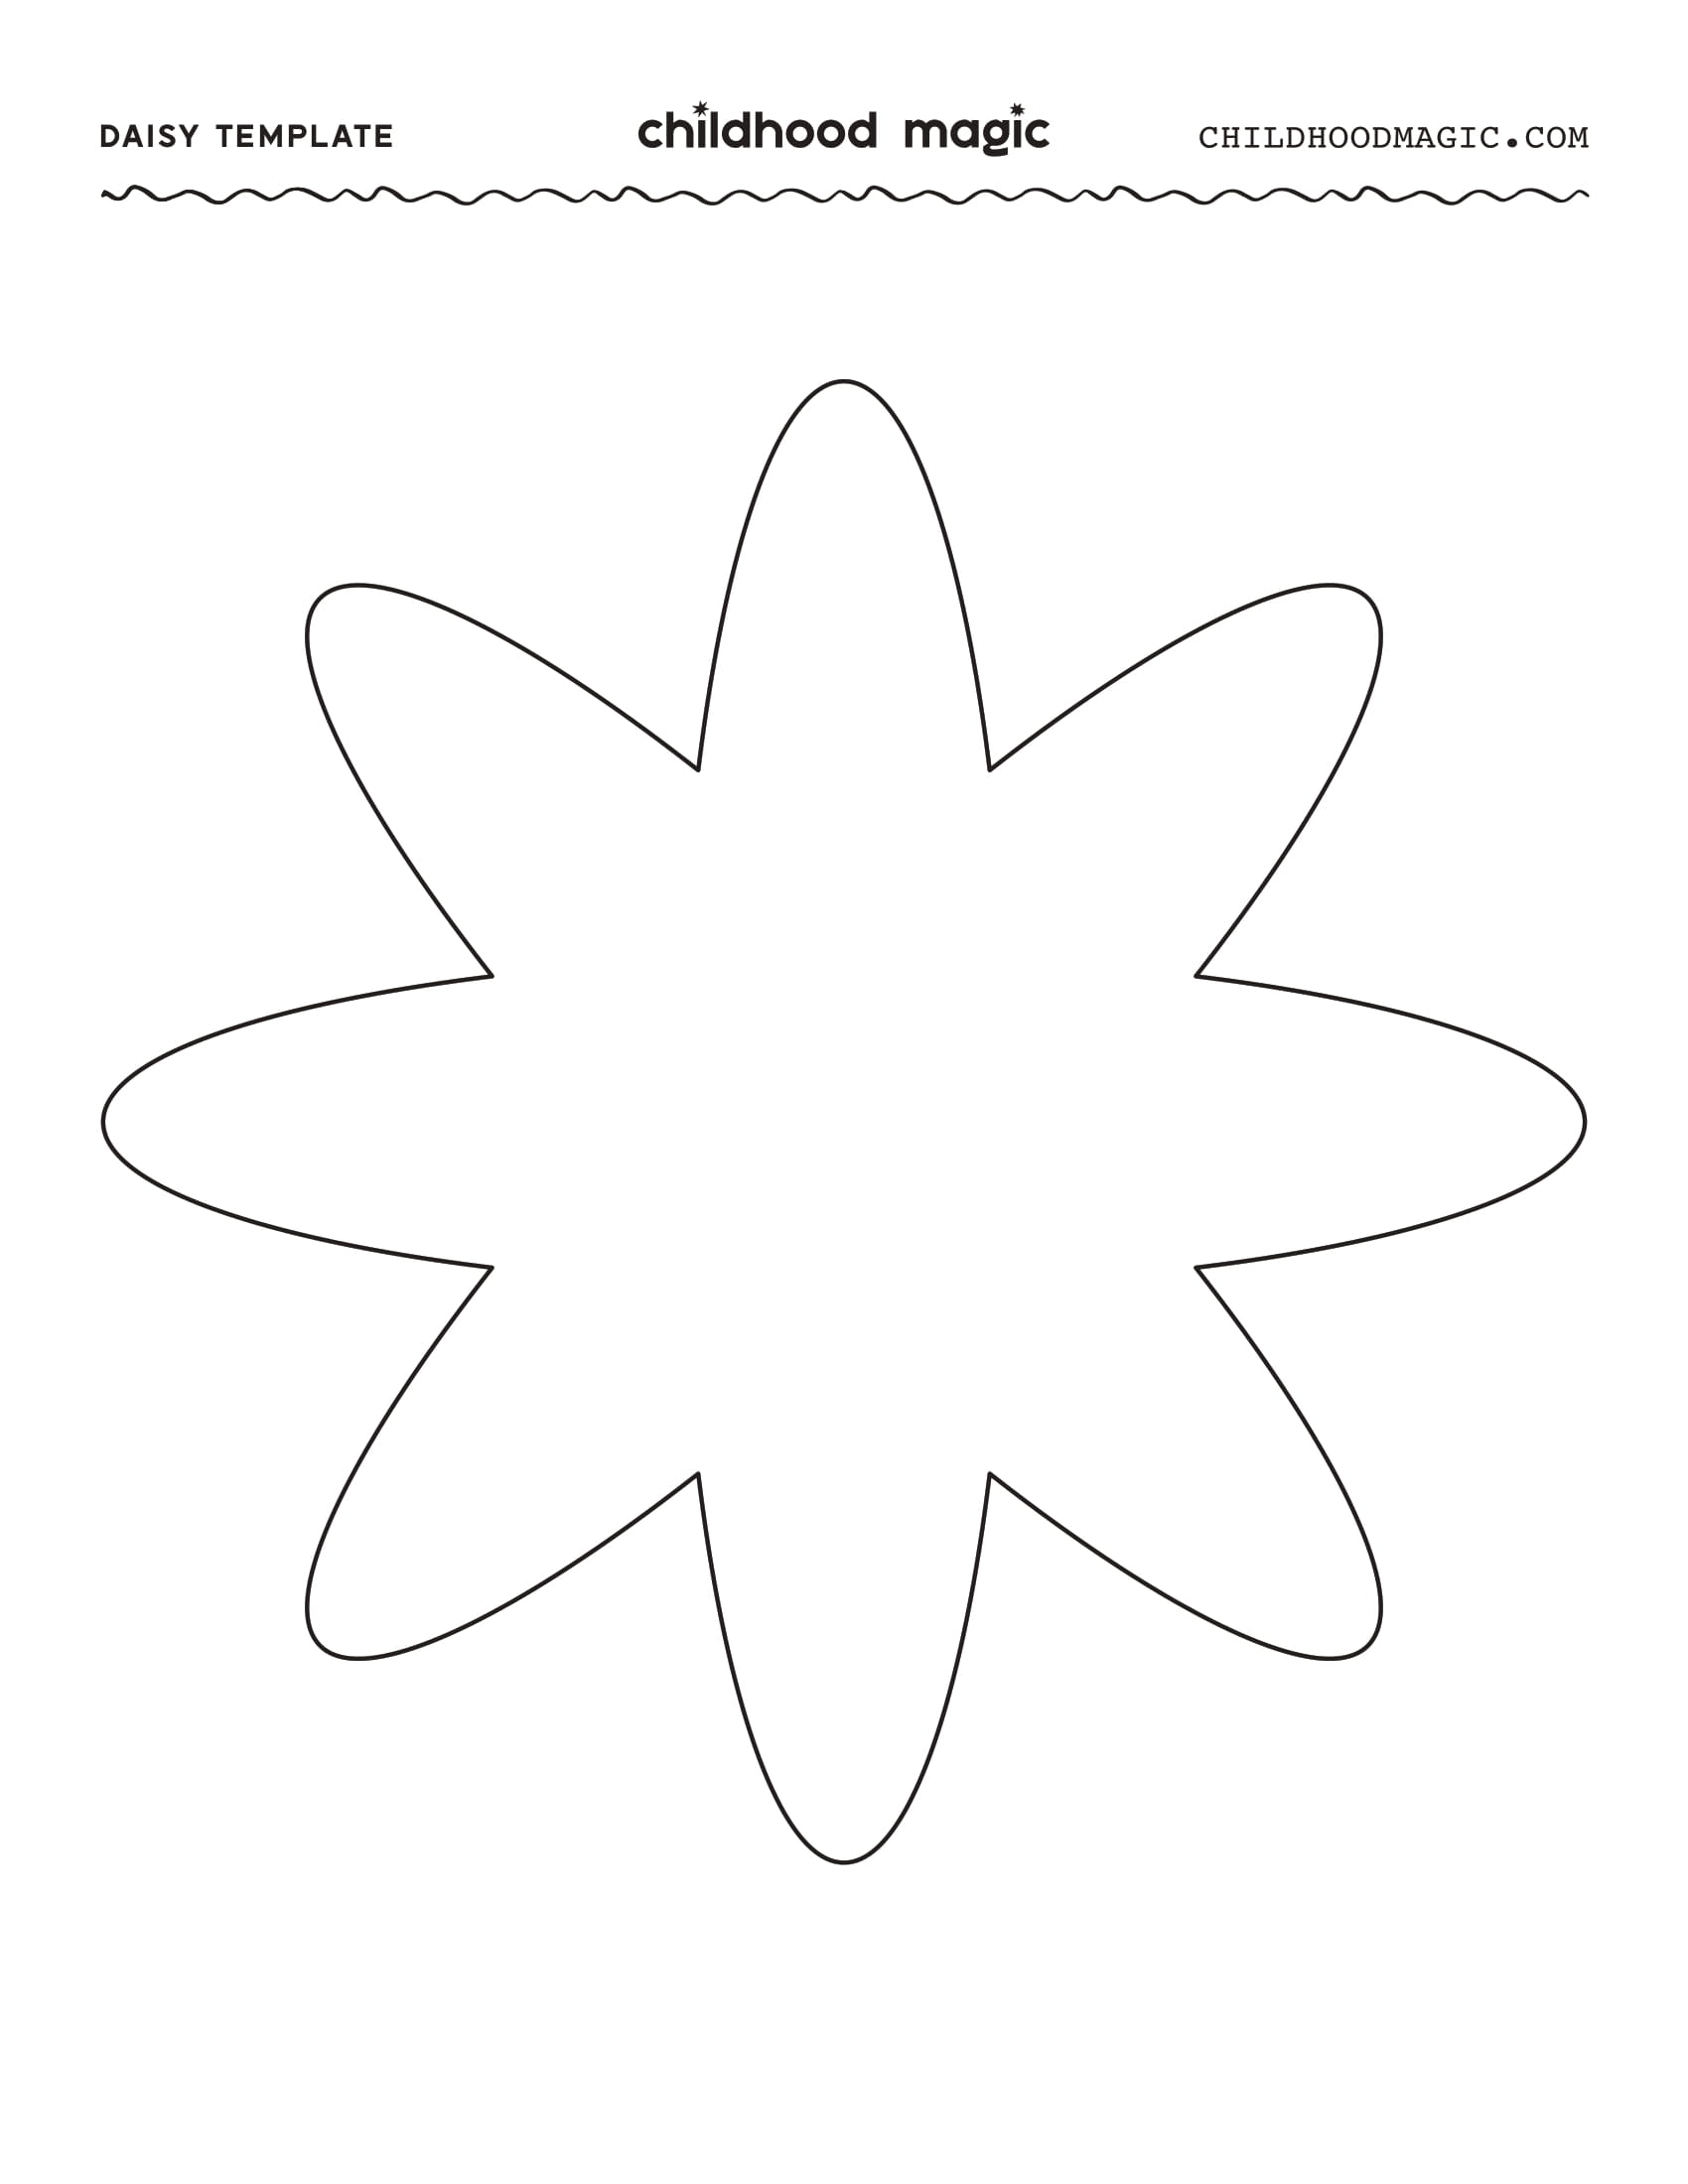
- Daisy template (this is the full set, large and smaller options below)
How to Make a Handprint Bouquet
- Add paint to child’s hand and have them press several handprints onto paper in the colors desired. Allow paint to dry. One tip for painting handprints- keep a baby wipe or wet paper towel nearby for a quick cleanup. My kiddo washed his hands in-between each set but it was nice to have something nearby in case of messes.

- Cut out, or assist the child with cutting out the ‘flowers’ made from handprints. Set aside.
- If adding flowers, print and cut out this free printable daisy template. Trace onto cardstock and decorate. You could also simply color the flowers from the printed page and cut those out to add to your handprint flower bouquet.

Would you like to save this?
- Using tape, secure the flower to the pipe cleaner. You could also use a strip of paper or a straw as your flower stem.
- Put the bouquet together by layering the handprint stems with your daisy ones. Glue down where needed.

- Take brown kraft paper and wrap it around your bouquet. I added in some green leaves I cut out and glued to the bouquet as well!
- Using twine or a ribbon tie a bow towards the bottom of the kraft paper to secure it.
- Add a tag or note for a loved one and it’s ready to be shared!


Daisy Template Printable
This daisy template printable includes a large daisy outline. If you’re looking for the full set use this download.
Daisy Template Printable
This daisy template printable includes several daisy outlines in medium and small sizes. If you’re looking for the full set use this download.


Get creative ideas for recipes, crafts, decor, and more in your inbox!
 Get the How-To

Supplies
- cardstock (in colors of choice)
- kids washable paint (in colors of choice)
- school glue
- scotch tape
- 1 piece kraft paper
- 1 piece twine
Instructions
- Add paint to child’s hand and have them press several handprints onto paper in the colors desired. Allow paint to dry.
- Cut out, or assist the child with cutting out the ‘flowers’ made from handprints. Set aside. If adding flowers, print and cut out the free printable daisy template. Trace onto cardstock and decorate. You could also simply color the flowers from the printed page and cut those out to add to your handprint flower bouquet.
- Using tape, secure the flower to the pipe cleaner. You could also use a strip of paper or a straw as your flower stem.
- Put the bouquet together by layering the handprint stems with your daisy ones. Glue down where needed.
- Take brown kraft paper and wrap it around your bouquet. I added in some green leaves I cut out and glued to the bouquet as well! Glue down the flowers where needed. Using twine or a ribbon tie a bow towards the bottom of the kraft paper to secure it.
I love this page and all of her work ideas
This is ADORABLE!!!