Kids love doing scratch art as it feels like magic when they scratch off the black surface to reveal the rainbow colors underneath. It may seem like you would need your own science lab to create this effect at home, but you actually just need two ingredients to create your magical black layer— dish soap and black craft paint!
This is a great two-part project as kids will love coloring their rainbow filled page with whatever design they want, and then they will get to “color” and draw more later once the paint layer has dried.
How Does DIY Scratch Art Work?
Mixing in dish soap with the black acrylic paint makes the paint dry a bit “looser” so it can be separated with a scratching stick and painting that over the waxy surface of the crayon helps the paint slide off the slippery surface underneath.
Why Kids Love DIY Scratch Art:
- Scratching off the black layer to reveal colors underneath feels like art magic!
- It’s a great project for preschoolers and elementary age kids alike so siblings can do it together.
- You get to have two different crafting sessions as you make the scratch off and then again as you scratch off a design once your paint is dry.
- Similar to our walking rainbow experiment, you do the first part of the project and then get to watch the changes!
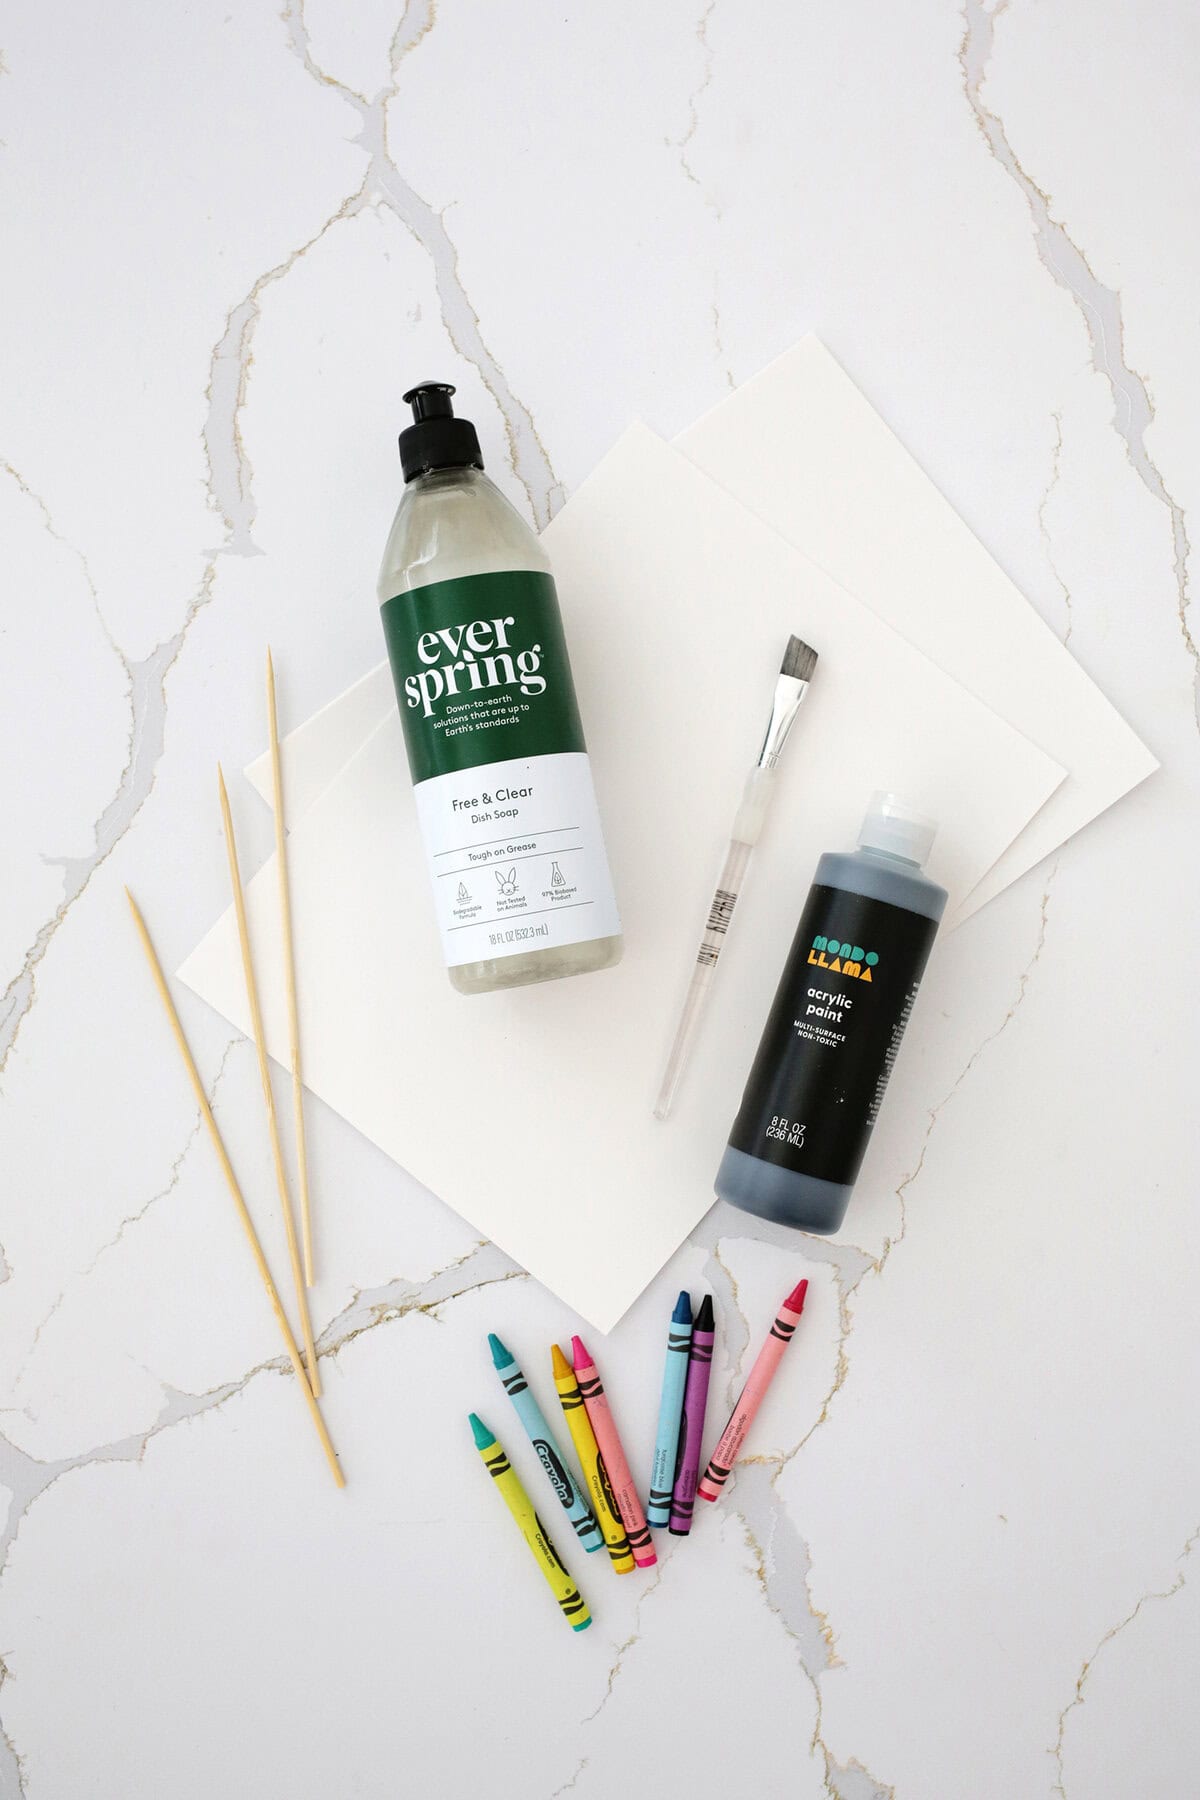
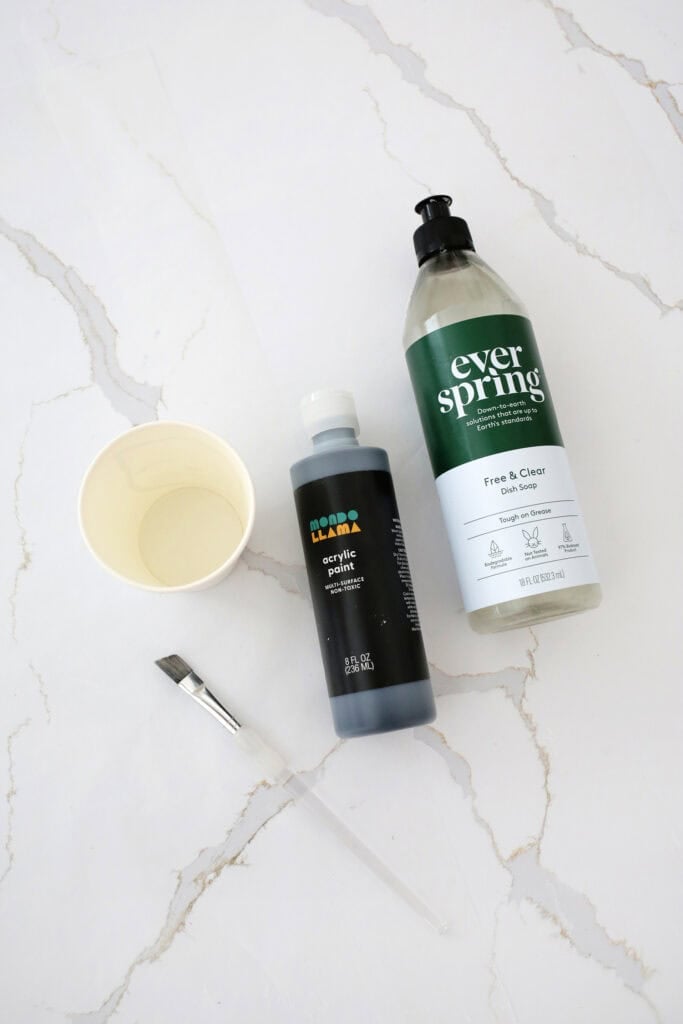
Supplies for DIY Scratch Art:
- Black acrylic craft paint: Just basic black craft paint will do for this project.
- Dish soap: Liquid dish soap mixes with the paint to make the paint more loose and “scratchable.”
- Foam brush or flat paintbrush: Some people prefer foam brushes for this project, but I found a flat paintbrush works well too.
- Card stock paper: You’ll want a thicker card stock for this project so you have less wavy paper as it dries. You can also try coloring thin cardboard as well!
- Crayons in bright colors: The brighter colors will show up best for this project. Save the leftover parts and learn how to make your own crayons!
- Wooden skewer or chopstick for scratching: Wider scratching tools will reveal more and more pointed tools will give you a fine point for details.
- Wax paper, cardboard, or baking sheet to put under your paper while you paint
How to Make DIY Scratch Art:
- Color your design: Pressing hard to create a waxy surface, color your paper with various bright colors until the entire paper is covered. You may want to put down a tablecloth or larger paper under their paper so they can fully color the edges properly.
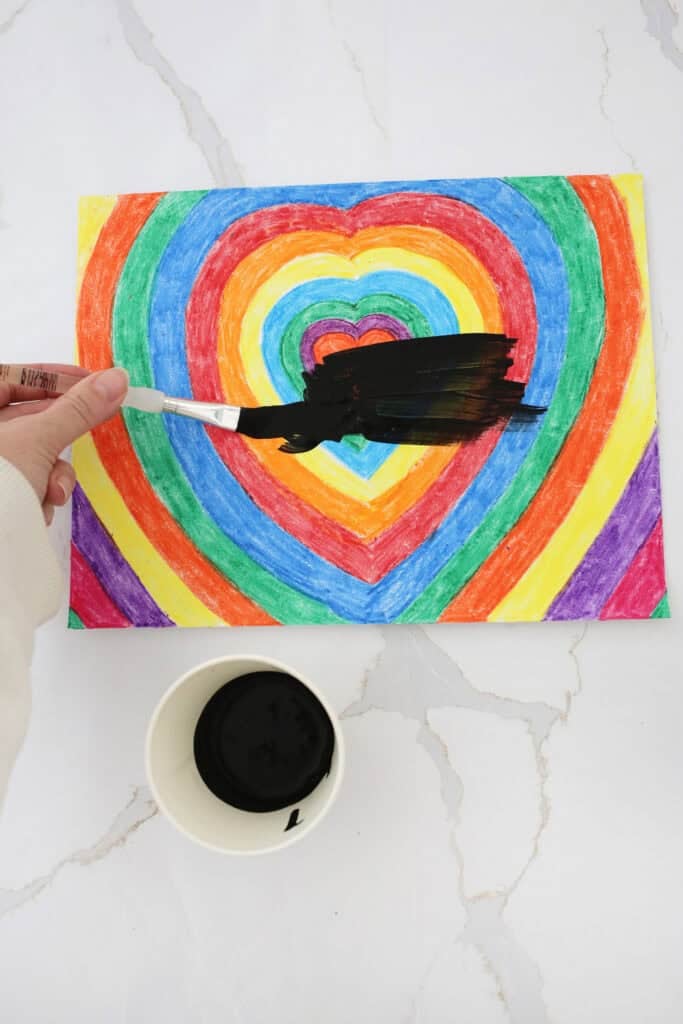
- Mix your paint: Add some black paint and some dish soap in a container in a 1:1 ration (so, equal parts of each) and mix together thoroughly. A ratio of 1 teaspoon of paint and 1 teaspoon of dish soap should cover 2-3 papers.
- Paint over your design: Use your brush to paint the mixture over your artwork. You can tape your artwork flat with tape donuts to another surface (like a piece of cardboard or onto wax paper that is also taped down flat) to keep it from curling up as it dries. If you feel like an area needs more paint, allow it to start to dry and then very gently add more paint/soap on top.
Would you like to save this?
- Let paint dry: Let your paint dry completely for at least 4 hours or overnight if you can.
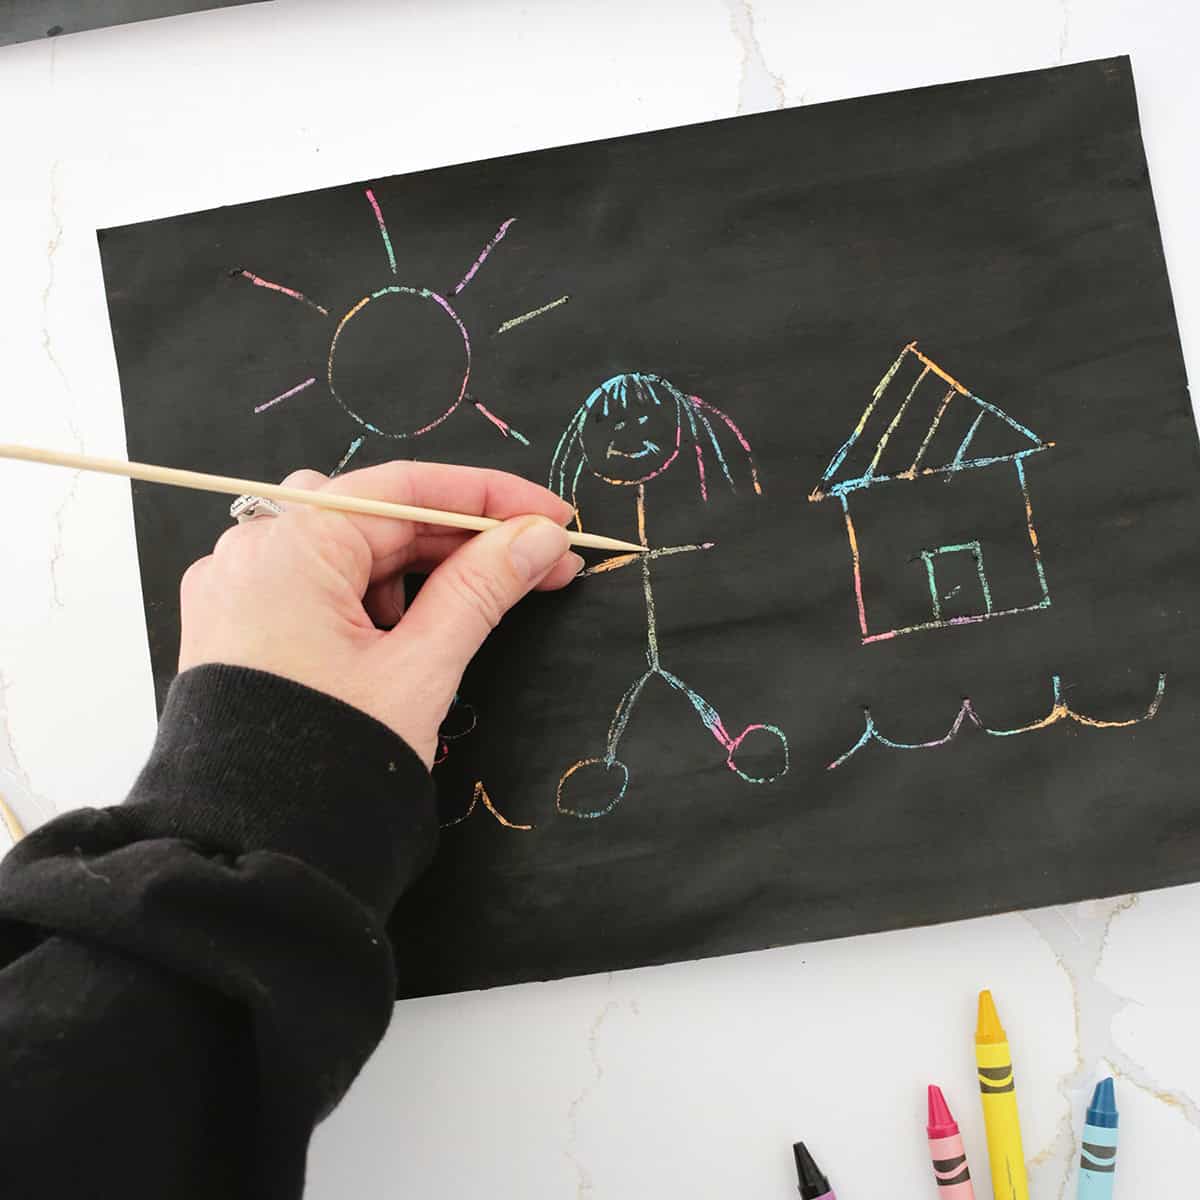
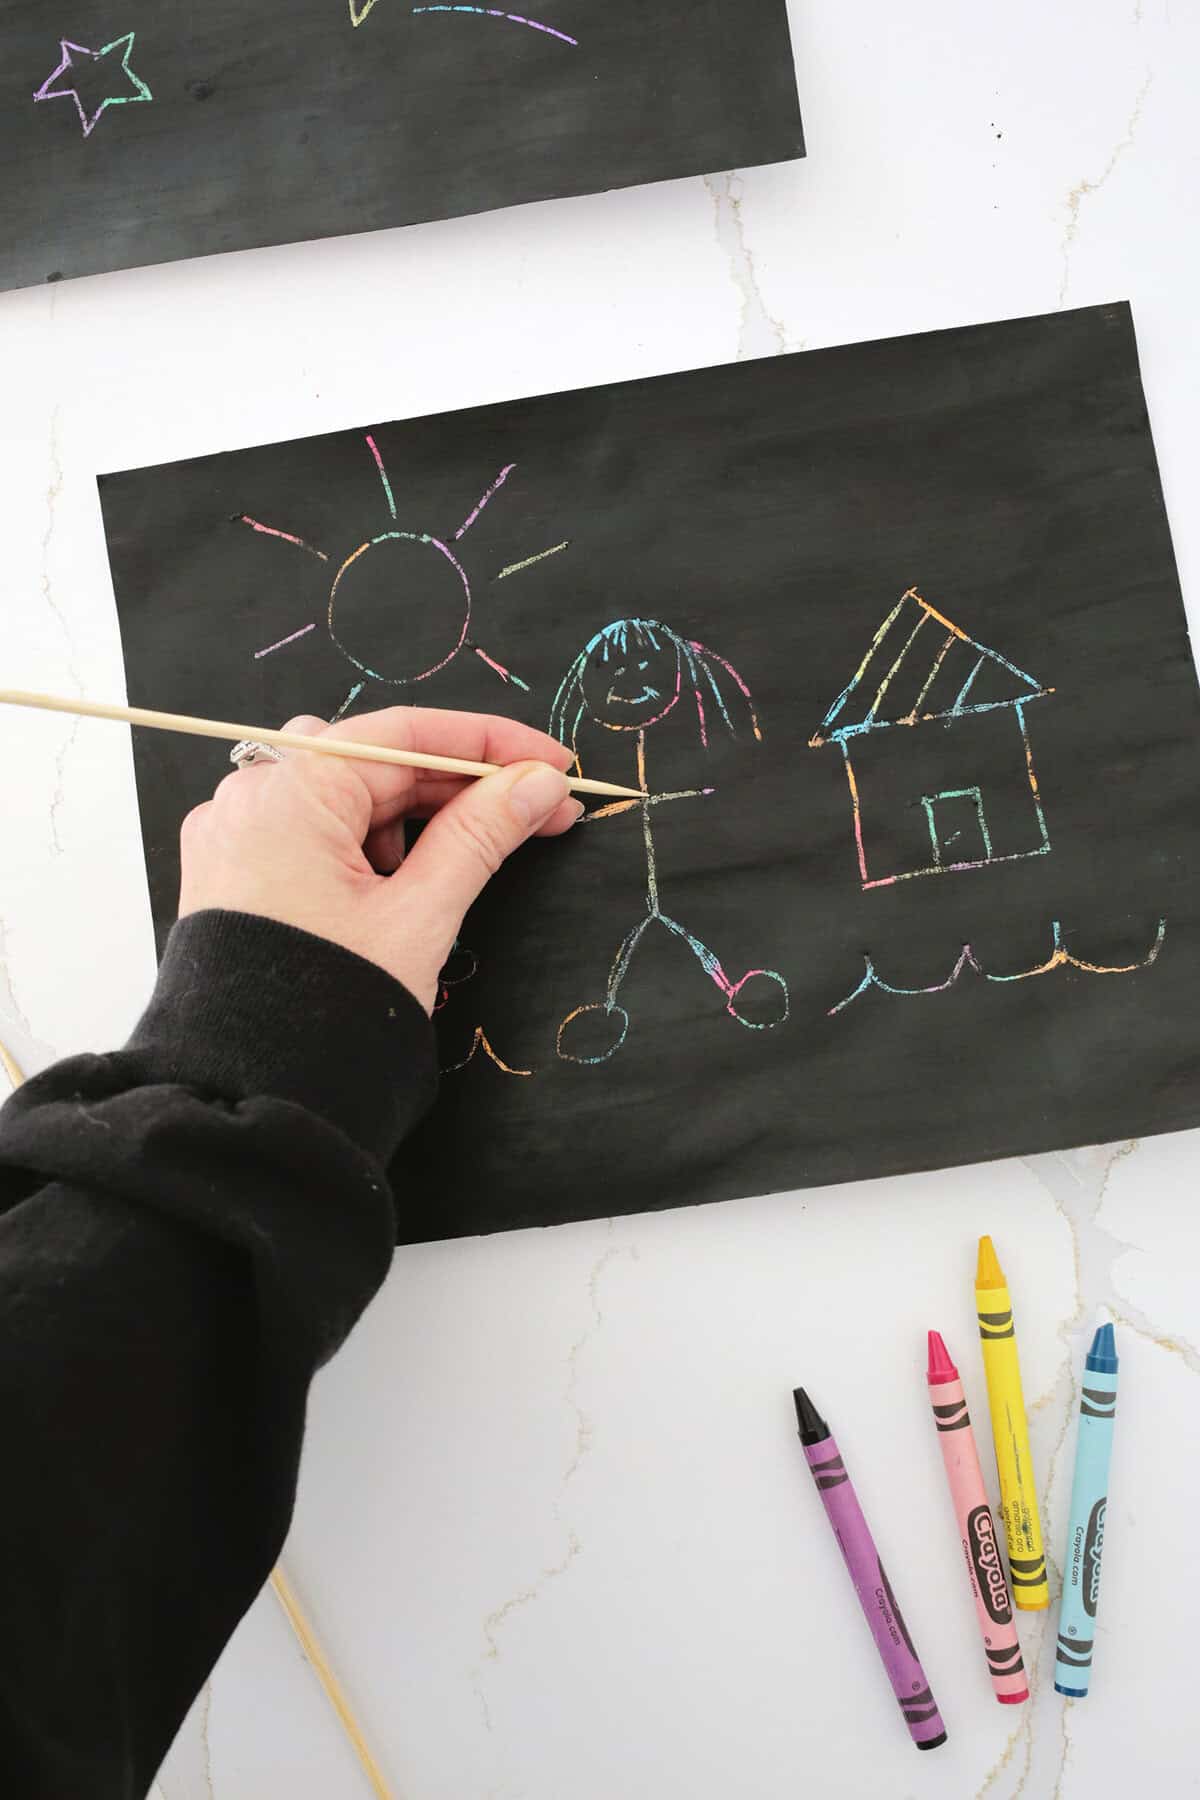
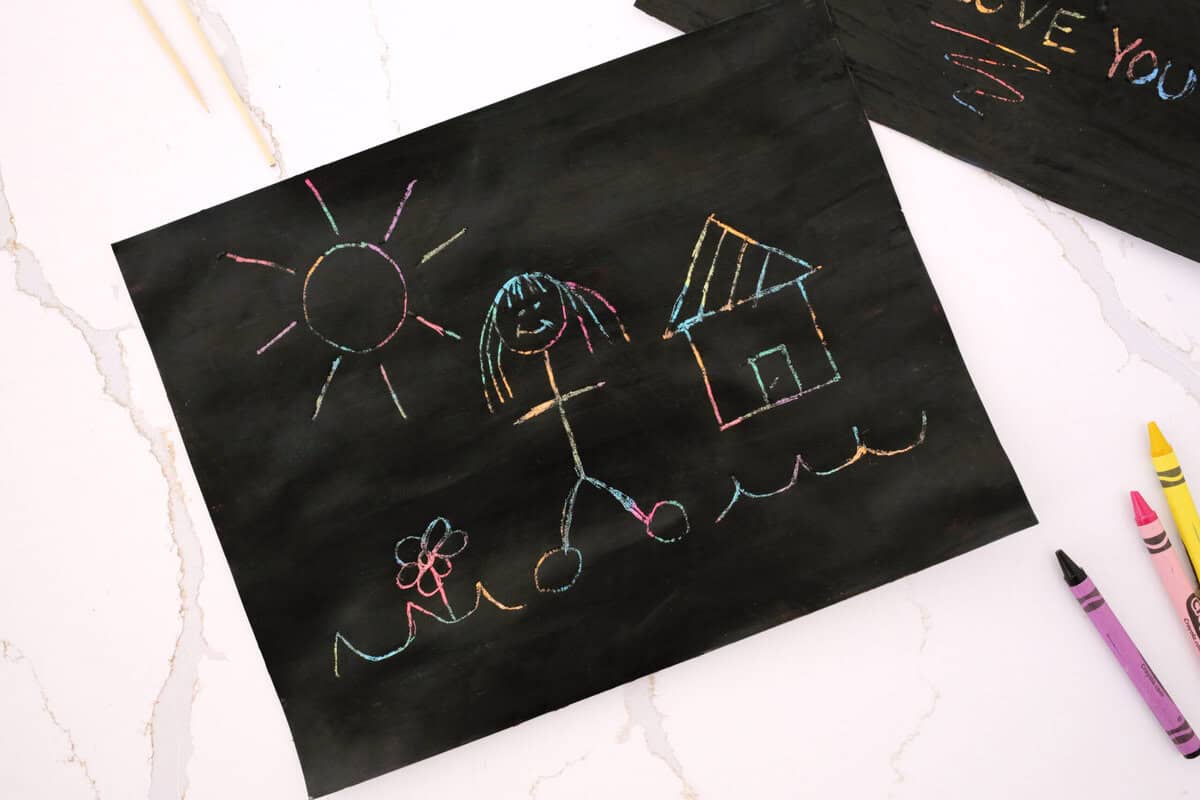
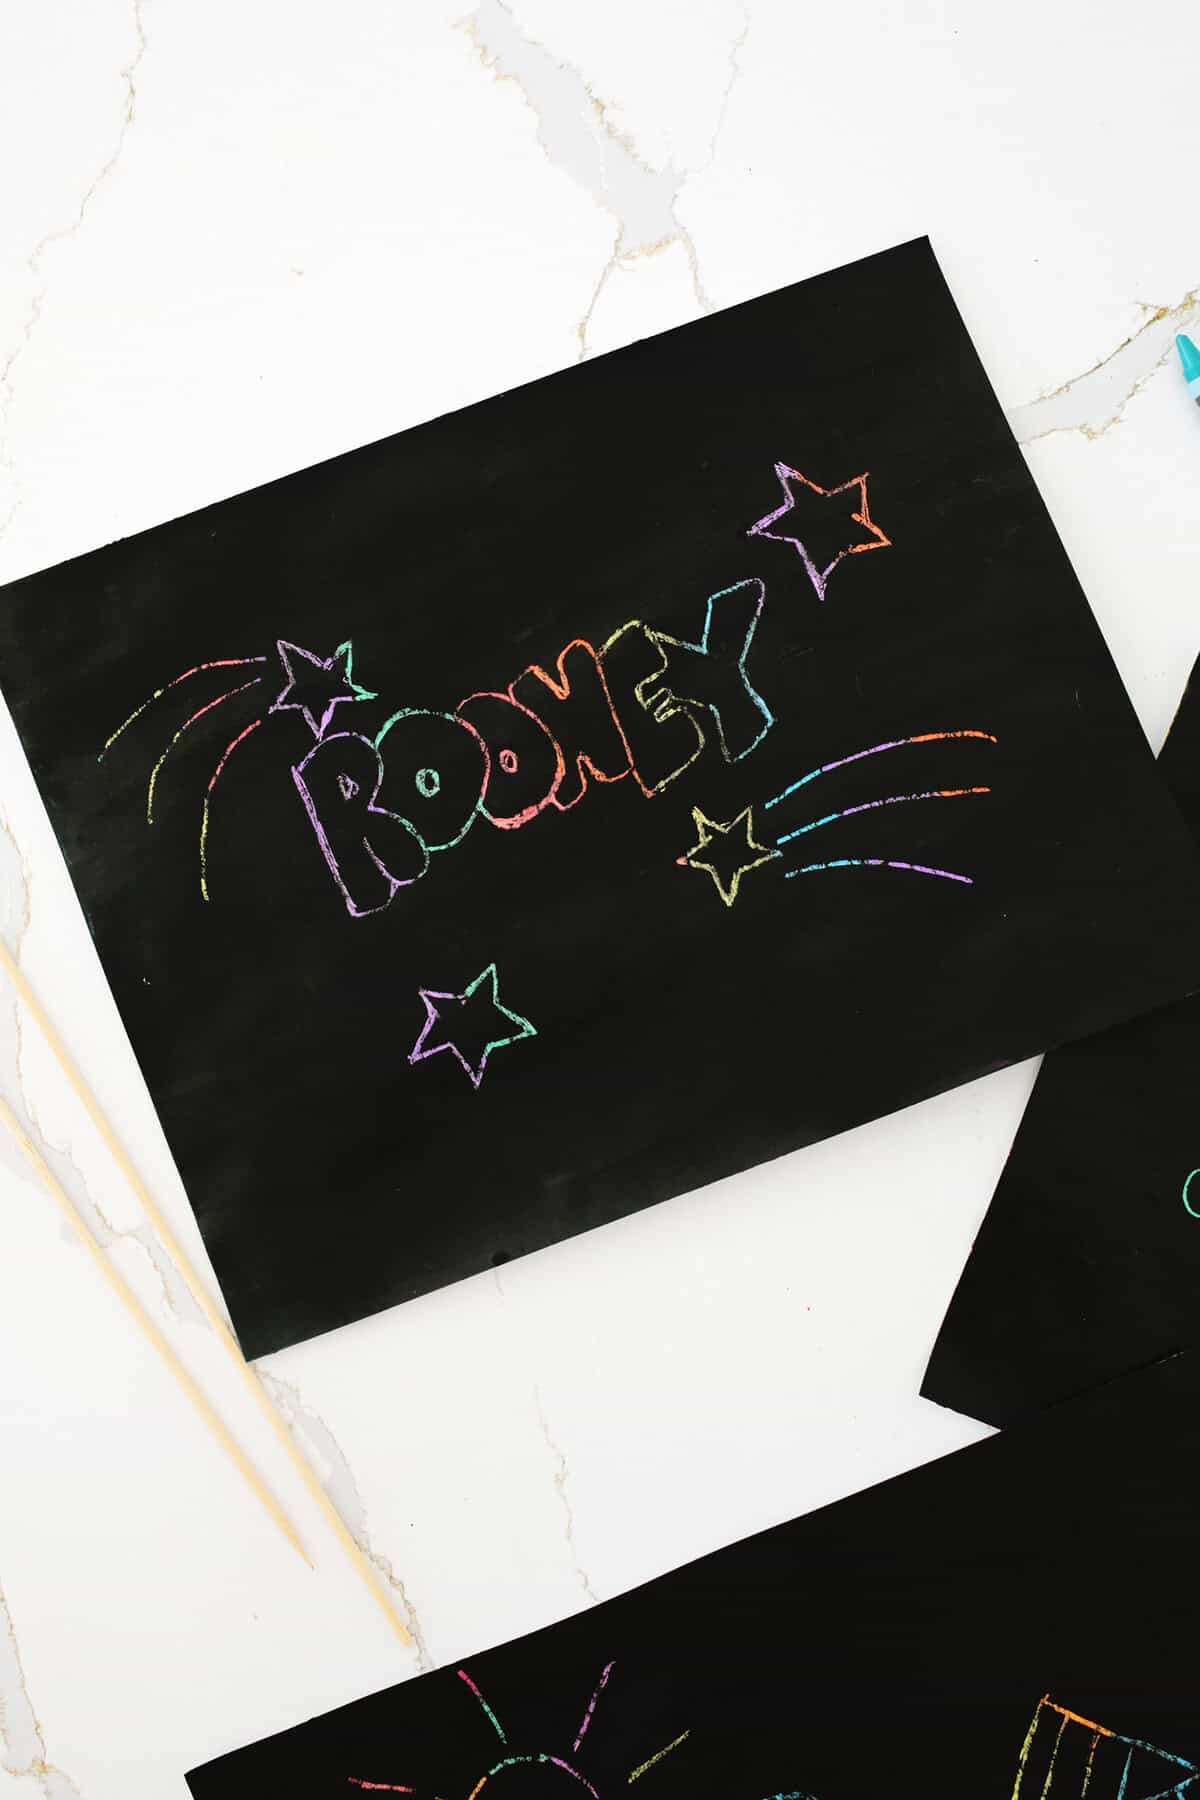
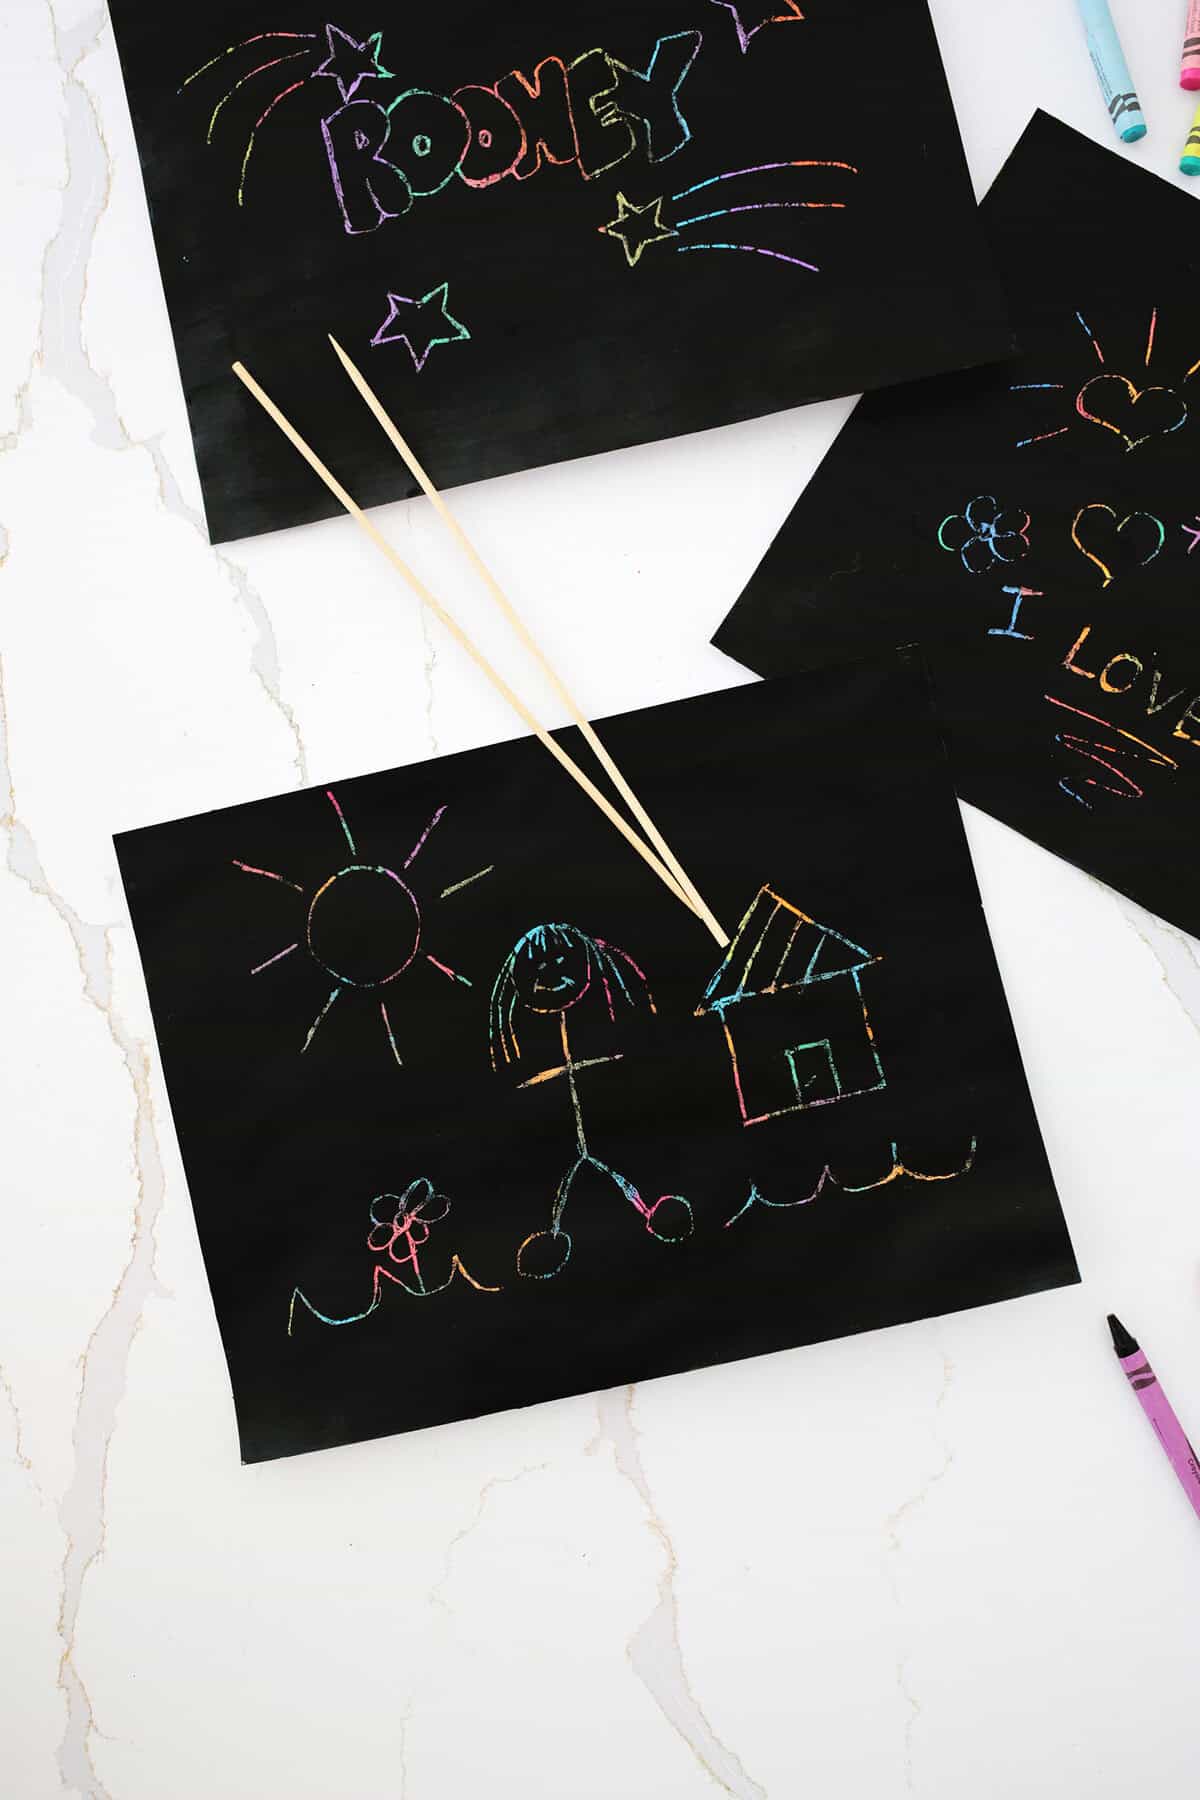
- Scratch off to create art! Use wooden cooking skewers or chopsticks to scratch off your black paint to create your own designs and reveal the colors underneath!
If little kids have a hard time coloring to the very end of the page, you can always crop the paper and cut off the uncolored ends with scissors before painting.

Looking for more creative art projects?
Tips for DIY Scratch Art:
- Make sure to get all surfaces of the paper fully colored as any uncolored areas will not scratch off well.
- Have a smaller pointed scratching tool (like the pointed side of a kabab stick) for fine details and a larger tool (like a chopstick end) to make bigger lines.
- Save the pastel colors for another project and use the brightest colors in the box for maximum effect.
- Make sure the paint is fully dry before scratching so you don’t end up with a smudgy black mess!
Do I have to use card stock paper for DIY scratch art?
Because you are doing some heavy coloring and adding a layer of paint, your regular printer paper isn’t quite tough enough to handle all the material and the scratching process so thicker card stock or thin cardboard (like the other side of a cereal box) is best.
Do I have to use the dish soap mixed with the paint?
Adding the dish soap to the paint really helps the paint slide off the waxy surface best. You can try it with just paint if that’s all you have, but your scratched off design won’t be as crisp and clear.
Can I use black crayon instead of black paint and dish soap?
You can achieve a scratch off look by coloring over your colorful crayon with a black crayon and then using a pointed scissor end to scratch off the black crayon, but the black color isn’t nearly as opaque and not everyone wants their kids to use scissors as a scratch off tool.
Ideas For Making Scratch Art:
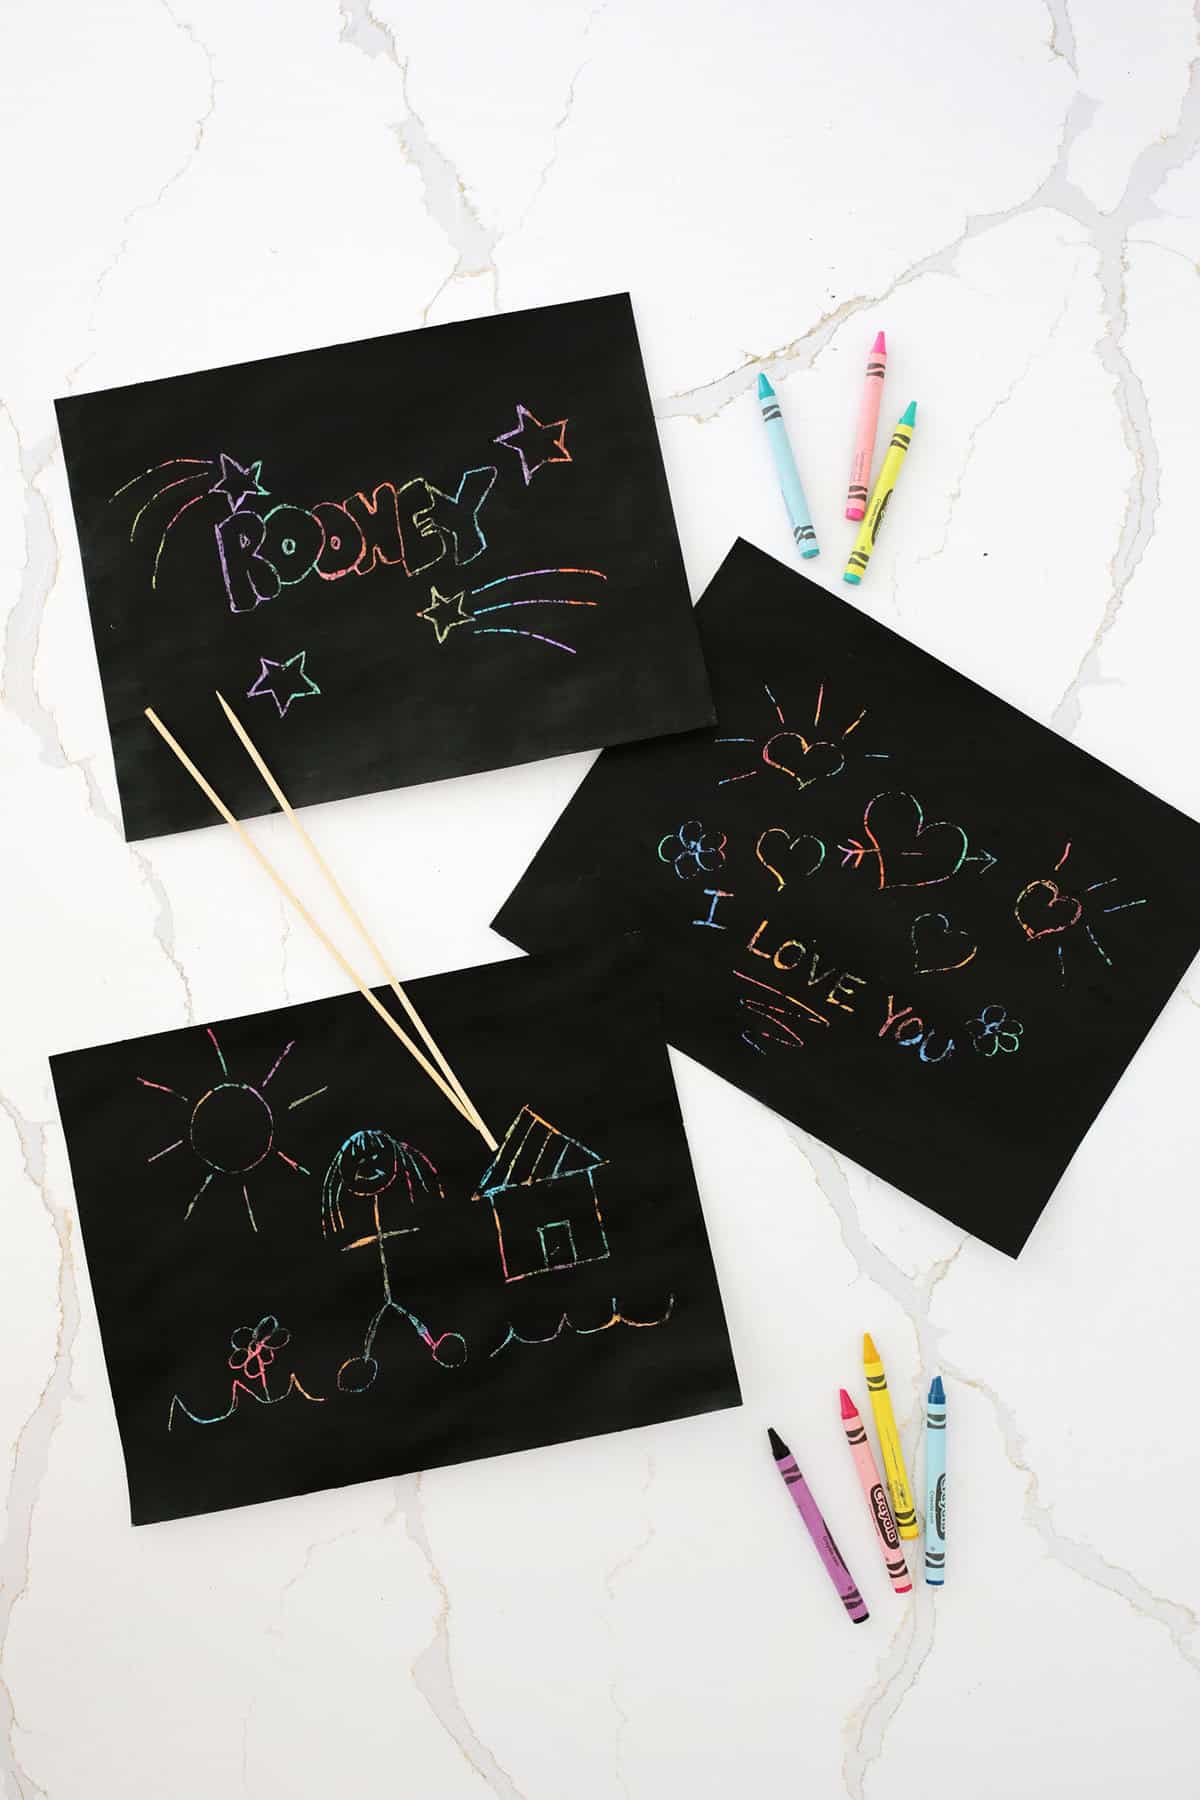
- Try folding card stock in half to make a card and color and paint just the front to create a unique DIY scratch art card.
- Draw a name to use a door sign.
- Create an outdoor scene by drawing the child’s house and yard
- Make a family portrait by drawing their family and pets
- Doodle sketches of hearts, smiley faces, flowers, etc

Get creative ideas for recipes, crafts, decor, and more in your inbox!
 Get the How-To

Supplies
- 1 piece cardstock paper (or thin cardboard)
- 1 box crayons (use the brightest colors!)
- 1 tsp black acrylic craft paint
- 1 tsp dish soap
- 1 wooden skewer or chopstick
Instructions
- Pressing hard to create a waxy surface, color your paper with various bright colors until the entire paper is covered. You may want to put down a tablecloth or larger paper under their paper so they can fully color the edges properly.
- Add some black paint and some dish soap in a container in a 1:1 ration (so, equal parts of each) and mix together thoroughly. A ratio of 1 teaspoon of paint and 1 teaspoon of dish soap should cover 2-3 papers.
- Use your brush to paint the mixture over your artwork. You can tape your artwork flat with tape donuts to another surface (like a piece of cardboard or onto wax paper that is also taped down flat) to keep it from curling up as it dries. If you feel like an area needs more paint, allow it to start to dry and then very gently add more paint/soap on top.
- Let your paint dry completely for at least 4 hours or overnight if you can.
- Use wooden cooking skewers or chopsticks to scratch off your black paint to create your own designs and reveal the colors underneath!
Love this craft!