
This simple paper plate lady bug craft is a fun way to learn about this insect, work on colors, talk about the Spring season or could even be used to make a Valentine.
I love projects with classic, easy-to-find supplies like popsicle sticks, toilet paper rolls, and paper plates. There is something nostalgic and timeless about them. I keep all these supplies stocked in a drawer, ready to craft!
It’s not just for preschool, though. You can make this really with any child by adjusting the steps and helping as needed.
Why kids love paper plate crafts
If you’re looking for ways to use basic supplies, we’re so glad you’re here and are cheering you on! Getting creative can feel way more daunting than it is, and the more you make, the more ideas you’ll have! Kids love paper plate crafts for a lot of the same reasons we do!
- Easy to find supplies are everything! Easy to find, easy to make, easy on parents and easy for kids.
- The best kind of kids projects are things you already have in your home, or can easily grab on your next grocery store trip.
- If you mess up it’s very easy and possible to start over.
- They can paint or color the plates and make their lady bugs as happy or silly as they want! Letting them get creative with it is the best part.

Supplies for your Paper Plate Lady Bug
- Paper plates
- Scissors (remember to do the cutting if your child isn’t ready to yet.)
- Googley eyes
- Construction paper scraps or cardstock
- Markers, crayons or paint
- School glue
Steps for Your Lady Bug Craft
Begin by painting or coloring your plate red. If you’re wanting this to be a faster craft then using markers, crayons or colored pencils is great! Or you can pre-paint your plates too.
You may want to have our heart template handy! I used it for the head and wings of the lady bug. I loved using the heart template to make all kinds of animal shapes, and this project uses heart shapes too as the wings.
Would you like to save this?

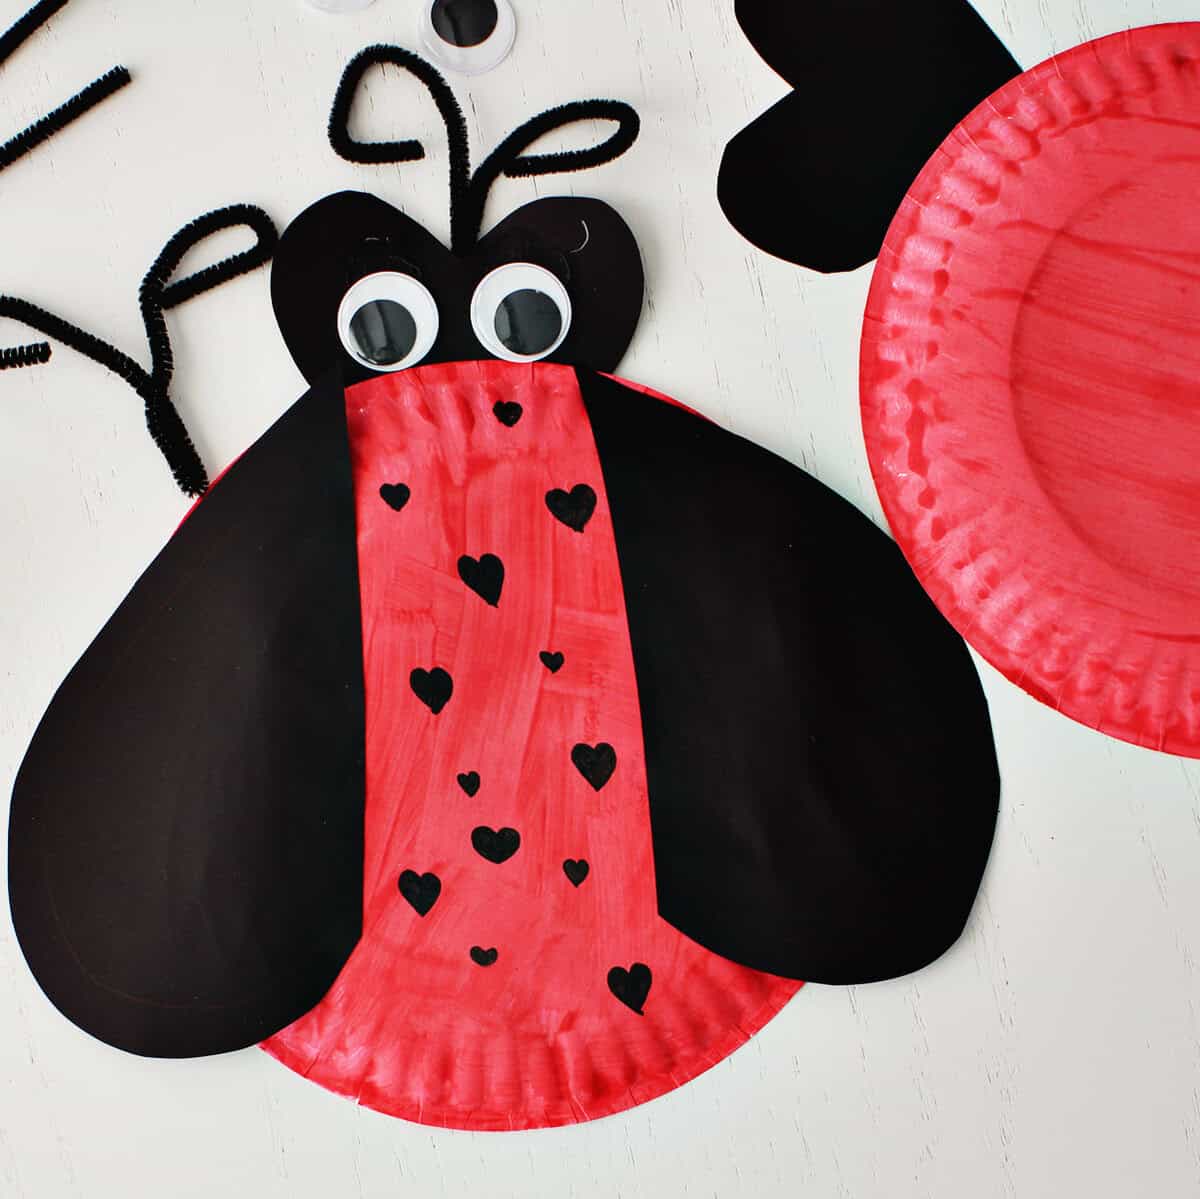
Take your black cardstock and cut into a heart shape to make the lady bug head. You can use our template if it’s helpful! Take a pipe cleaner and bend in half and twist into an antenna shape. Glue onto the back of the plate.

Glue the head onto the paper plate, hiding part of the head so that only the top part or the ‘eyes’ of the lady bug is visible.

Add googley eyes to the small black cardstock which is the head of the lady bug.
Cut out a larger heart shape from the black cardstock paper, and then cut the heart in half to create wings. Glue onto the paper plate.
Allow to dry. Once dried, draw on little hearts or dots with a black marker and your lady bug is ready to take flight!

Tips for Making a Paper Plate Lady Bug:
- Use leftover scraps of paper from other projects. You could also use tissue paper for the dots or other materials to make it a sensory type of craft.
- If you’re making this with a younger child who can’t cut with scissors yet, it may be helpful to prep the paper pieces for the wings in advance.
- Wait until everything is completely dry before drawing on the dots or smaller hearts.
- If you have a kiddo who will want to craft right away, you can even pre-paint the plate so that they can start assembling without having to wait for the paint to dry.


Get creative ideas for recipes, crafts, decor, and more in your inbox!
 Get the How-To

Supplies
- 1 paper plate
- 2 tbsp red paint
- 1 pen or marker (black)
- 1 bottle school glue (or glue stick)
- 2 googley eyes
- 1 pipe cleaner (black)
Instructions
- Begin by painting or coloring your plate red. If you're wanting this to be a faster craft then using markers, crayons or colored pencils is great! Or you can pre-paint your plates too.
- Take your black cardstock and cut into a heart shape to make the lady bug head. You can use our template if it's helpful!
- Take a pipe cleaner and bend in half and twist into an antenna shape. Glue onto the back of the small heart shape.
- Glue the head onto the paper plate, hiding part of the head so that only the top part or the 'eyes' of the lady bug is visible.
- Add googley eyes to the black cardstock.
- Cut out a large hearts onto black cardstock. You can do this by hand or use our heart template! I loved using the heart template to make all kinds of animal shapes, and this project uses heart shapes too as the wings. Line these up and using either school glue or a glue stick attach to your paper plate.
- Allow to dry. Once dried, draw on little hearts or dots with a black marker and your lady bug is ready to take flight!