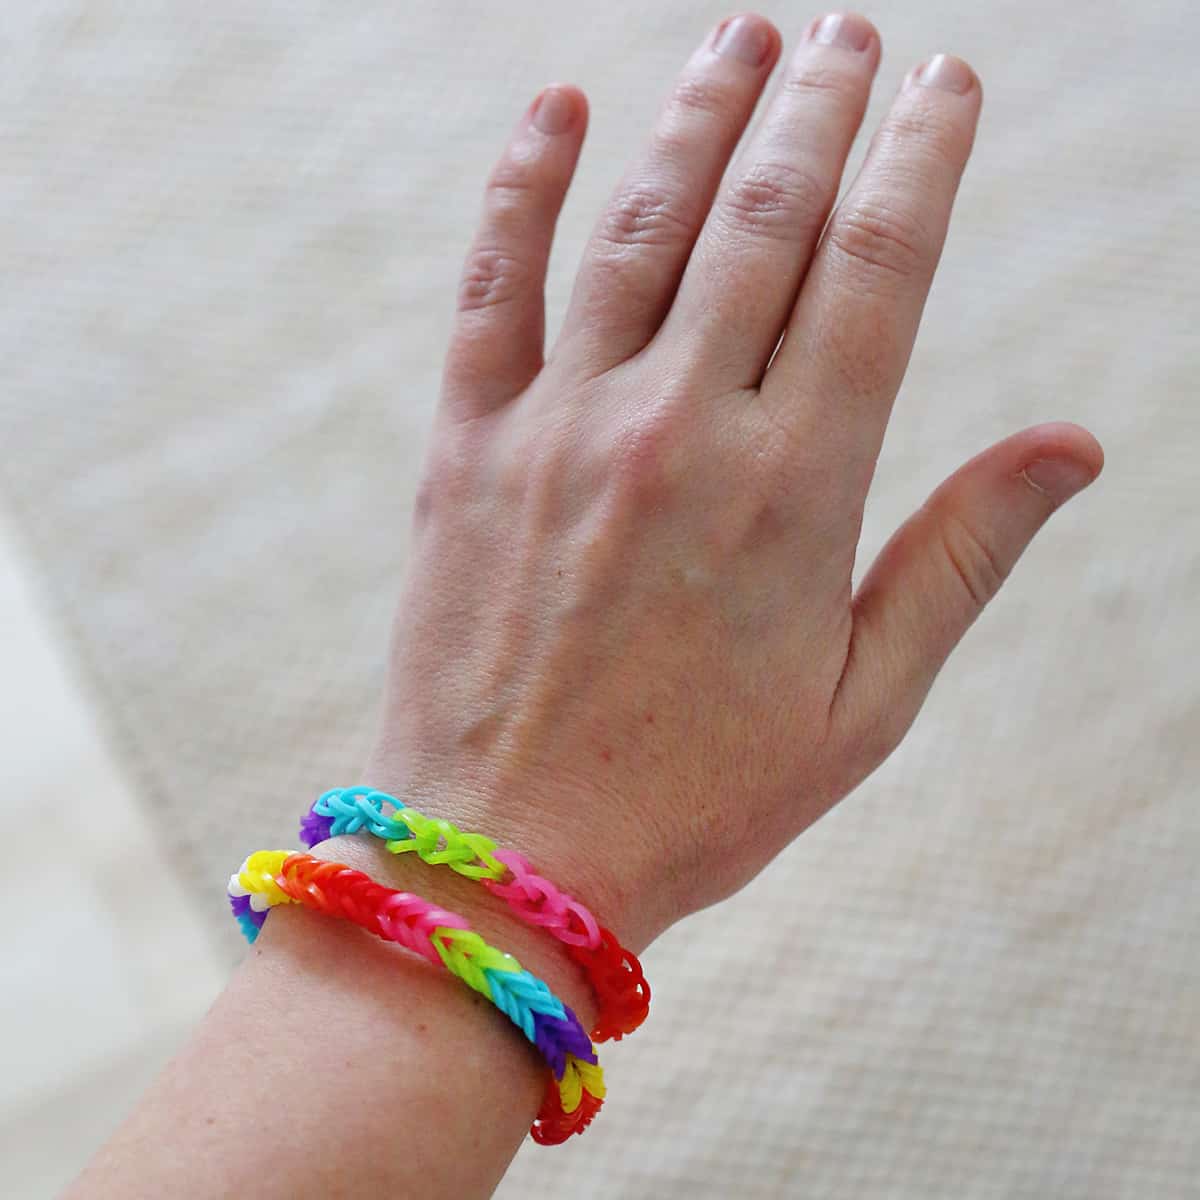
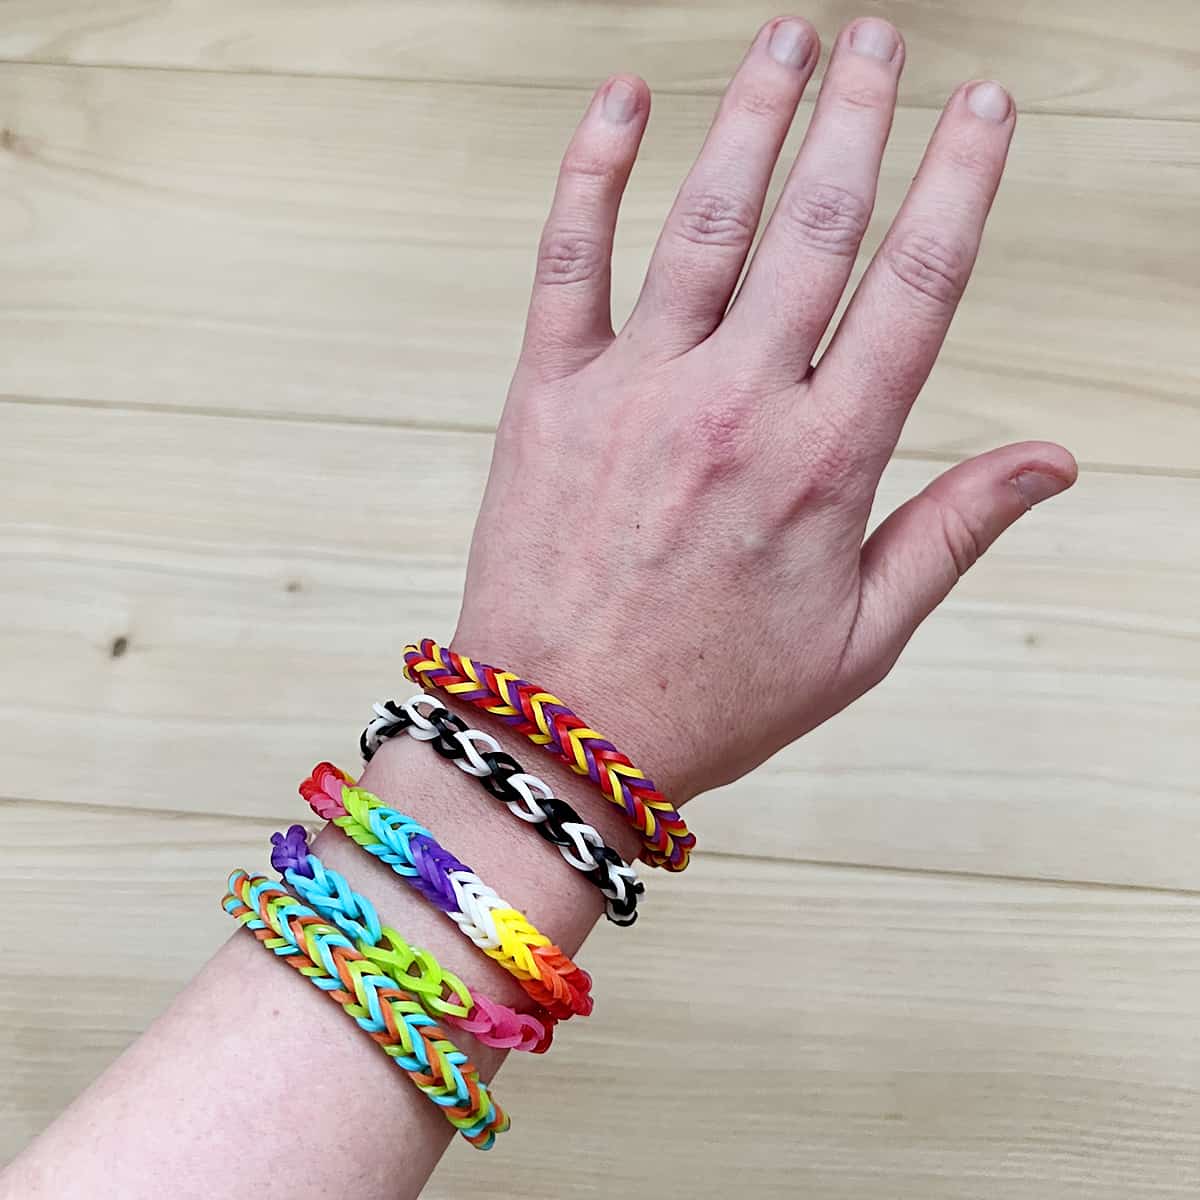
Rubber band bracelets are a fun and inexpensive activity for elementary age children. They are fun to make and fun to gift to friends!
In this post, I’ll share step-by-step instructions to make rubber band bracelets without a loom, with a mini loom, and with a rainbow loom.
Making rubber band bracelets can be a fun activity for a party, road trip, or anytime your kids need something to do with their hands. They can think about color theory when they pick out what color bands to use, and it’s a great exercise for following instructions.
If you need more hands-on activities, check out our full Activities archive.
Table of Contents
Rubber Band Bracelets without a Loom
- 2 pencils
- Colorful rubber bands
- C-clip

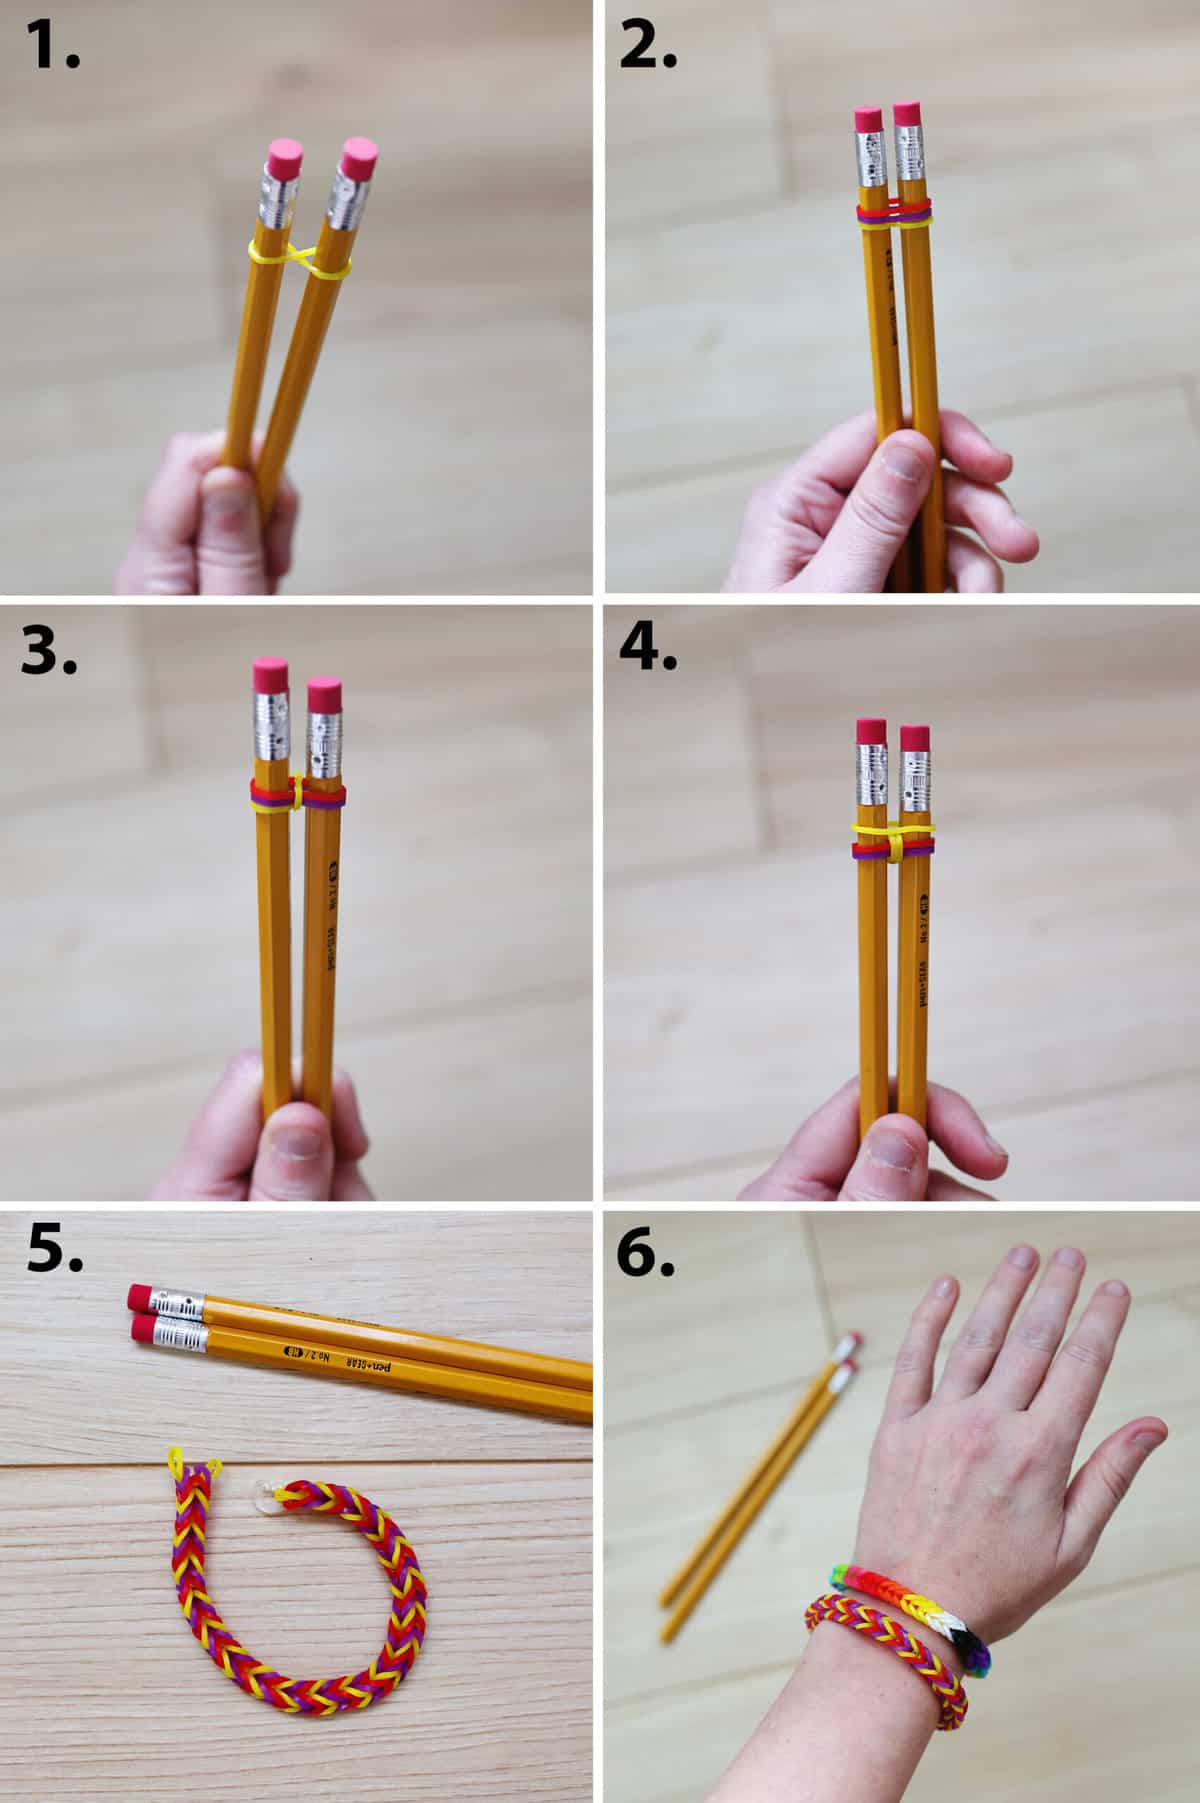
Tutorial
- Loop a rubber band around each pencil, creating a figure eight.
- Add two more rubber bands above the first one. These are not looped, so they are just a circle or a figure zero.
- Pull one side of the bottom rubber band over the top of the pencil so it belts the other two rubber bands. Repeat on the other side.
- Add another rubber band to the top in a figure zero.
- Repeat these two steps again and again to create the length of your bracelet.
- Then, pull the end off and add the c-clip to hold the bracelet together.
Video Tutorial
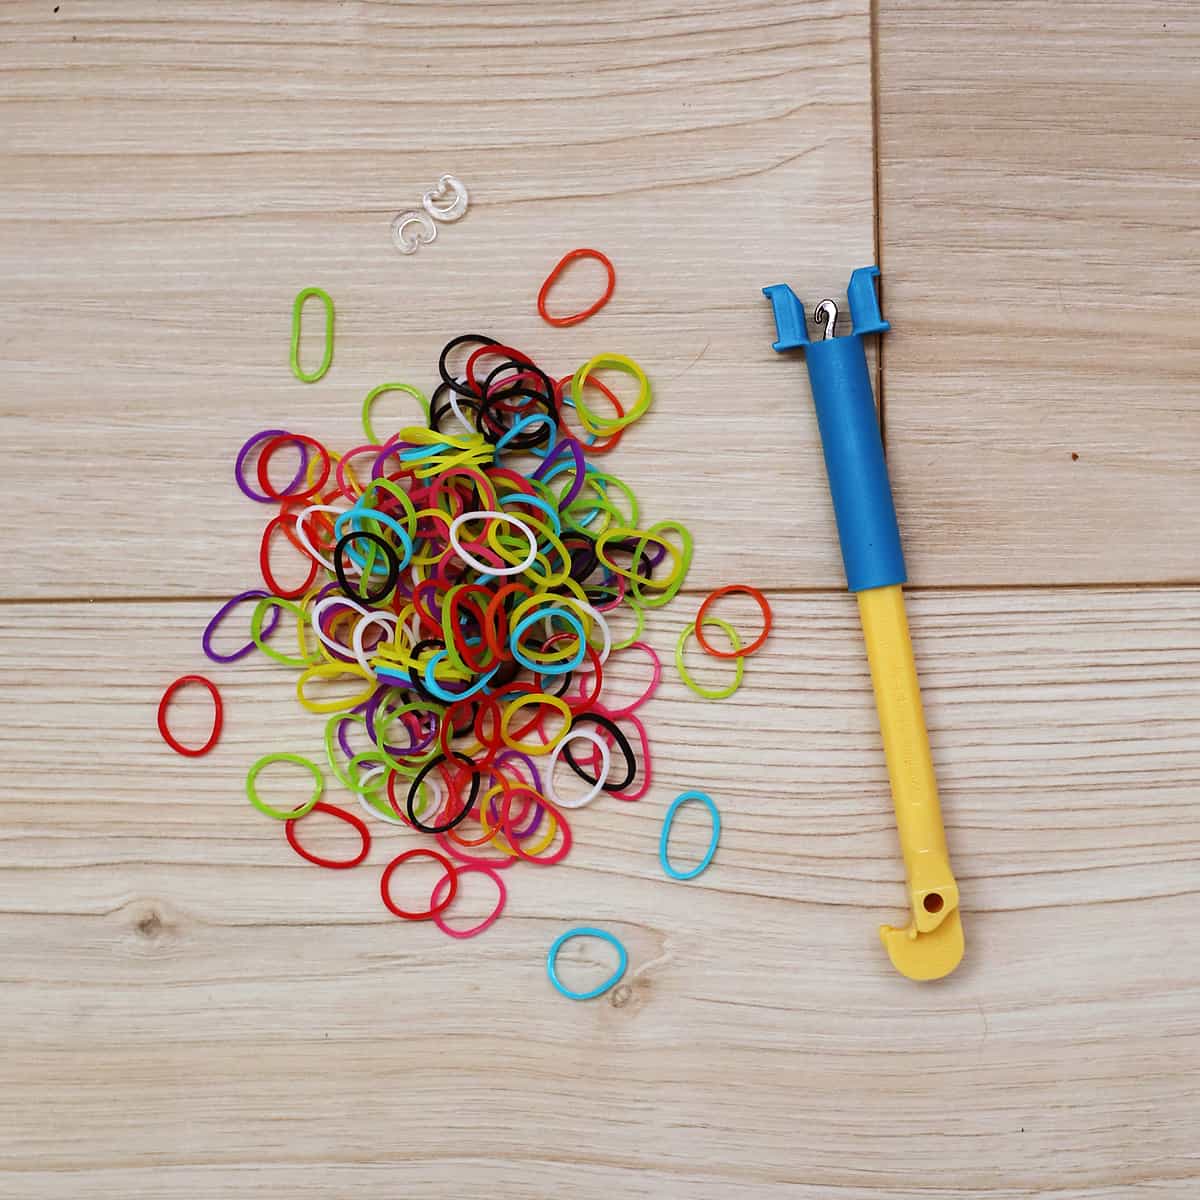
Fishtail Bracelet with Mini Loom
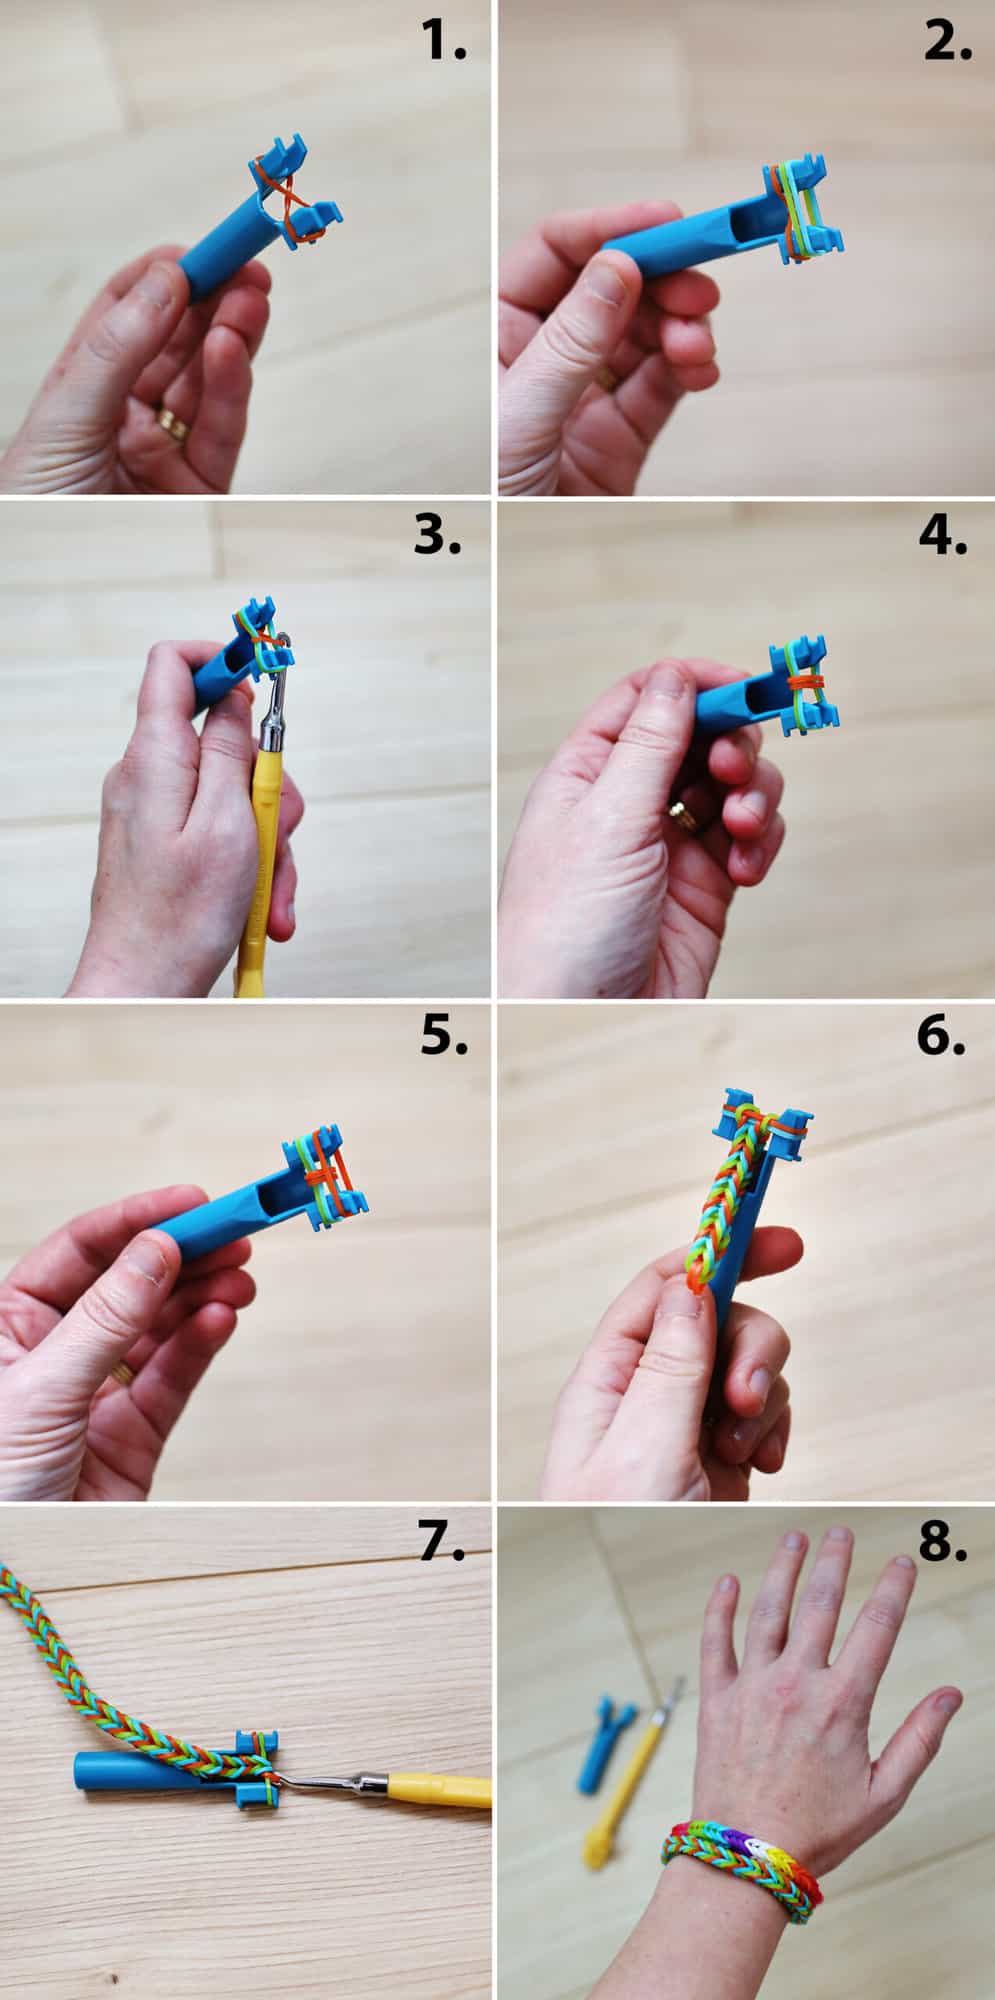
Tutorial
- Loop a rubber band around the end of the loom, creating a figure eight.
- Add two more rubber bands above the first one. These not looped, so they are just a circle or a figure zero.
- Pull one side of the bottom rubber band over the top of the loom so it belts the other two rubber bands. Repeat on the other side.
- Add another rubber band to the top in a figure zero.
- Repeat these two steps again and again to create the length of your bracelet.
- Then, pull the end off and add the c-clip to hold the bracelet together.
Would you like to save this?
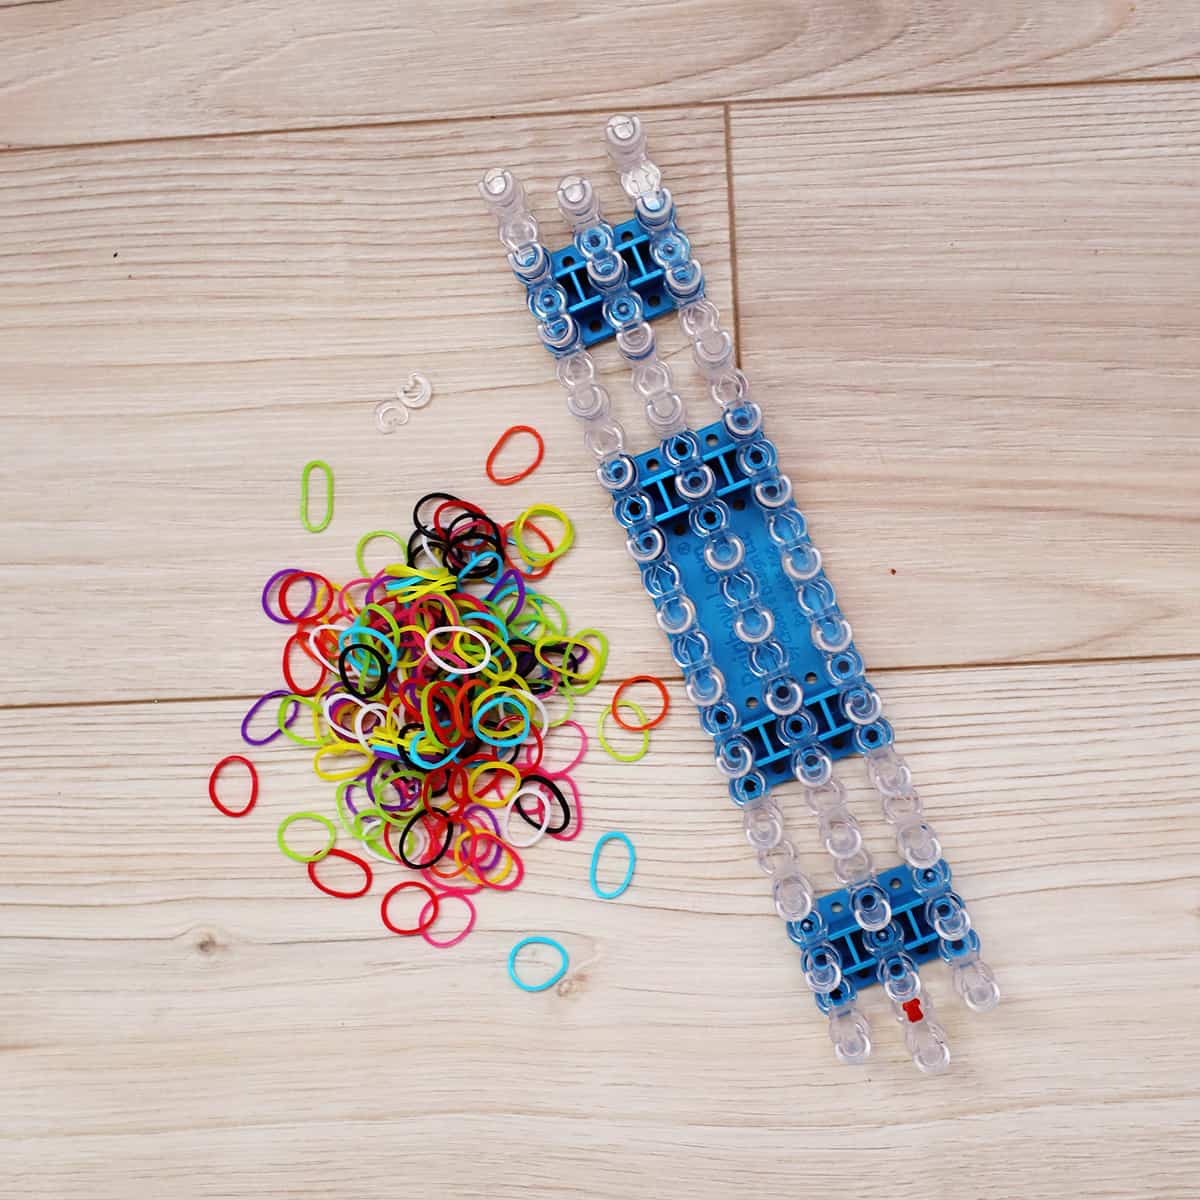
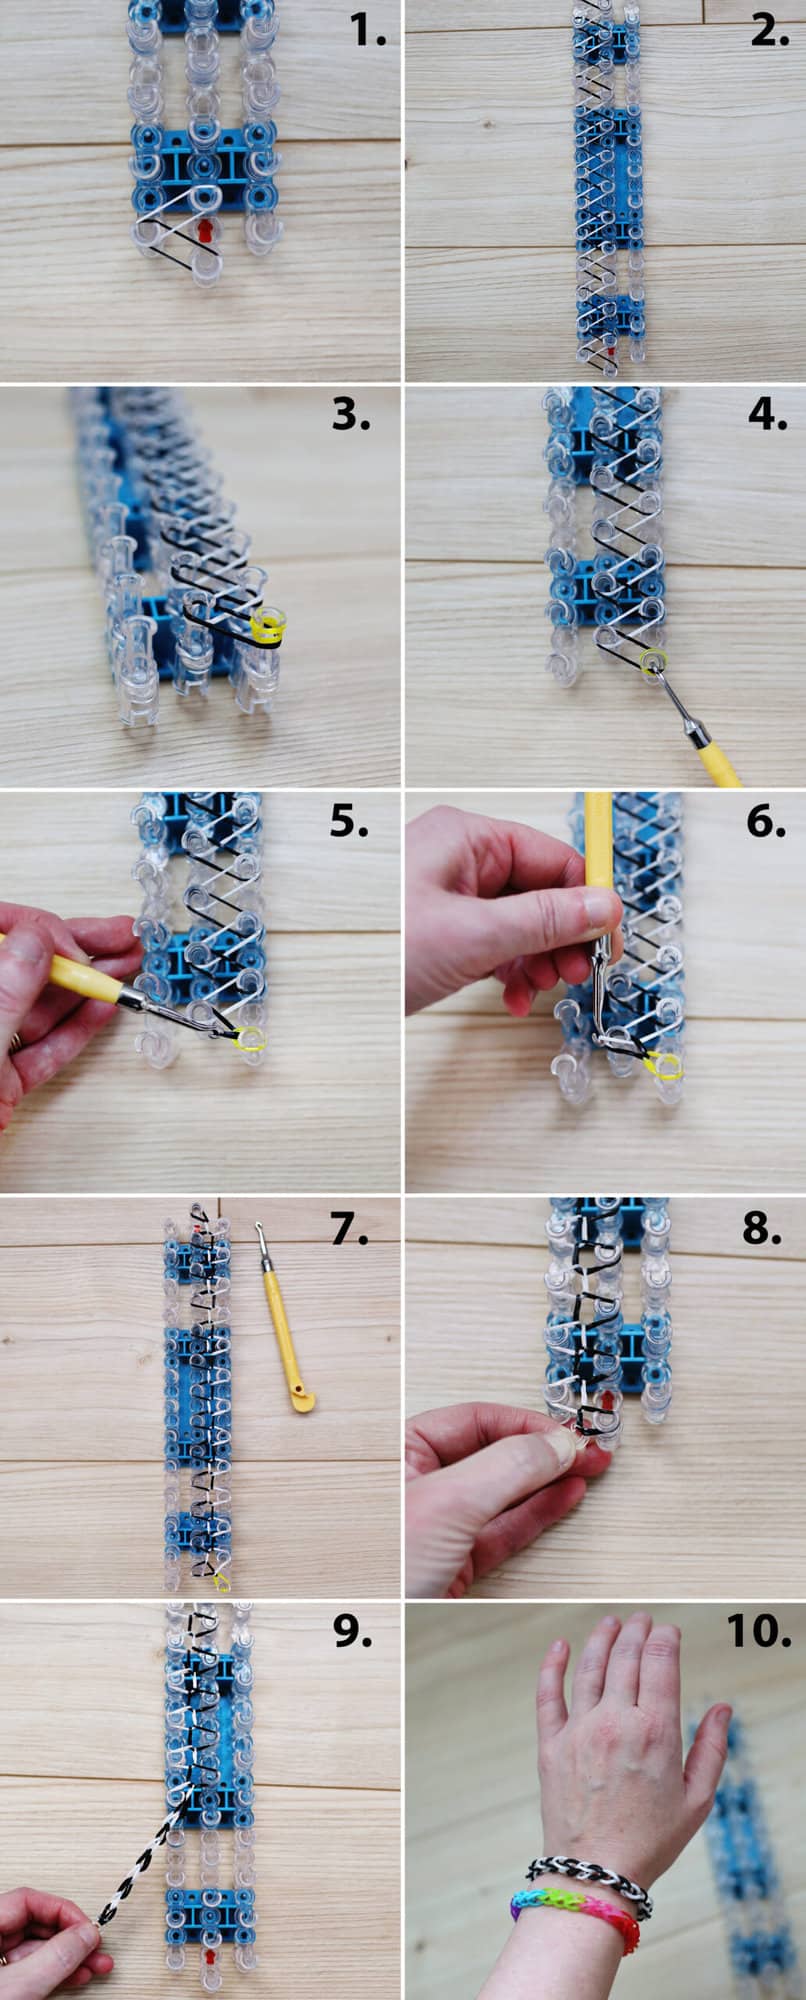
Single Chain Bracelet with Rainbow Loom
- Rainbow loom – kits usually come with everything you need
- Colorful rubber bands
- C-clip
Tutorial
- Add the first rubber band to the bottom left side of the loom with the arrow pointing away from you. Then, add the second rubber band so it overlaps the first on one side.
- Repeat this for the length of the loom.
- After the farthest rubber band, add one above that is double looped (yellow in the photos above).
- Hook the bottom rubber band under this double looped band so you can pull it up and over the double looped band.
- Pull it back to the closet loom knob, essentially pulling it over itself.
- Now do this with the next rubber band, pulling it over the last one you double looped back in over itself.
- Repeat this all down the loom.
- Add a c-clip to the end of the bracelet.
- Gently pull the bracelet off of the rainbow loom.
- Then, add the other end of the bracelet to the c-clip.

Get creative ideas for recipes, crafts, decor, and more in your inbox!
 Get the How-To

how to make rubber band bracelets without a loom
Supplies
- 2 pencils
- colorful rubber bands
- c-cliip
Instructions
- Loop a rubber band around each pencil, creating a figure eight.
- Add two more rubber bands above the first one. These are not looped, so they are just a circle or a figure zero.
- Pull one side of the bottom rubber band over the top of the pencil so it belts the other two rubber bands. Repeat on the other side.
- Add another rubber band to the top in a figure zero.
- Repeat these two steps again and again to create the length of your bracelet.
- Then, pull the end off and add the c-clip to hold the bracelet together.
Notes
- You can use any colors you like!