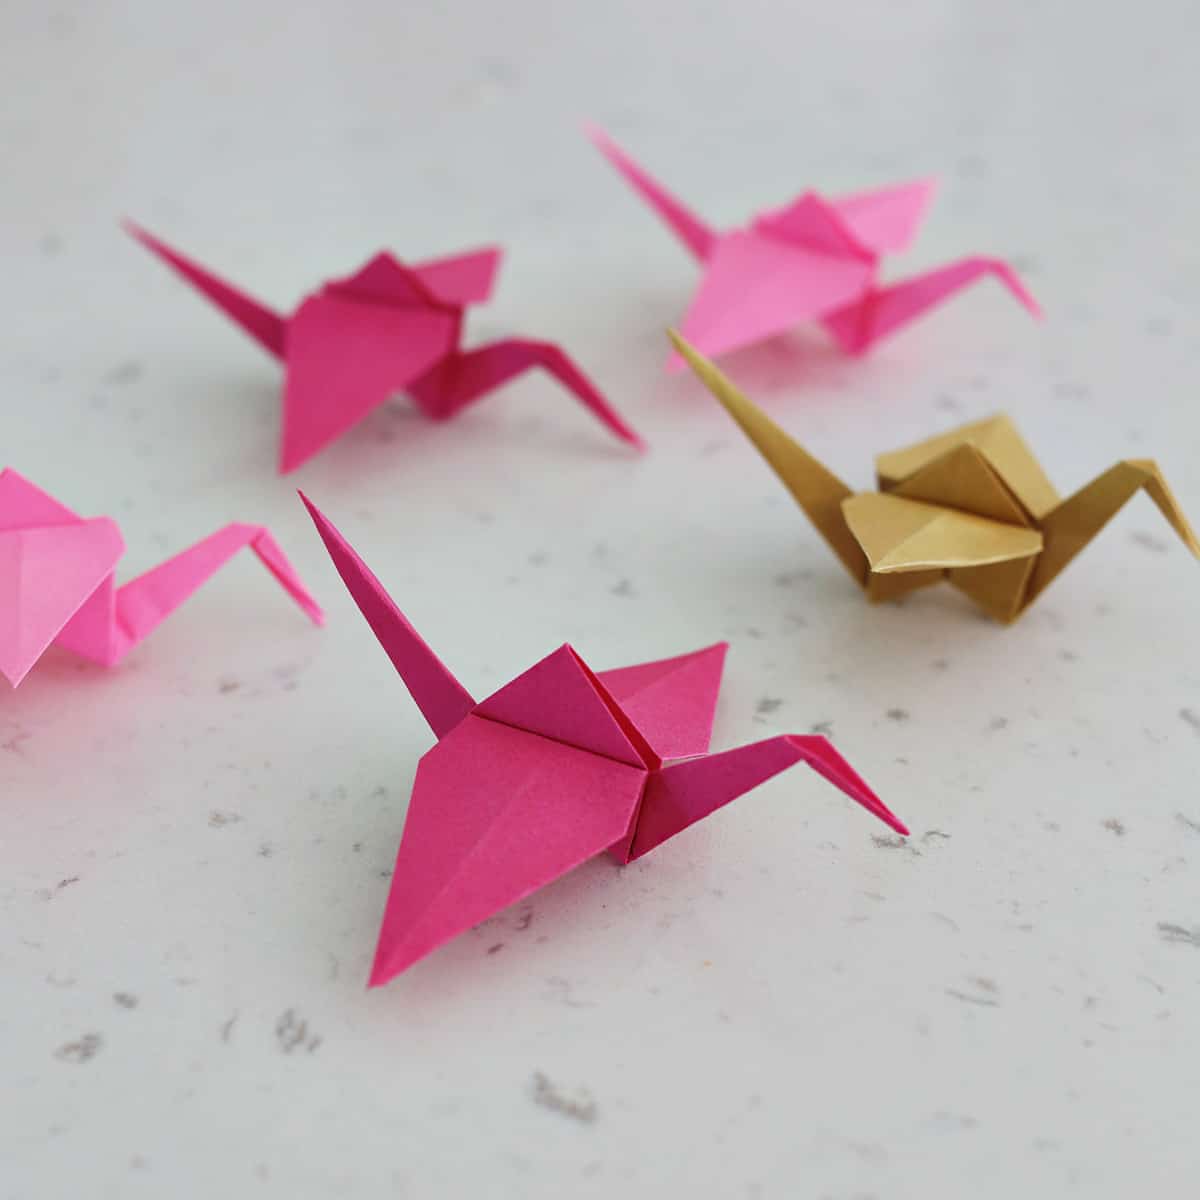
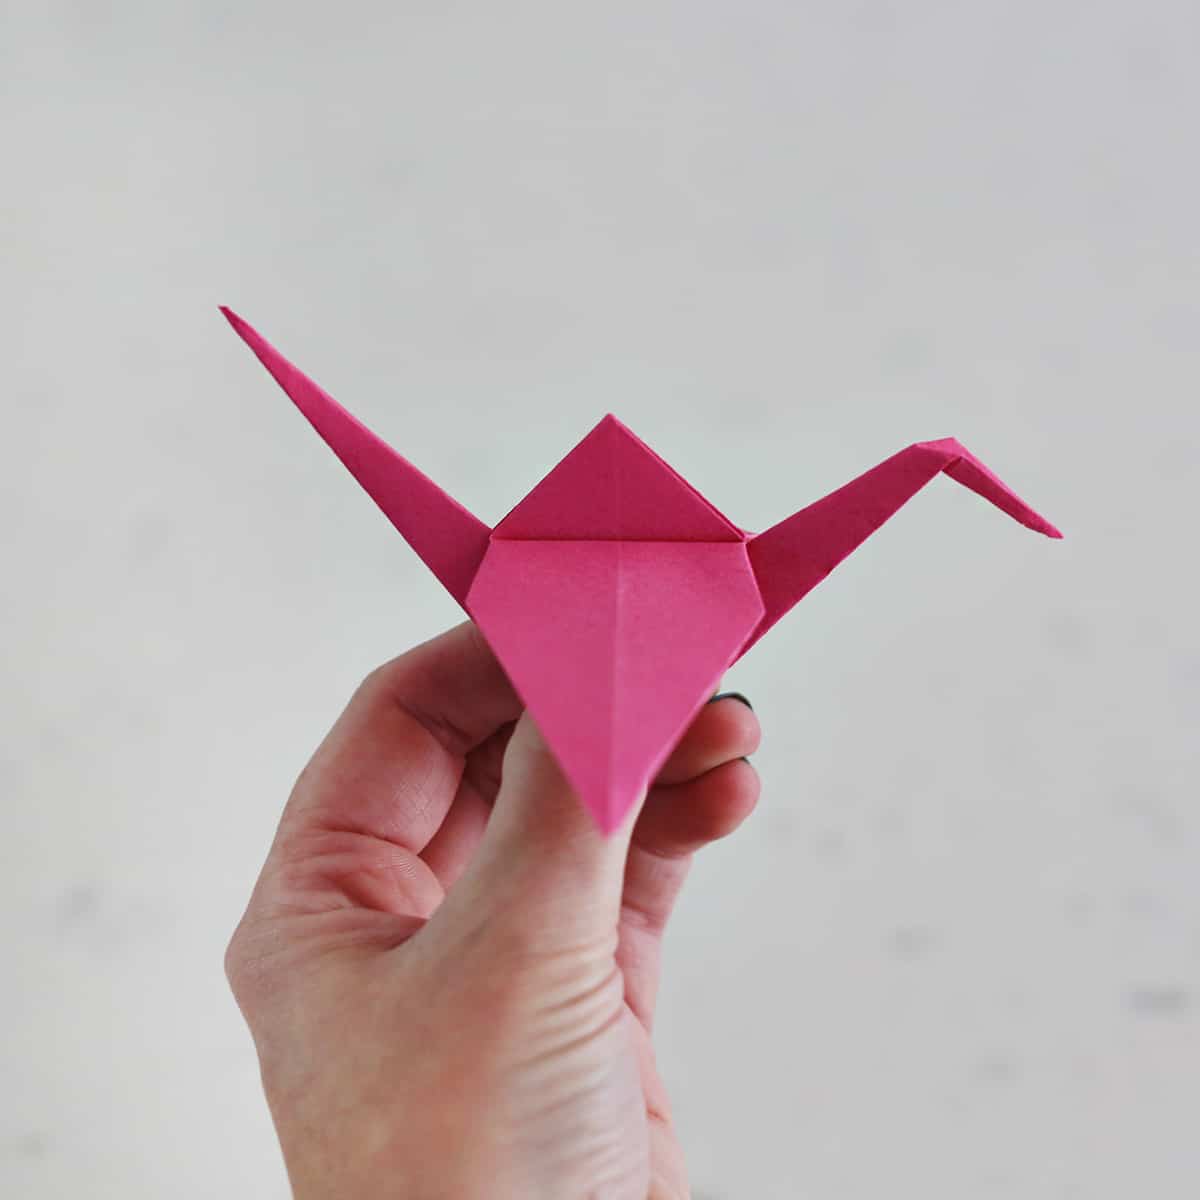
If you are looking to get into origami, then you must try this step-by-step tutorial to fold an origami crane (sometimes called tsuru). This is a must-try origami project, as the crane is so elegant and pretty.
Origami is an awesome project for kids because it helps with fine motor skills as well as following directions. All you need is a square piece of paper and you can make this!
Related: Love origami? Try making an origami butterfly, Origami Box (with video!), origami flower, origami heart, 3 paper airplanes, or cootie catcher next.
Would you like to save this?
Here is a quick video tutorial on how to make an origami crane:
Supplies:
–origami paper
Or you can use any paper (including recycled paper). Just begin by cutting it into a square.

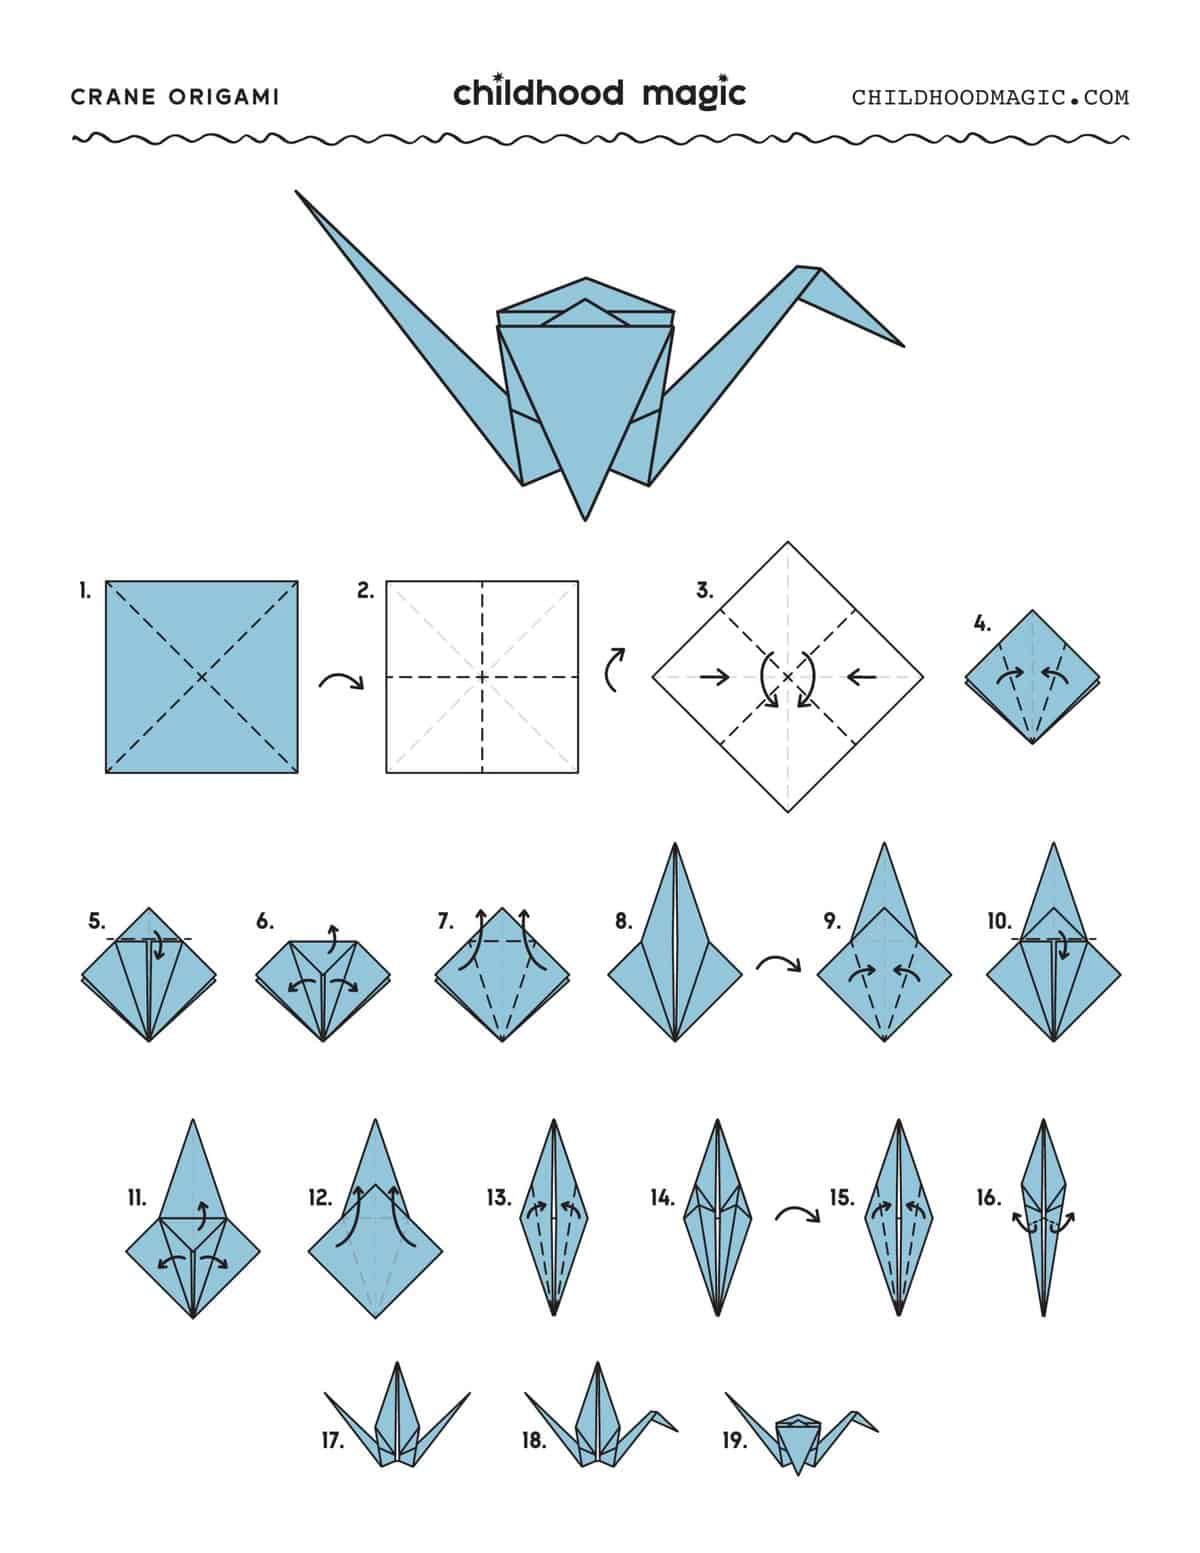
Step 1: Fold the paper in half diagonally on each side, then unfold.
Step 2: Fold the paper in half lengthwise on each side, then unfold.

Step 3: Bring the top point down to the bottom while also folding the left and right corners into the center.

Step 4: Taking care the opening is positioned at the bottom, fold the right and left top layer into the center.
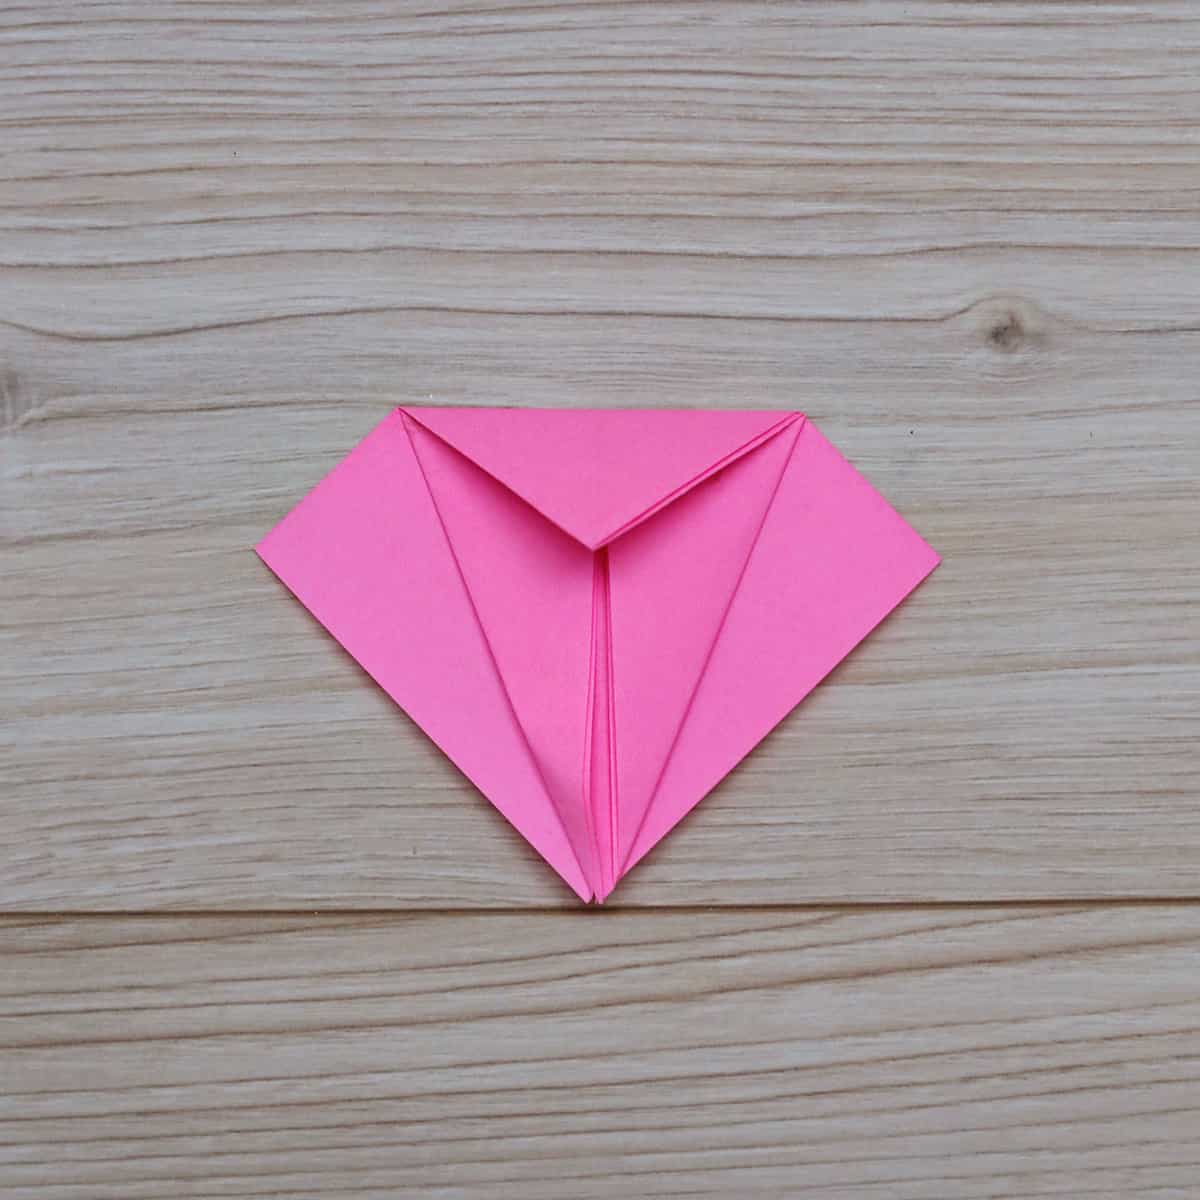
Step 5: Fold the top point down toward the center.
Step 6: Unfold these last three folds (steps 4 and 5).
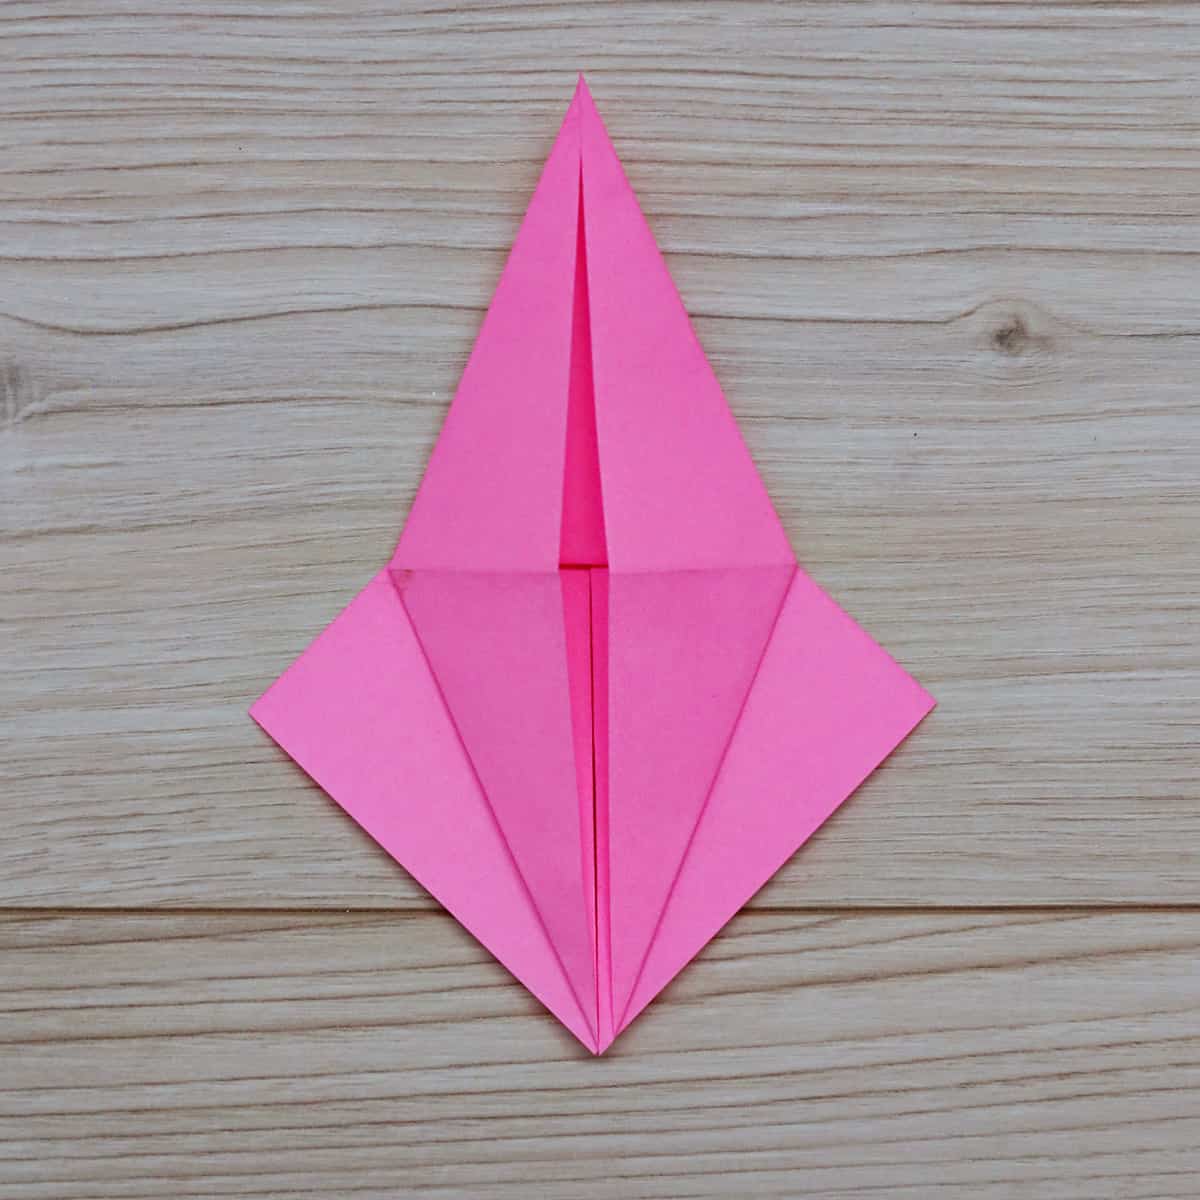
Step 7: Pull the top layer up from the bottom along the creases you just made.
Step 8: Push the left and right edges inwards to create a squash fold.
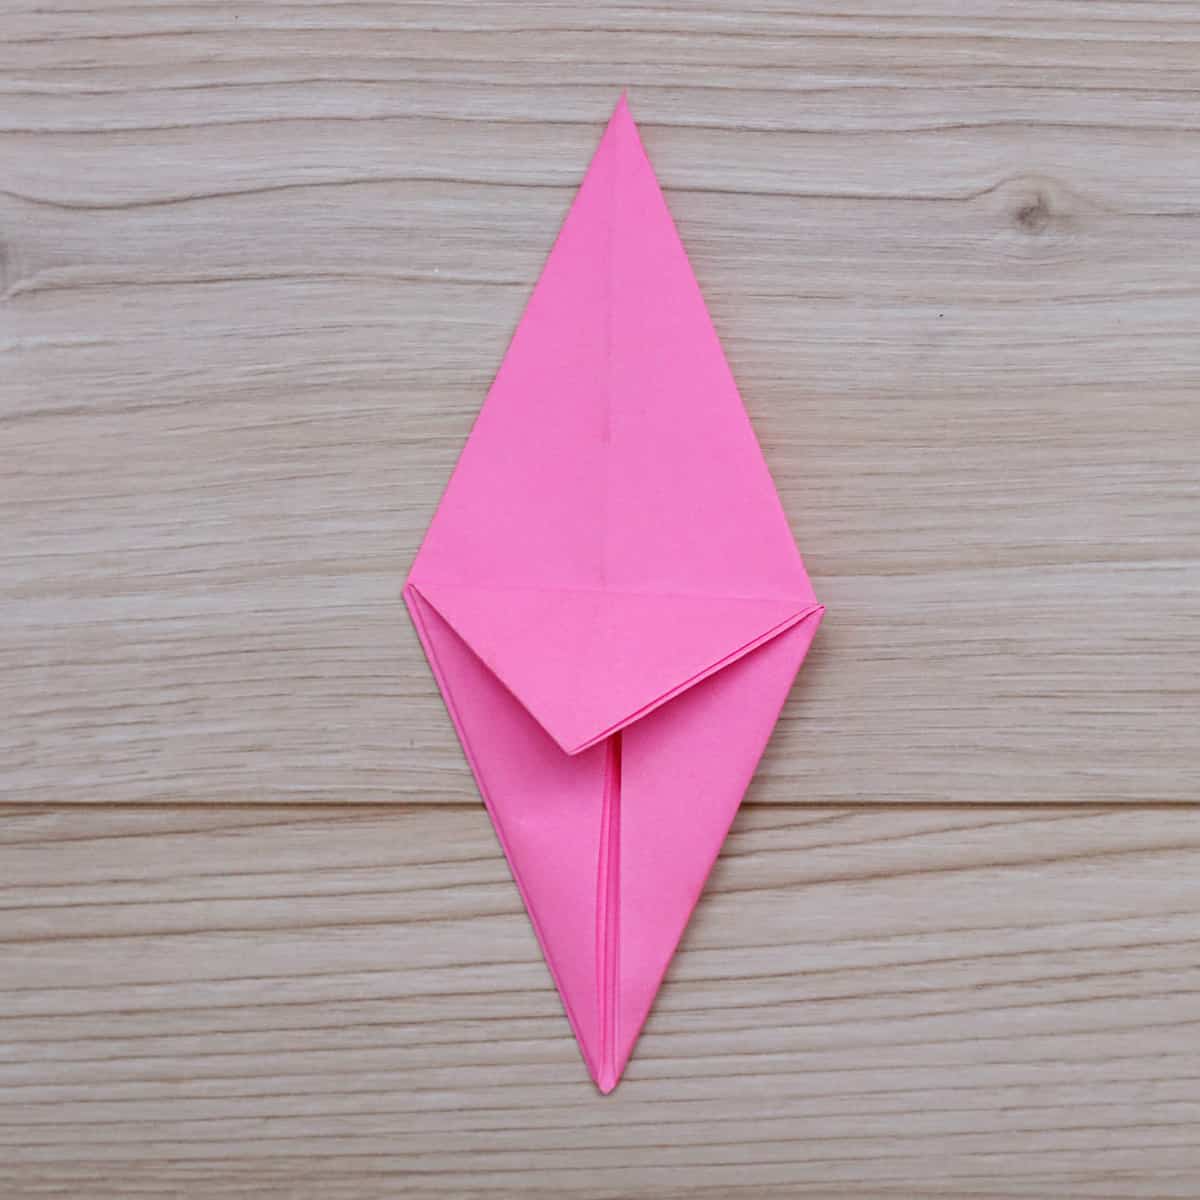
Step 9: Flip the origami over. Then, on the other side, fold the right and left corners in toward the center.
Step 10: Fold the upper layer top down toward the center (similar to step 5).
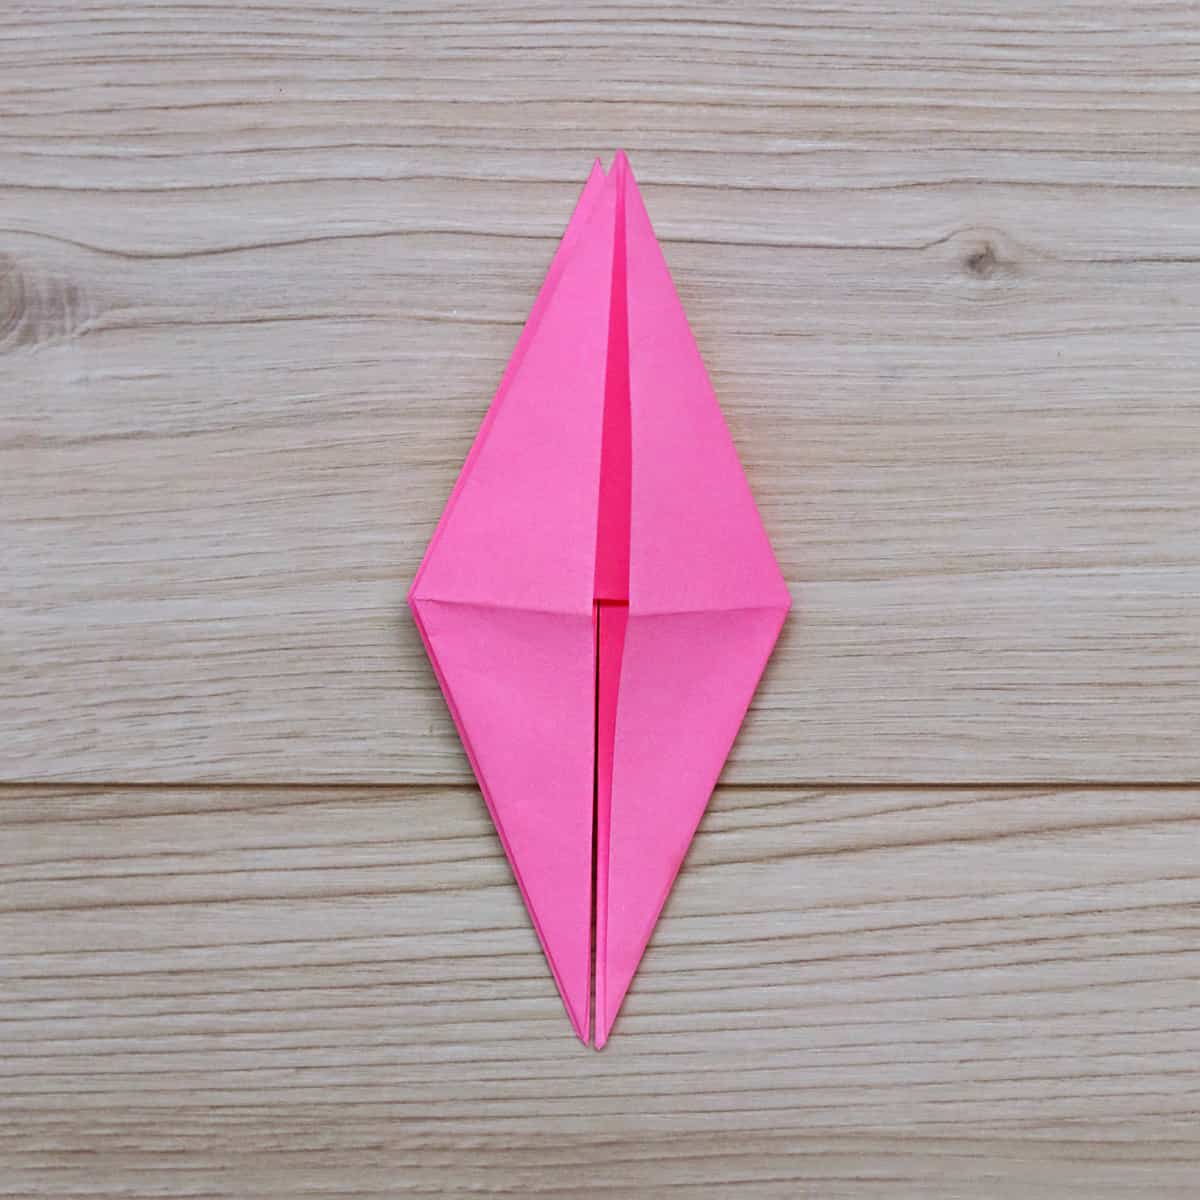
Step 11: Unfold these last three folds.
Step 12: Pull one layer up from the bottom along the creases you just made and push the left and right edges in to create a second squash fold (similar to step 8).
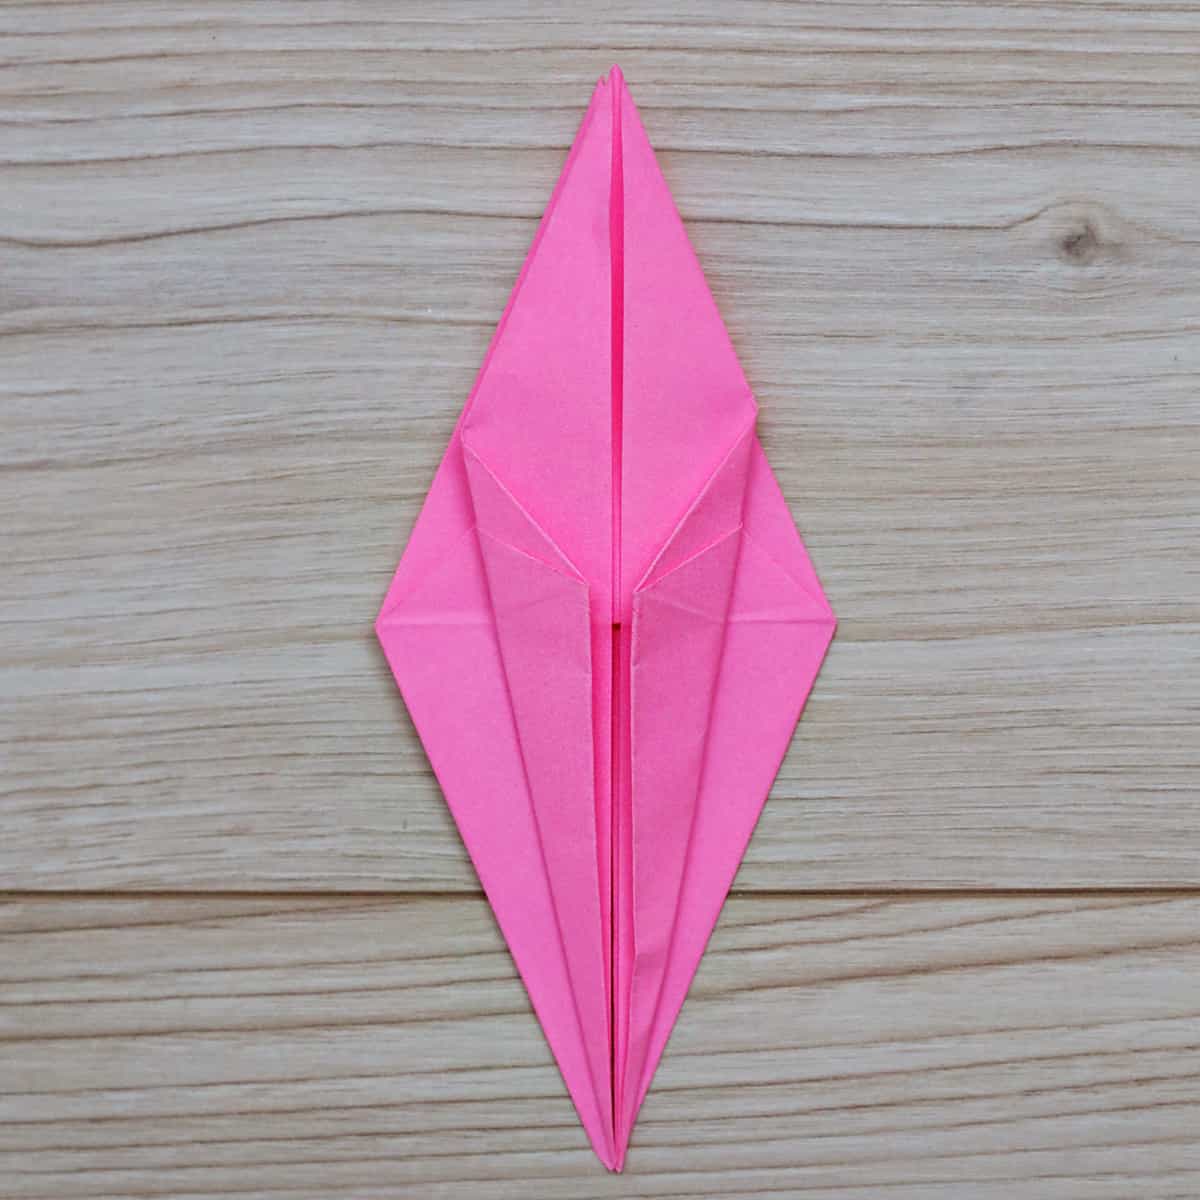
Step 13: Fold the right and left top layer corners in toward the center.
Step 14: Flip the project over.
Step 15: Fold the right and left top layer corners in toward the center (essentially repeating step 13 on the other side).
Step 16: Flip the bottom right piece up. Then, fold the tip once more to create the crane head.

Step 17: Flip the bottom left piece up.
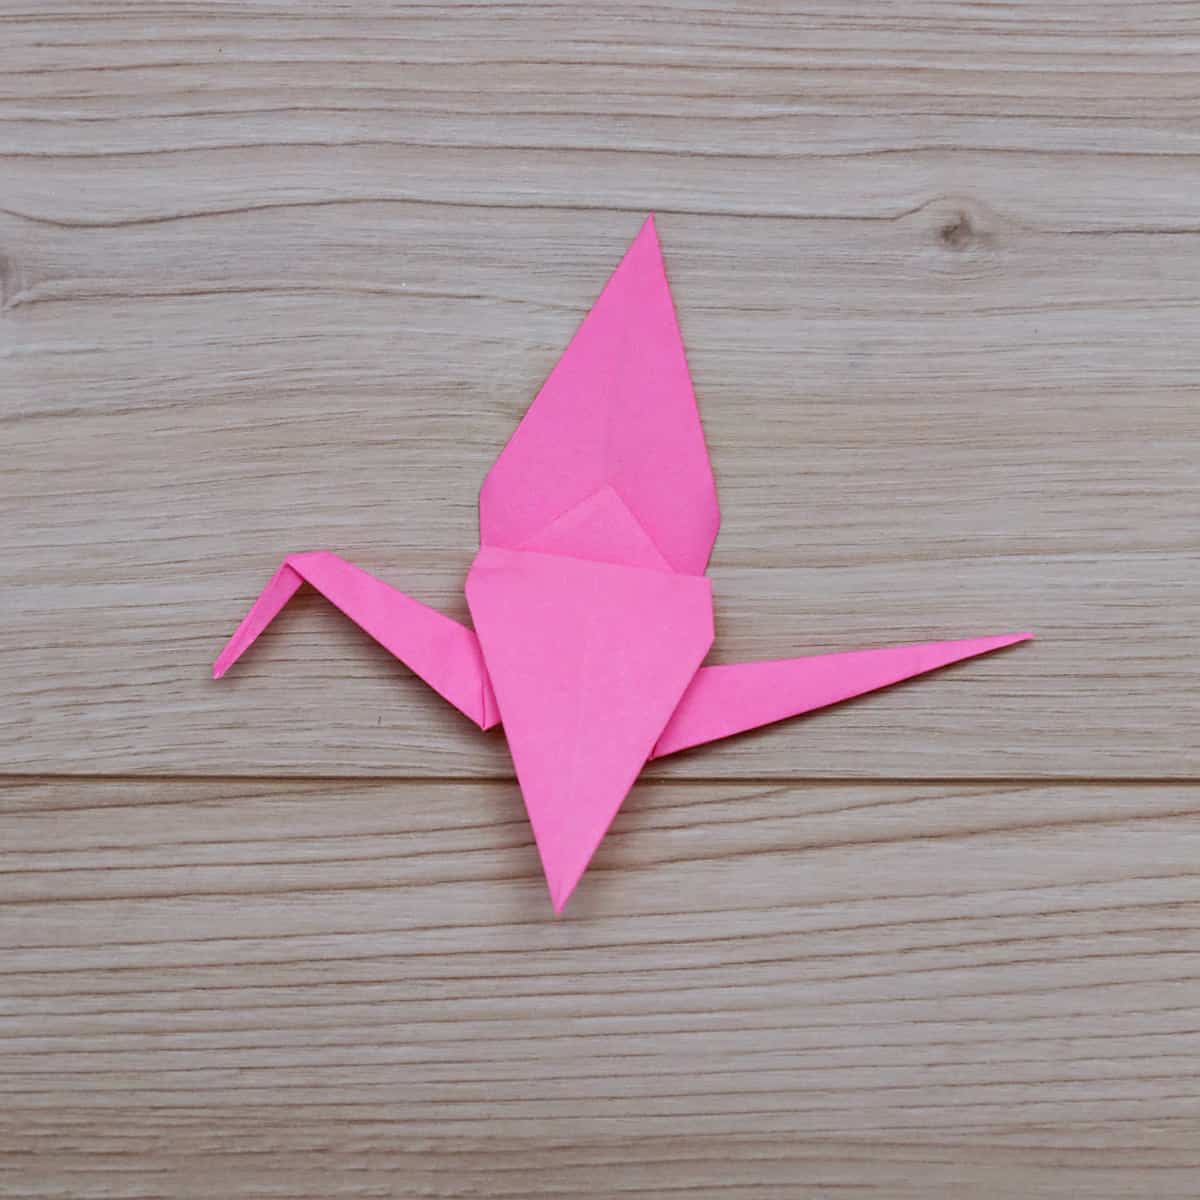
Step 18: Fold down the wings of the crane.

Step 19: Adjust and crease anything needed to complete your origami crane!

Download this one-sheet printable instructions for a quick and handy guide.
More Activities to Try:
Get creative ideas for recipes, crafts, decor, and more in your inbox!
 Get the How-To
Supplies
- 1 origami paper
Instructions
- Fold the paper in half diagonally on each side, then unfold.
- Fold the paper in half lengthwise on each side, then unfold.
- Bring the top point down to the bottom while also folding the left and right corners into the center.
- Taking care the opening is positioned at the bottom, fold the right and left top layer into the center.
- Fold the top point down toward the center.
- Unfold these last three folds (steps 4 and 5).
- Pull the top layer up from the bottom, along the creases you just made.
- Push the left and right edges inwards to create a squash fold.
- Flip the origami over. Then, on the other side, fold the right and left corners in toward the center.
- Fold the upper layer top down toward the center (similar to step 5).
- Unfold these last three folds.
- Pull one layer up from the bottom along the creases you just made and push the left and right edges in to create a second squash fold (similar to step 8).
- Fold the right and left top layer corners in toward the center.
- Flip the project over.
- Fold the right and left top layer corners in toward the center (essentially repeating step 13 on the other side).
- Flip the bottom right piece up. Then, fold the tip once more to create the crane head.
- Flip the bottom left piece up.
- Fold down the wings of the crane.
- Adjust and crease anything needed to complete your origami crane!
Notes
- If you don’t have origami paper, you can use any thin paper (including recycling paper) that has already been printed on. Simply cut the paper into a square before beginning.



I’m an adult, and usually considered a smart person, but I just cannot seem to follow visual instructions. I tried at least 8 other origami crane instructions and failed before finding yours — from which I managed at last to make a crane! There were some difficult parts though. To make the instructions easier, I would suggest trying to indicate how the “squash fold” is supposed to fall back on the other folds. Also instructions like “repeat step 13” are hard to follow if you don’t understand what you did the first time around. (If I’m following visual instruction all I can do is hope to imitate, I don’t understand the process or why it does anything.)
Thank you for sharing this feedback! It’s super helpful to hear as everyone learns a bit differently so I want the content to be as useful as possible. Congrats on making a crane! 🙂