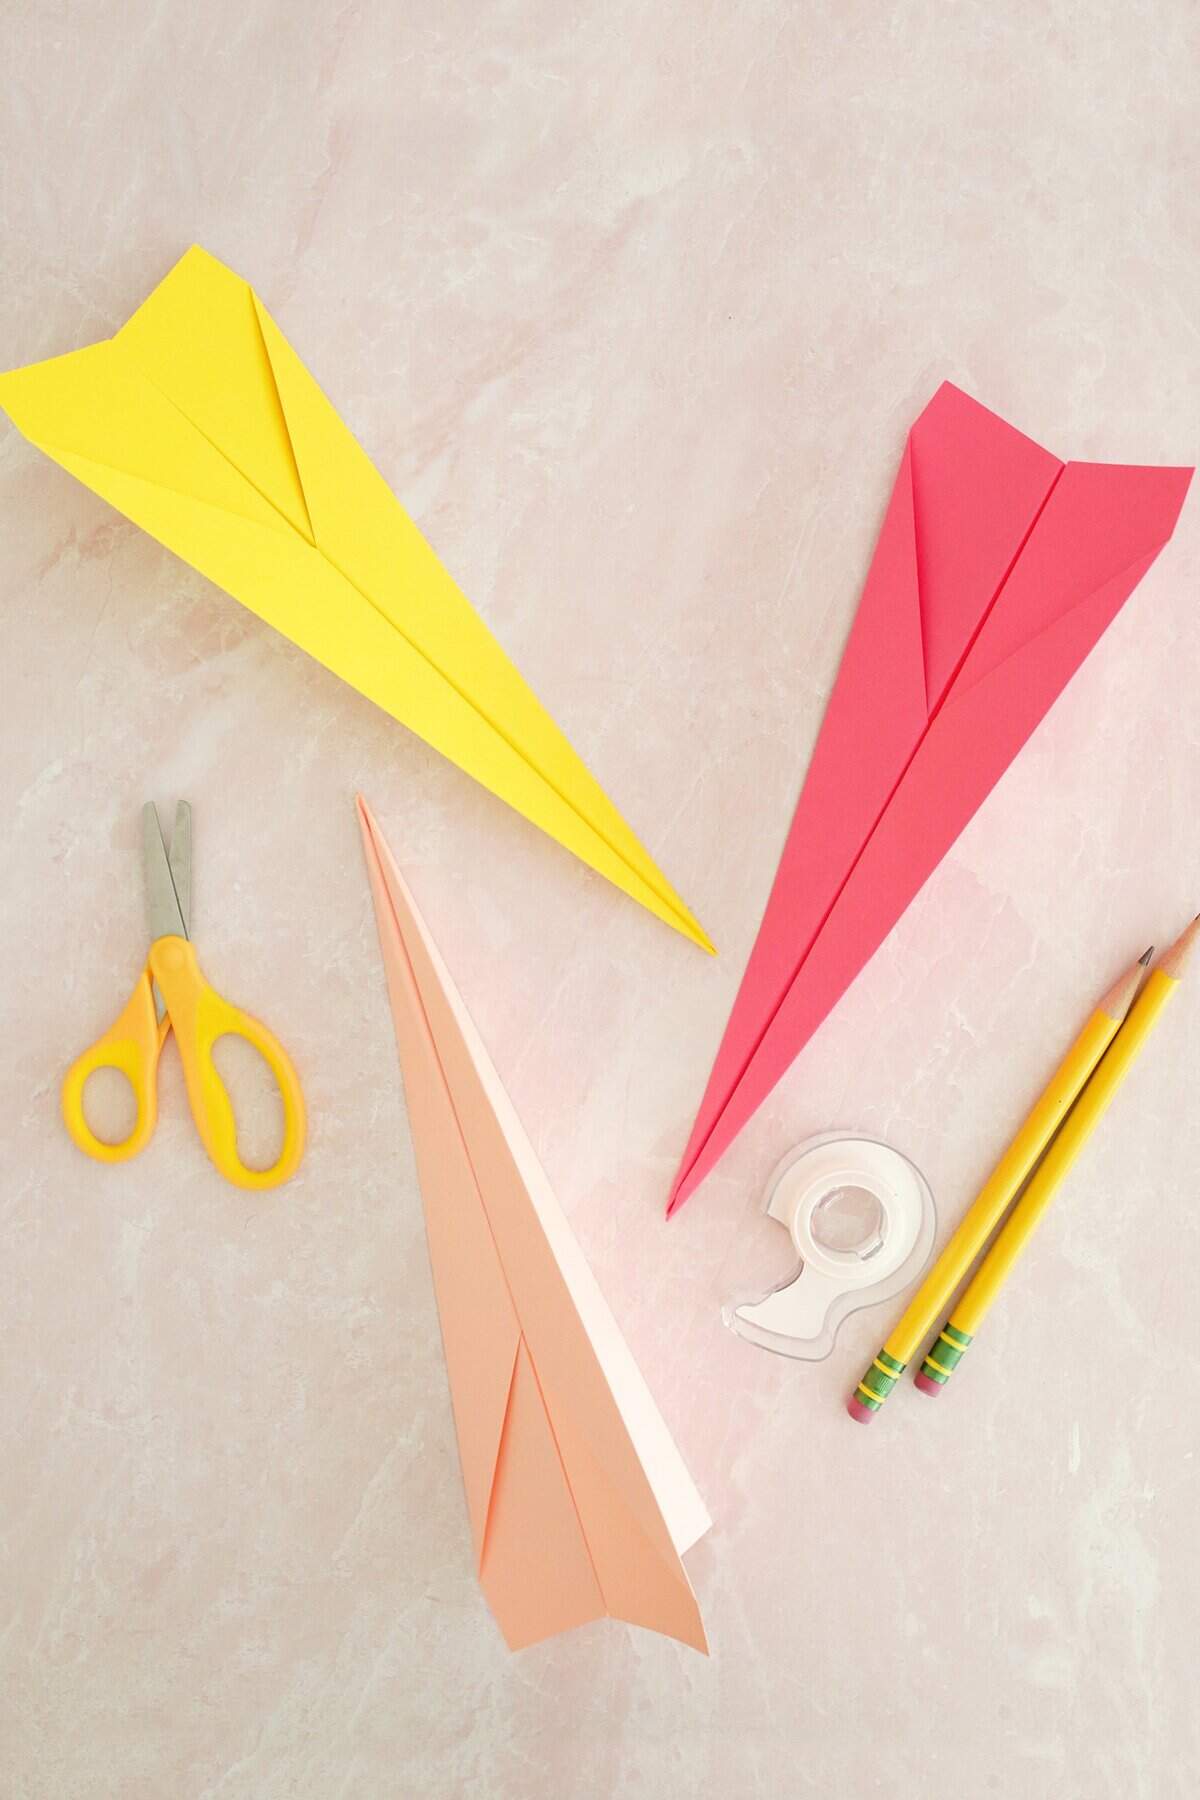
Making paper airplanes is a rite of passage and we’ve got three easy airplanes to fold with your kiddos (or just to feel like a kid again). The dart, bumble, and bullnose planes are all classic paper airplane designs that will give you hours of flying fun.
All you need for these beginner planes is paper and a little tape (if you have some lying around), so check out the steps and videos below and let’s get started!
Related: Looking for more paper projects to do with kids? Try our Origami Crane, Easy Origami Butterfly, Origami Box (with video!), Easy Origami Heart or Origami Flower!

Would you like to save this?
Supplies to make a paper airplane:
- Paper: You can use either plain printer paper, colored thin paper, or construction paper for these paper airplanes.
- Tape: While most paper airplanes will still fly if you are short on tape, it does help to keep the main body crease together and keep your plane more aerodynamic.
Tips for making paper airplanes:
- Make sure you are using paper thin enough, as a thick card stock material can be too heavy and bulky to fold multiple times.
- Double-sided tape is great to keep the body of your plane together, but you can also make “tape donuts” from regular tape if that’s what you have on hand.
- When making creases in your planes, run your nail along the crease to really give it a sharp folded edge so it stays in place.
- Make sure that the two sides are as symmetrical as you can make them as that will help your plane fly the farthest.
- To make it more fun, use markers to decorate the paper first (or after you fold it) for a stylish personalized plane.

How to make a classic dart paper airplane:
This is the most classic airplane, a great choice for a beginner flyer.
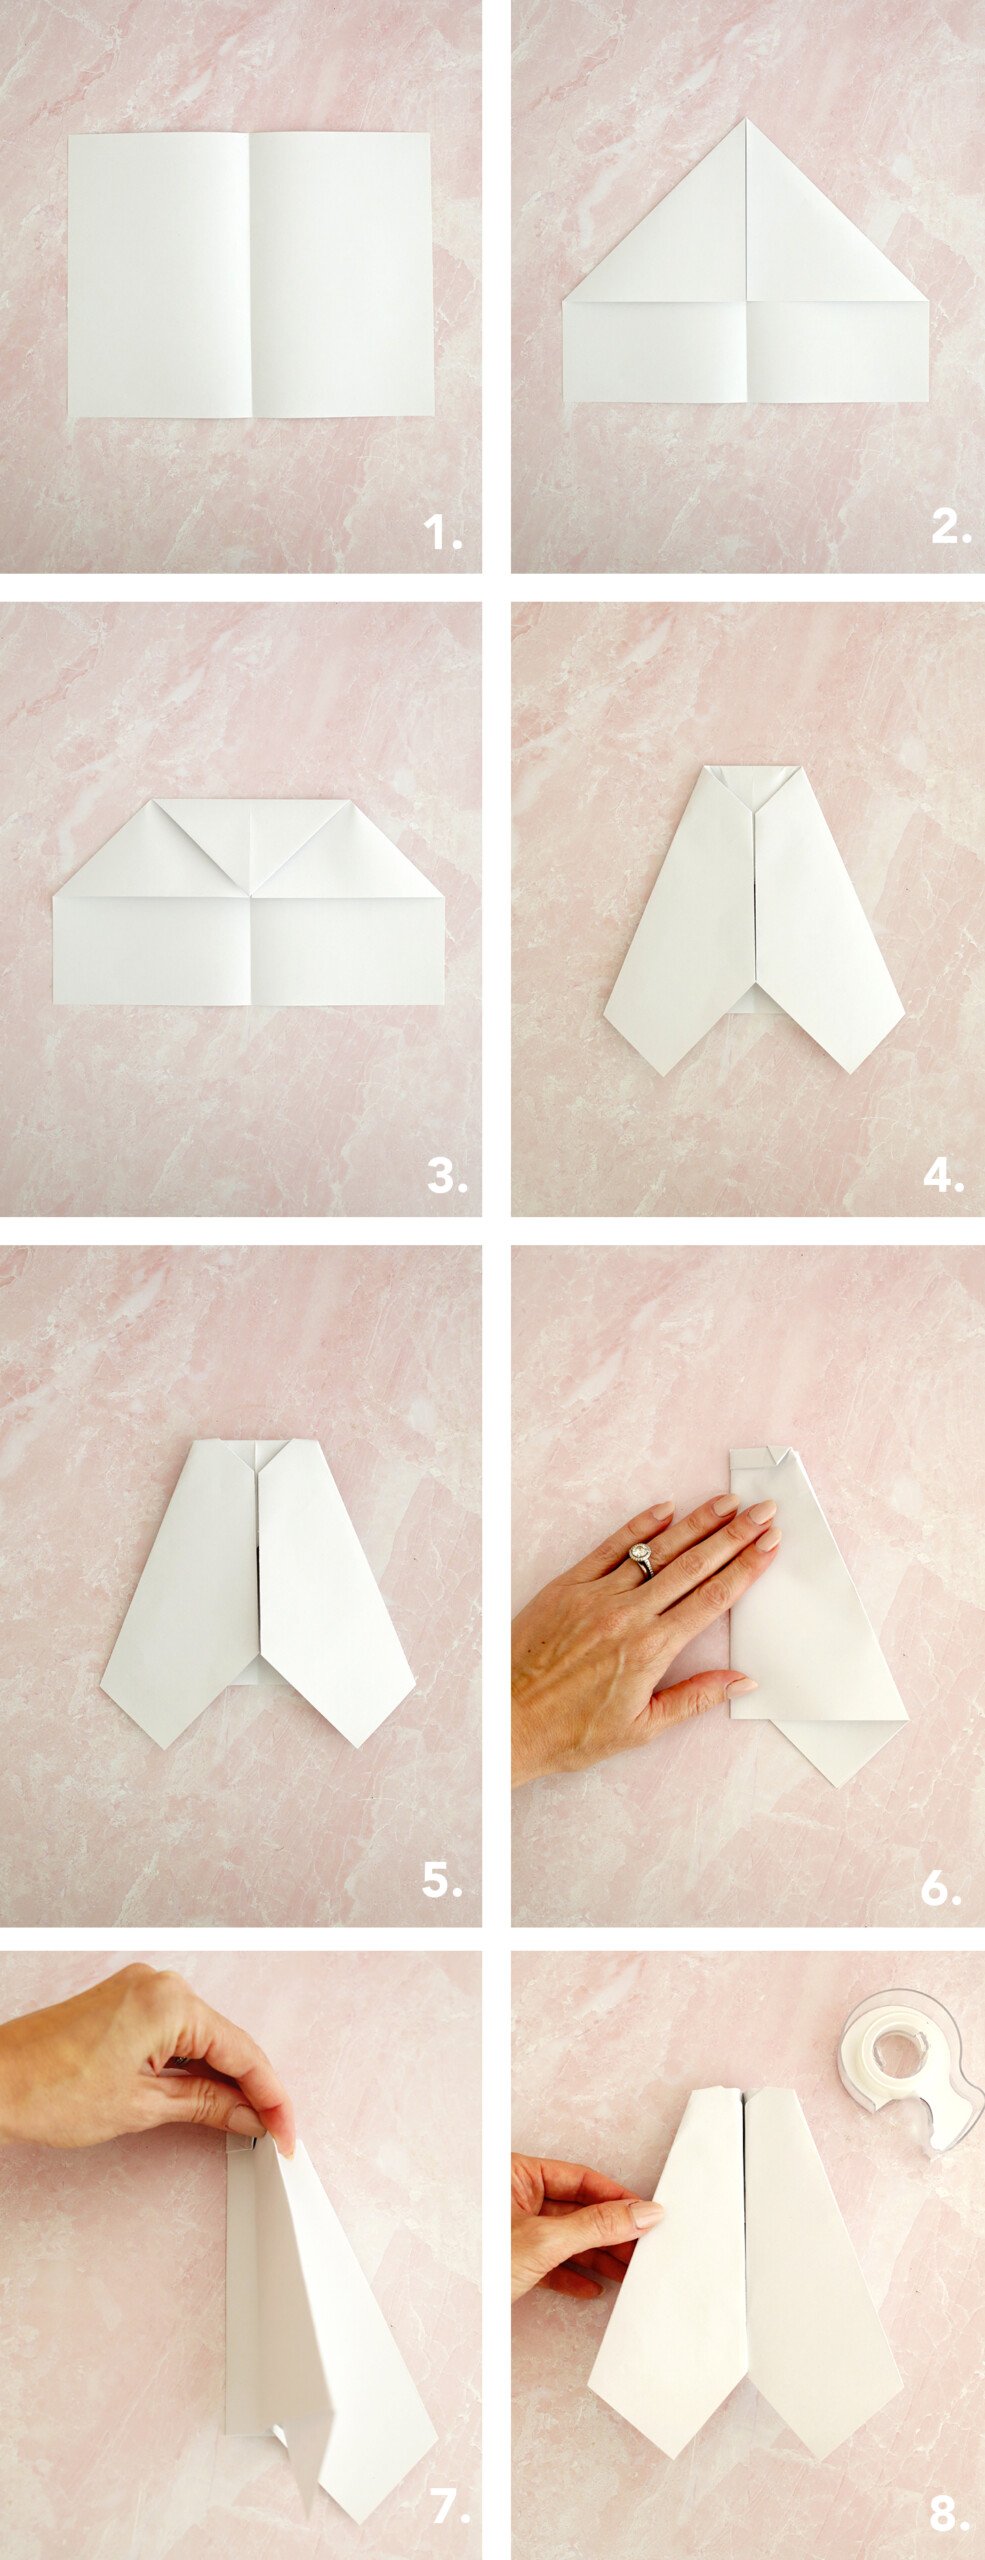
- Fold your paper in half vertically and then unfold the paper.
- Fold each top corner in to meet the center line.
- Fold right top edge down again to meet the center line.
- Repeat with left side.
- Fold the plane in half along the center line.
- To make the wings, fold down the top edge to meet the center fold. Flip and repeat with other side.
- Add double-sided tape (or tape donuts) to the inside of the plane body so it looks like the final photo.

How to make a bumble paper airplane:
The shorter shape of this airplane gives it a bee-like look … add some stripes for fun!
- Fold your paper in half horizontally to make a crease. Unfold paper.
- Fold in each top corner to meet your center line.
- Fold the top peak down to meet the line of your previous folds.
- Take your upper sides and fold them down to meet up with the center line.
- Fold back the top 1/2″ of your plane away from you.
- Fold your plane in half down the center line.
- Fold the wing down 1/2″ from the center fold of your plane. Repeat on other side.
- Add double-sided tape (or tape donuts) to the inside of the plane body so it looks like the final photo.

How to make a bullnose paper airplane:
The bullnose is a tough paper airplane as it can take some rough landings because of its bulkier nose design.
- Fold your top right corner over to meet the opposite side of the page so it makes a fold down to the bottom right corner of your paper. Unfold.
- Repeat with left top corner. Unfold.
- Bring the right edge of your paper over to meet the right side creased line from the first fold.
- Repeat with left side.
- Fold your right side again to meet the edge of your folded paper from previous step.
- Repeat with left side.
- Fold the top of your plane nose down towards you until it meets the upside down “V” shape of your folds.
- Fold your paper in half down the middle.
- Fold your plane wing down about 1″ away from your center fold. Repeat on opposite side.
- Add double-sided tape (or tape donuts) to the inside of the plane body so it looks like the final photo.

More activities to try:
- Fluffy Slime Recipe – Cloud Slime
- How to Paper Mache
- Invisible Ink – 5 Ways
- 10 Handprint Animal Crafts That Kids Will Love!
Get creative ideas for recipes, crafts, decor, and more in your inbox!
 Get the How-To
Supplies
- 1 piece paper
- double-sided or regular tape
Instructions
Dart Paper Airplane
- 1. Fold your paper in half vertically and then unfold the paper.2. Fold each top corner in to meet the center line.3. Fold right top edge down again to meet the center line.4. Repeat with left side.5. Fold the plane in half along the center line.6. To make the wings, fold down the top edge to meet the center fold. 7. Flip and repeat with other side.8. Add double-sided tape (or tape donuts) to the inside of the plane body so it looks like the final photo.
Bumble Paper Airplane
- 1. Fold your paper in half horizontally to make a crease. Unfold paper.2. Fold in each top corner to meet your center line.3. Fold the top peak down to meet the line of your previous folds.4. Take your upper sides and fold them down to meet up with the center line.5. Fold back the top 1/2″ of your plane away from you.6. Fold your plane in half down the center line.7. Fold the wing down 1/2″ from the center fold of your plane. Repeat on other side.8. Add double-sided tape (or tape donuts) to the inside of the plane body so it looks like the final photo.
Bullnose Paper Airplane
- 1. Fold your top right corner over to meet the opposite side of the page so it makes a fold down to the bottom right corner of your paper. Unfold.2. Repeat with left top corner. Unfold.3. Bring the right edge of your paper over to meet the right side creased line from the first fold.4. Repeat with left side.5. Fold your right side again to meet the edge of your folded paper from previous step.6. Repeat with left side.7. Fold the top of your plane nose down towards you until it meets the upside down “V” shape of your folds.8. Fold your paper in half down the middle.9. Fold your plane wing down about 1″ away from your center fold. Repeat on opposite side.10. Add double-sided tape (or tape donuts) to the inside of the plane body so it looks like the final photo.
Notes
Supplies to make a paper airplane:
- Paper: You can use either plain printer paper, colored thin paper, or construction paper for these paper airplanes.
- Tape: While most paper airplanes will still fly if you are short on tape, it does help to keep the main body crease together and keep your plane more aerodynamic.
Tips for making paper airplanes:
- Make sure you are using paper thin enough, as a thick card stock material can be too heavy and bulky to fold multiple times.
- Double-sided tape is great to keep the body of your plane together, but you can also make “tape donuts” from regular tape if that’s what you have on hand.
- When making creases in your planes, run your nail along the crease to really give it a sharp folded edge so it stays in place.
- Make sure that the two sides are as symmetrical as you can make them as that will help your plane fly the farthest.


Fun easy way to make paper planes!