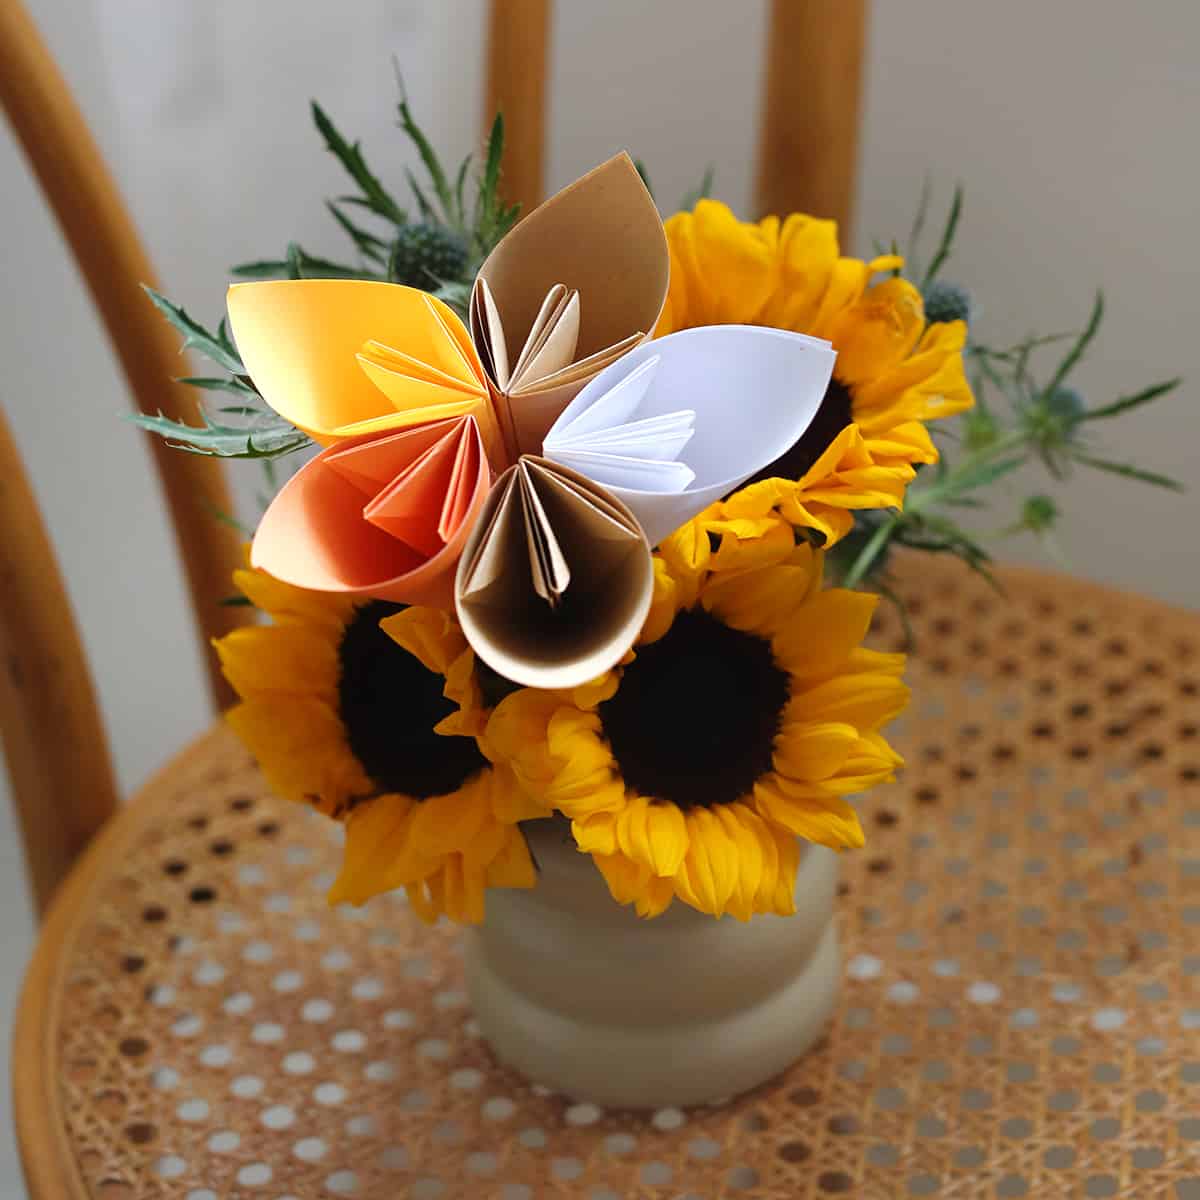
Origami is such a great activity as you can create lots of beautiful shapes and objects with just a few sheets of paper. While it might look complicated, this origami flower is very simple and easy to make.
Origami is a great activity for kids as it teaches fine motor skills as well as following instructions. Projects like this origami flower can be made almost anywhere, like a road trip or a plane ride— as you have a flat surface to work on. This could be a hardcover book if you don’t have any kind of table or tray.
Origami Flower Supplies:
- Origami paper – or recycled paper that is cut into squares (needs to be thin like copy paper, not thick paper like card stock or art papers)
- Tape
- Straws or wooden skewers – for the stems
Here is a video tutorial of how to make these origami flowers:
Why Kids Love Origami:
- It’s colorful!
- It’s inexpensive – make hundreds of shapes for just a few dollars OR use recycled paper for free
- Origami is a fun to do with friends and you can do it almost anywhere!
How to Make an Origami Flower:
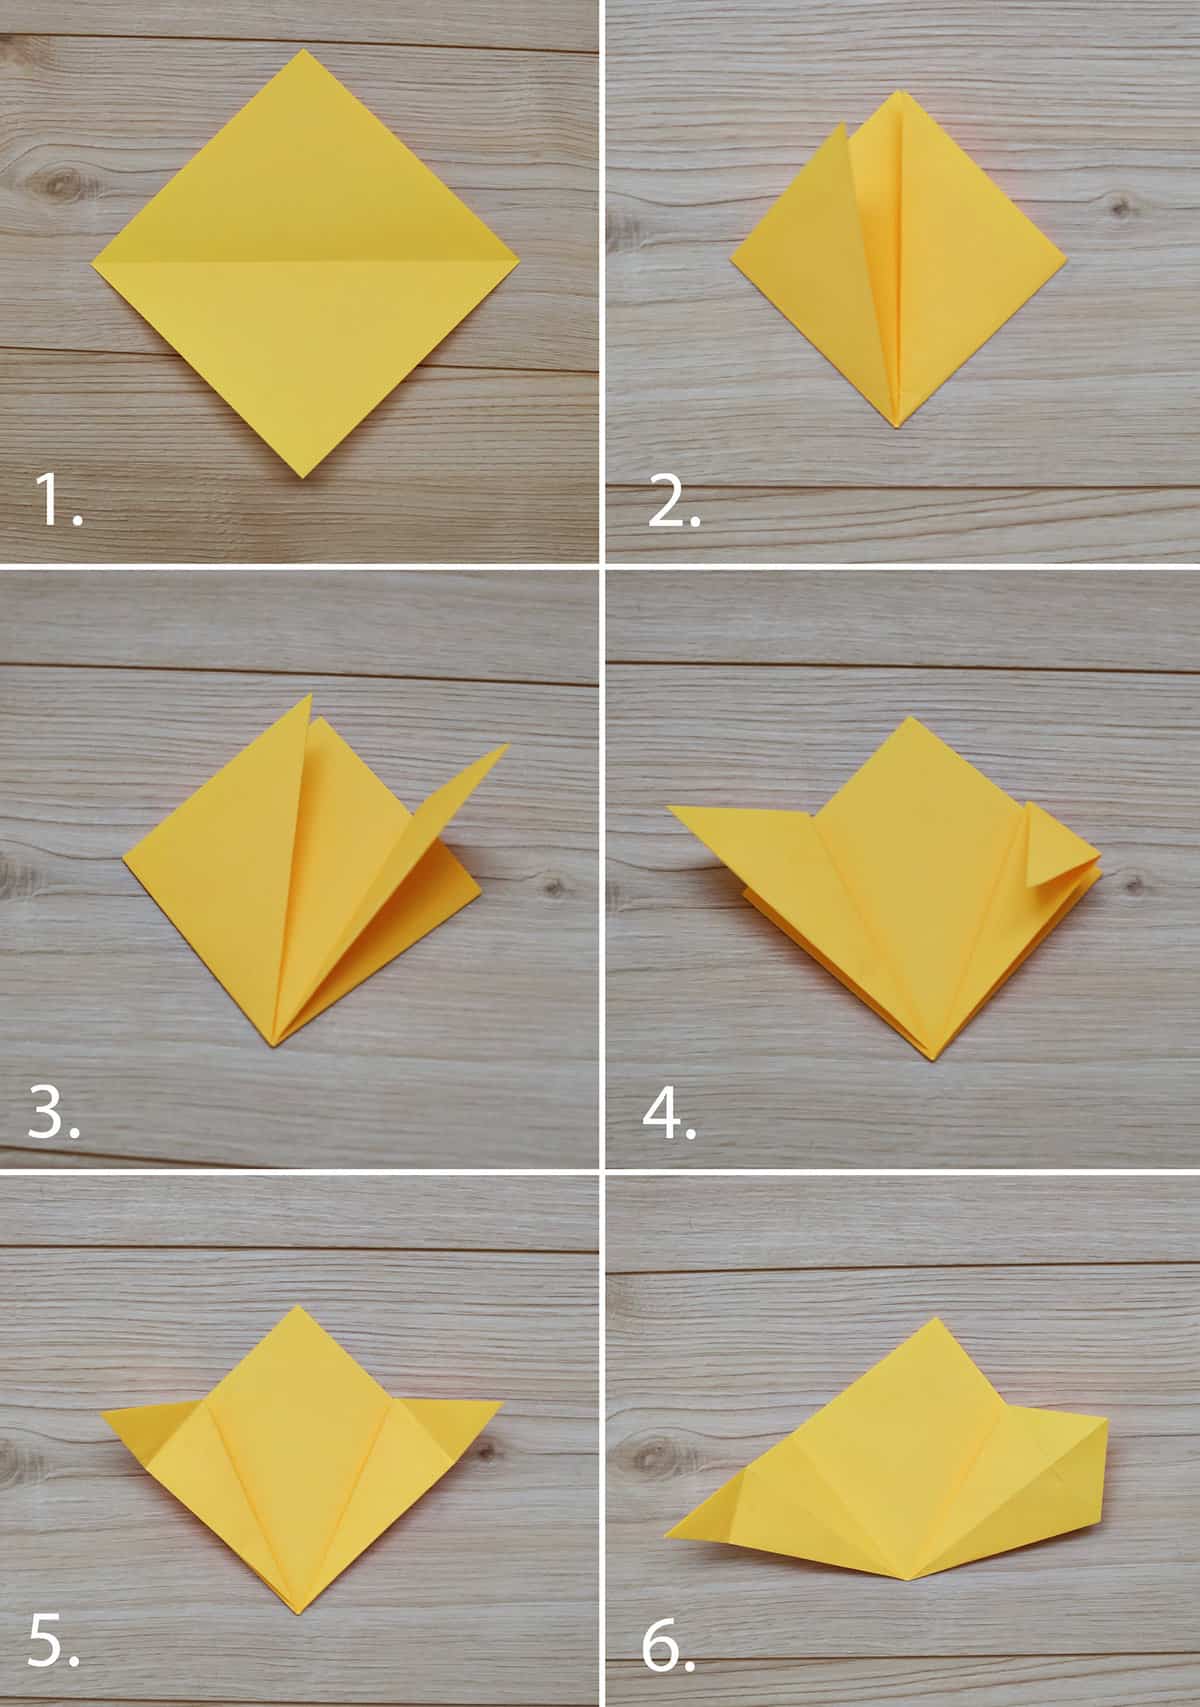
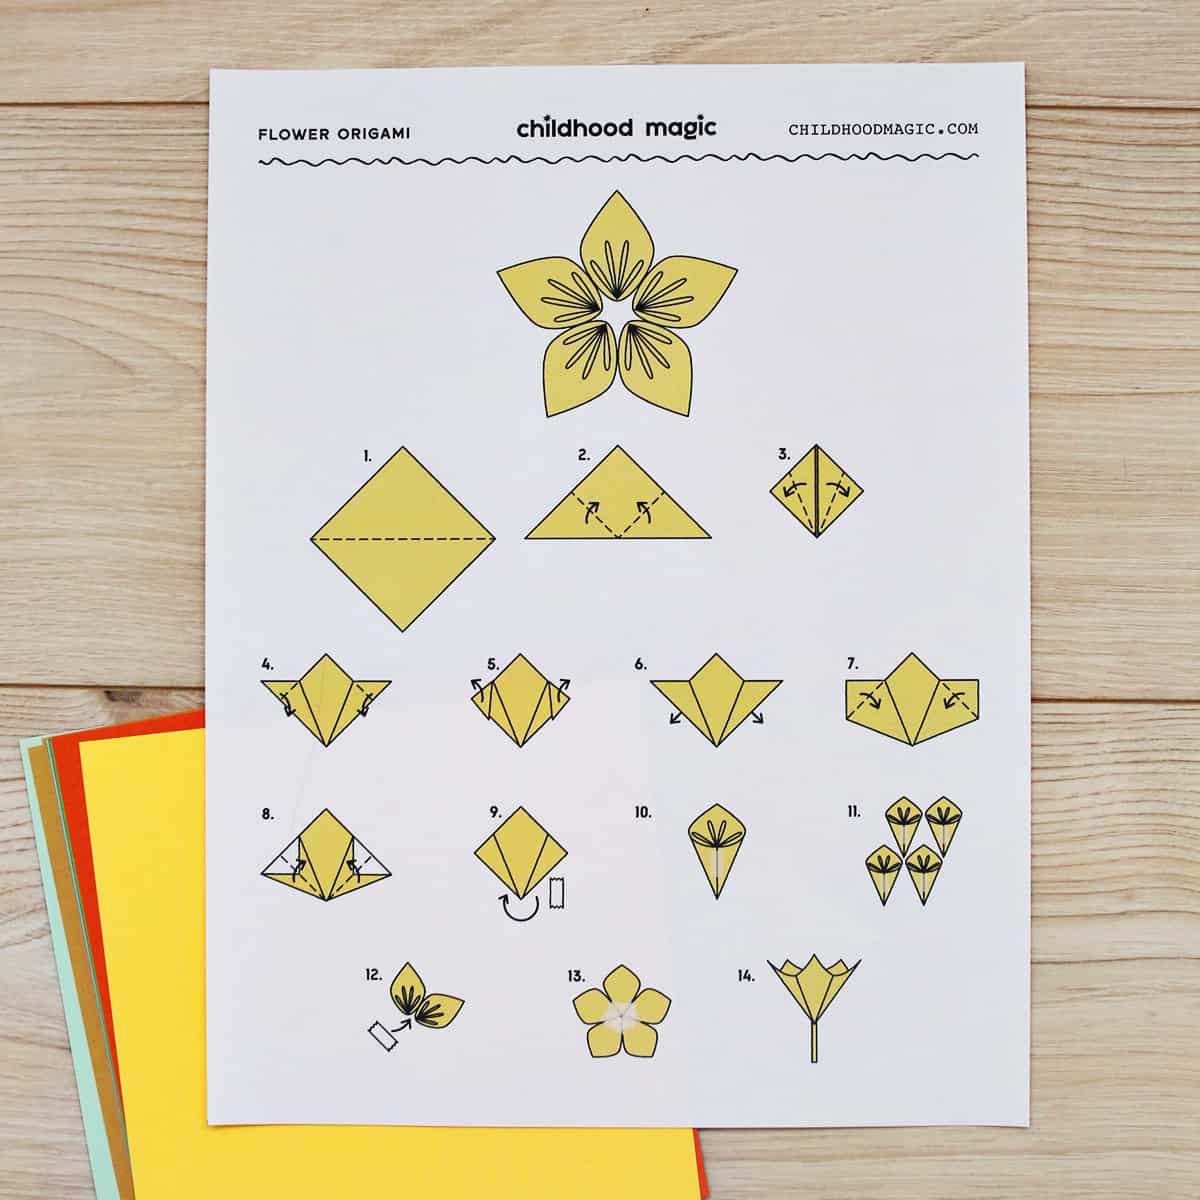
- Fold the paper from corner to corner.
- Fold each side of the triangle up to the center point.
- Fold the tips of the triangle out and away from the center.
- Fold the tips of the outer triangles down.
- Unfold the original large triangle.
- Holding one side to triangle down, gently fold in over the existing fold lines. One side should look like a kite. Repeat on the other side.

7. Fold the tips down.
Would you like to save this?
8. Fold the corners in over the existing fold lines.
9. Roll the two sides toward each other.
10. Tape to hold. Now you have one petal done!
11. Repeat this four more times so you have five petals total.
12. Tape the petals to each other, creating the origami flower.
13. Add your straw or wooden skewer (or popsicle stick, or pencil, etc.) and tape in place for the stem of the flower.

More Paper Crafts for Kids

Flower Origami Printable Tutorial
Get the quick guide printable tutorial.
Print our Origami Flower tutorial quick guide for reference! All the steps for this tutorial fit on one page and you can print the color version or choose to print black and white.
More Kid’s Activities to Try

 Get the Recipe

Ingredients
- 5 origami papers
- tape
- straw (or wooden skewer)
Instructions
- Fold the paper from corner to corner.
- Fold each side of the triangle up to the center point.
- Fold the tips of the triangle out and away from the center.
- Fold the tips of the outer triangles down.
- Unfold the original large triangle.
- Holding one side to triangle down, gently fold in over the existing fold lines. One side should look like a kite. Repeat on the other side.
- Fold the tips down.
- Fold the corners in over the existing fold lines.
- Roll the two sides toward each other.
- Tape to hold. Now you have one petal done!
- Repeat this four more times so you have five petals total.
- Tape the petals to each other, creating the origami flower.
- Add your straw or wooden skewer (or popsicle stick, or pencil, etc.) and tape in place for the stem of the flower.
This is hard
I agree it takes some practice! If there’s a specific spot giving you trouble let me know and I’m happy to try and help!